***You can purchase an INEXPENSIVE AD-FREE PDF of this pattern on Etsy HERE and on LoveCrochet HERE! This beautifully formatted PDF includes the step-by-step pictures and is a total of 7 pages including the cover page!
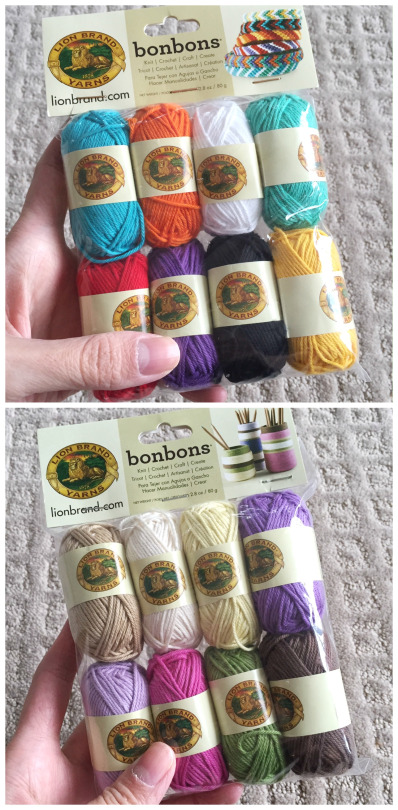
When I first saw Lion Brand Yarn’s Bonbons at Michaels, I thought they looked so cute and I was itching to use them for a project! Each set comes with 8 different colours, and the sets range from acrylic, metallic, or cotton yarn. The first thought that came to mind was to use them for amigurumi, and I thought it would be so neat to be able to make one ami per bonbon, with the possibility of 8 different amigurumi with one set! Pictured below are the 100% cotton sets that are a fine (level 2) yarn: Beach (top) and Nature (bottom).
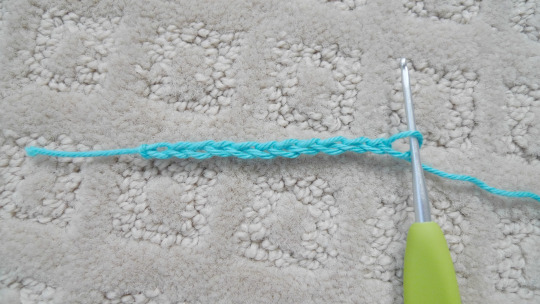
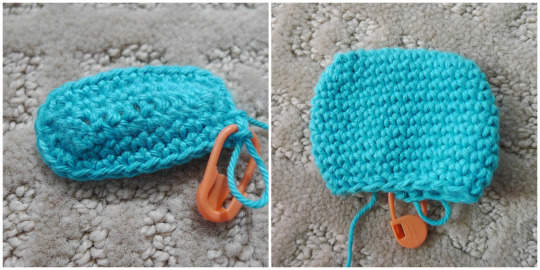
Since most amigurumi tend to be very round and three-dimensional, I thought it would be cute to make a flat teddy that could be attached to a keychain and toted wherever you go! Thus, instead of making spherical, ball-like shapes, I used the technique of working around a foundation chain to make ovals (see my full tutorial HERE). To make my teddy’s head, I chained 11 with my 2 mm hook.
To work around a foundation chain, you start from the second chain from the hook and single crochet in the back loops (the ones further away from you) of the foundation chain. In this case, you will work ten single crochets in the back loops. Then, you turn the piece and single crochet in the front loops of the foundation chain. Another ten single crochets in the back loops will bring you to a total of 20 stitches completed after Round 1.
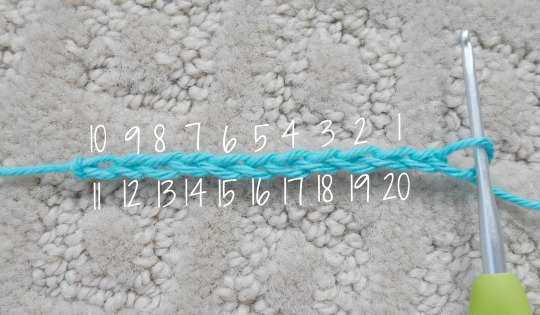
We have created an oval after Round 1!
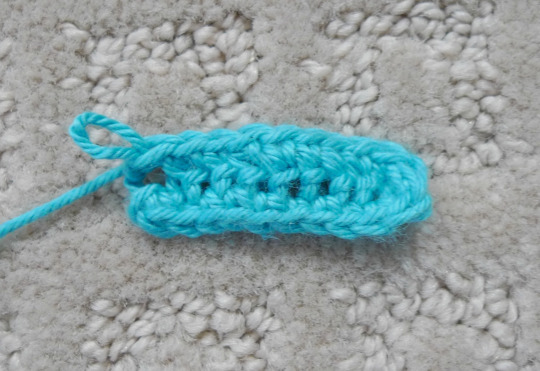
As the head continued to build up, this shape began to form!
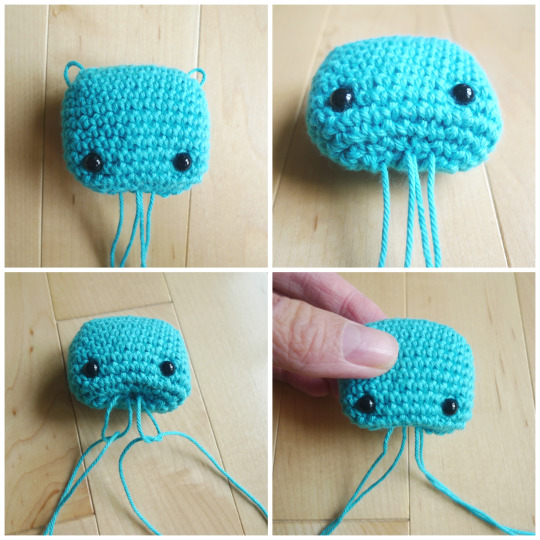
Before closing up the head, we attached 6 mm safety eyes. We attached them between Rounds 10 and 11, about 6 stitches apart.

Typically to end off my amigurumi shapes, I close up the hole when there are six stitches left. In this case, however, I decreased until there were 12 stitches left. Then, I moved my yarn tail to one side, pinched the head flat, and whip stitched the opening shut.
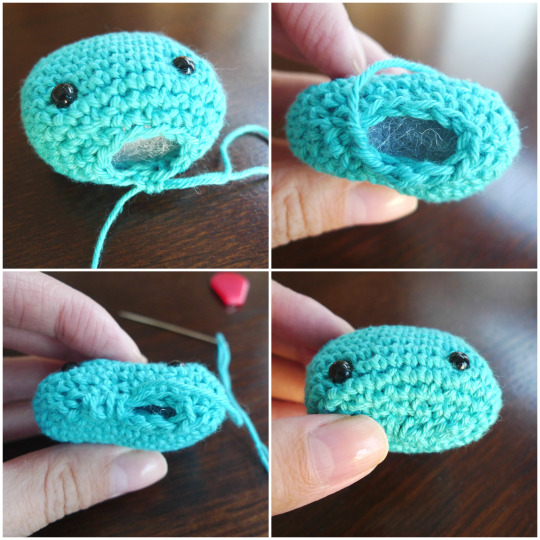
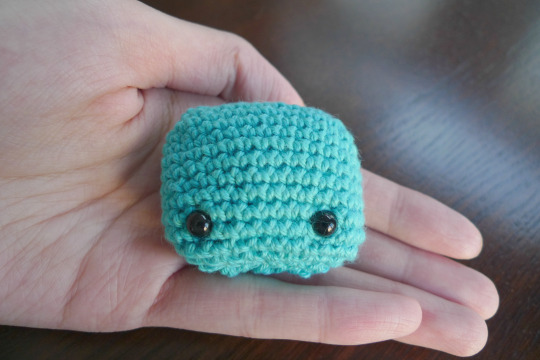
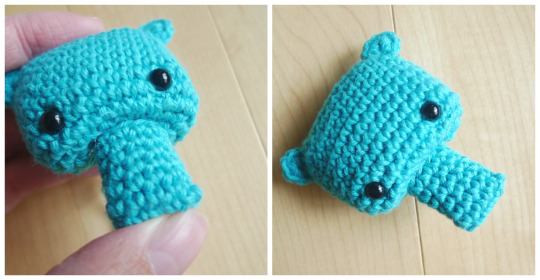
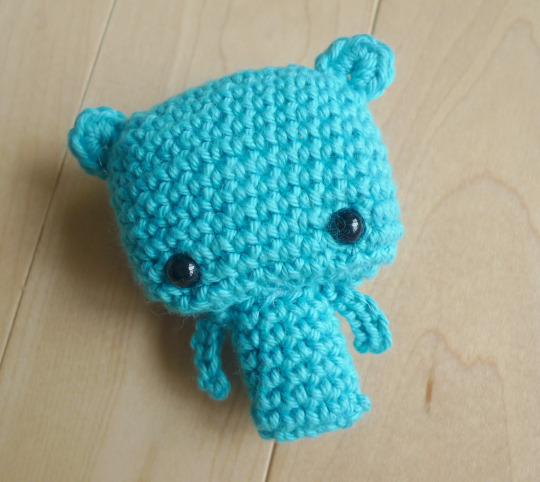
This was the resulting rectangular head!
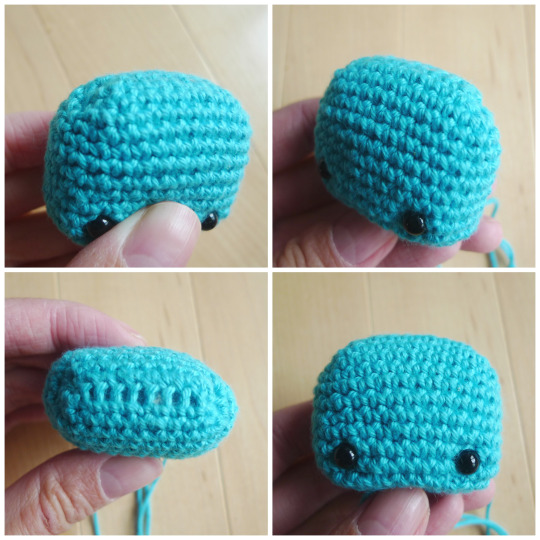
Next we created indentations at the corners of the head and where the neck would be at the bottom of the head. I threaded my needle through the bottom of the head to the upper right corner and then back down with a tapestry needle.
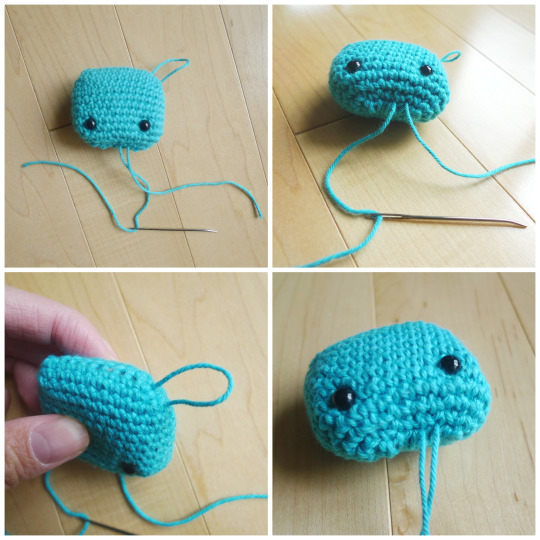
I repeated the same process on the left side and then tied the ends into double knots. Tying these knots created an indentation on the bottom of the head, which caused the cheeks to protrude slightly downwards!
This was the head shape we created with indented corners!
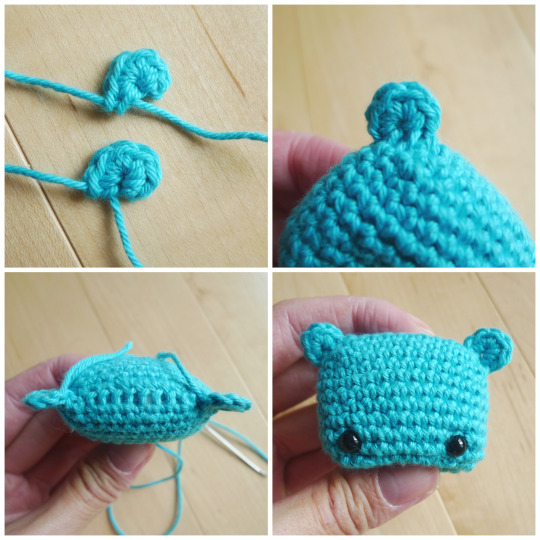
To crochet the ears, I simply single crocheted 6 in a Magic Ring (see tutorial HERE) without closing up the circle so a semi-circle was created! I sewed the ears onto the corners where we made the indentations.
I crocheted a tiny body and stuffed it gently by pushing the stuffing in with the end of my crochet hook.
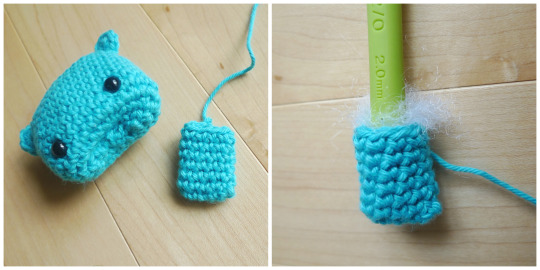
I then attached the body onto the bottom of the head by fitting it snugly into the indentation we created.
Next it was time for the limbs! I wanted simple, floppy limbs that could be attached directly onto the body. To create his left arm, I inserted my crochet hook into a stitch on the top left of his body. I created a slip knot with the yarn and pulled that slip knot through the stitch on my hook.
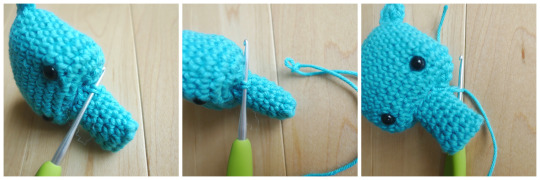
Then I chained 6 and began slip stitching back up the chain, ending off where I first inserted my crochet hook. I was left with a cute little arm that curved downwards.

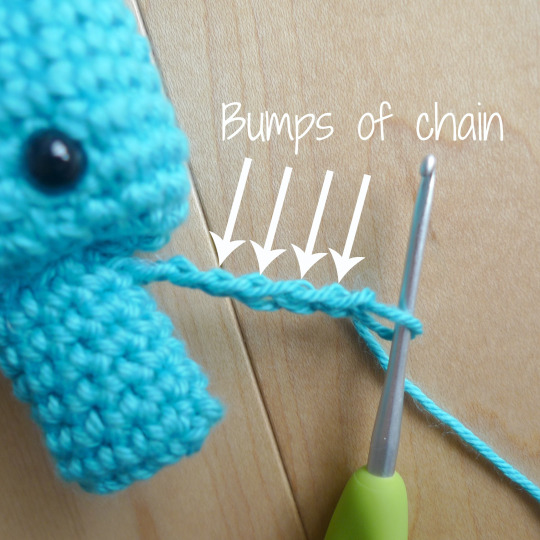
I worked all the slip stitches into the back bumps of the chain found behind the front and back loops of the chain.
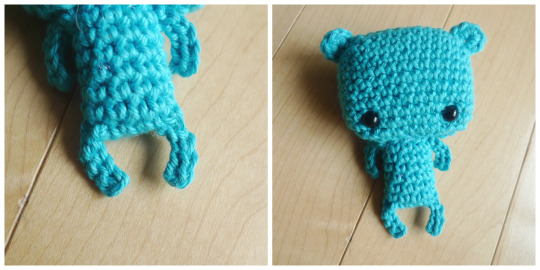
To create his right arm, I flipped him backwards and repeated the process. This ensured that the right arm also curved downwards. If you want his arm to curve upwards, you can attach this arm with him facing you!
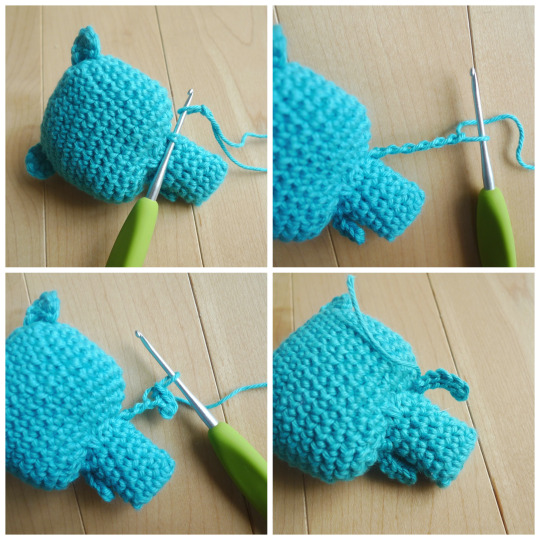
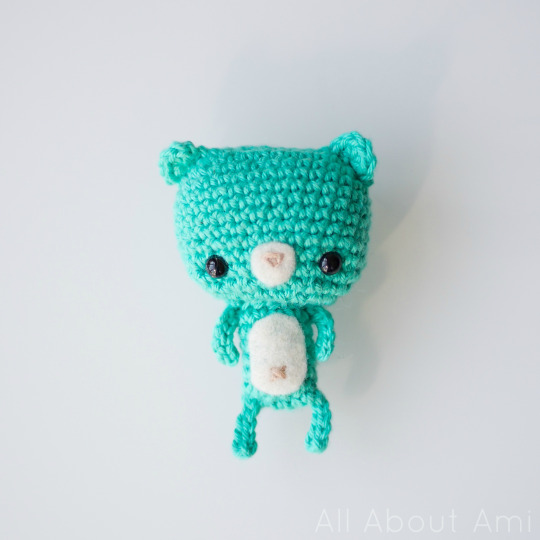
Both arms are complete- they are so simple and dainty! If you want, you could stop here and have a legless bear which I think is also very cute!
To create the legs, I repeated the same process as the arms, with only one chain less. Remember to keep him facing you for his left leg and flip him backwards for his right leg!
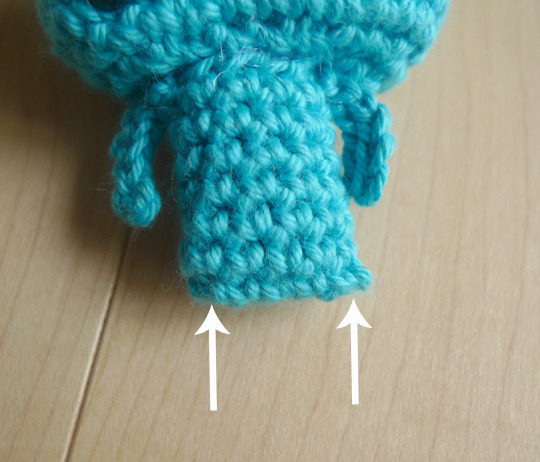
Both legs are complete! Yay for limbs that don’t have to be separately attached!
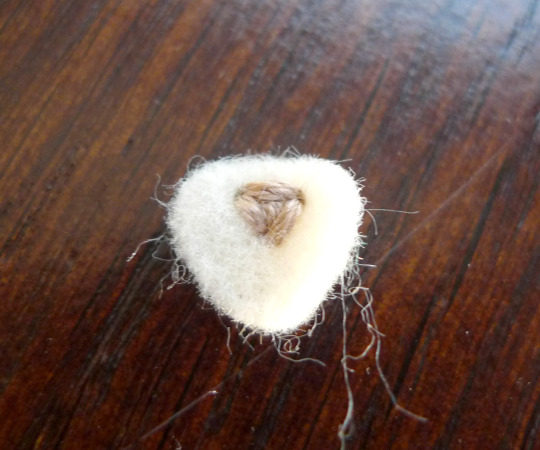
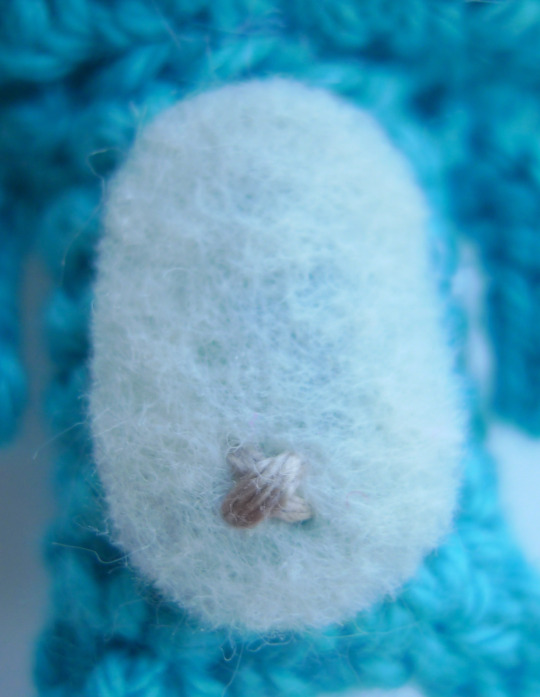
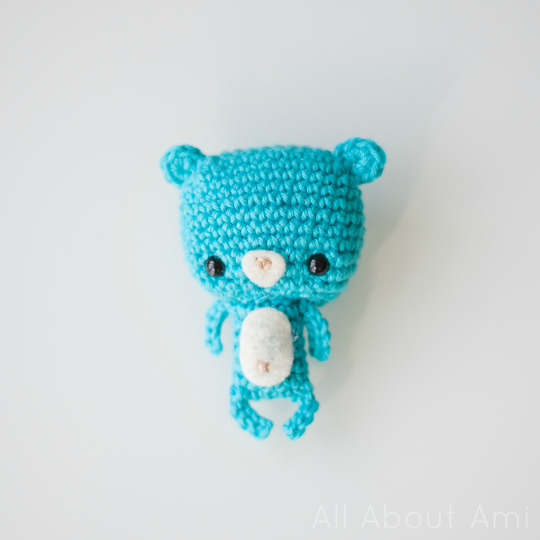
To create his nose, we cut a triangle out of white felt. We then embroidered an upside down triangle on the felt with embroidery floss.
We then created a belly by cutting an oval out of white felt. We embroidered a little “X” for his belly button using the same embroidery floss.
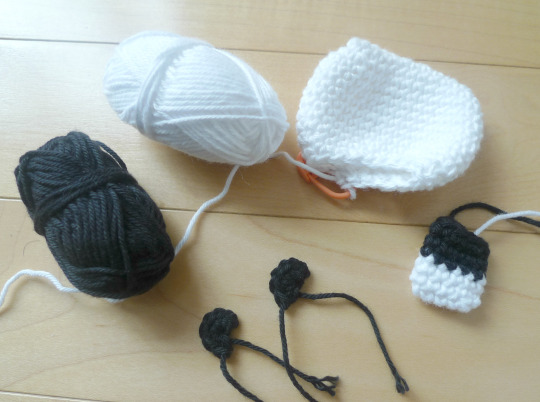
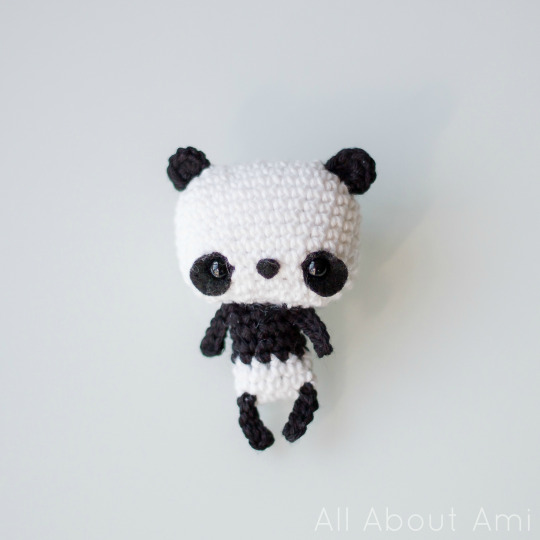
One Bonbon Bear only requires 6-7 grams of yarn (each Bonbon’s net weight is 10 grams in case you’re curious)! I decided to make two colourful bears and a panda bear using the black and white yarn in my “Beach” package. To create the panda bear, I crocheted a white head, a half white/half black body, black ears, and black limbs! I also made the body one less round compared to the colourful bears.
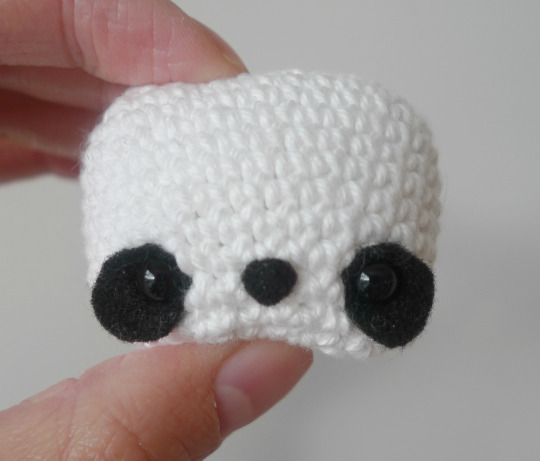
Isn’t this such a cute face? To emphasize his features, Ryan cut large eye roundies out of black felt and made them downturned. He used black felt for the nose too!
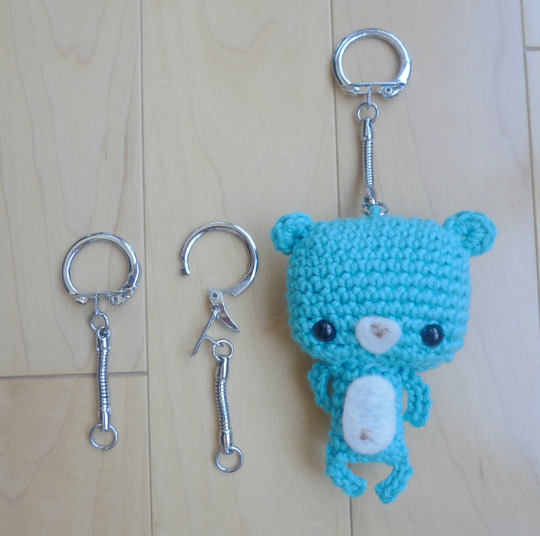
If you want to tote these cuties around with you wherever you go, you could attach them to these key rings with snake chains! I bought these on Etsy HERE (be warned that shipping took a long time though since they ship from Thailand!), but you can search your local craft stores for them too.
********************************
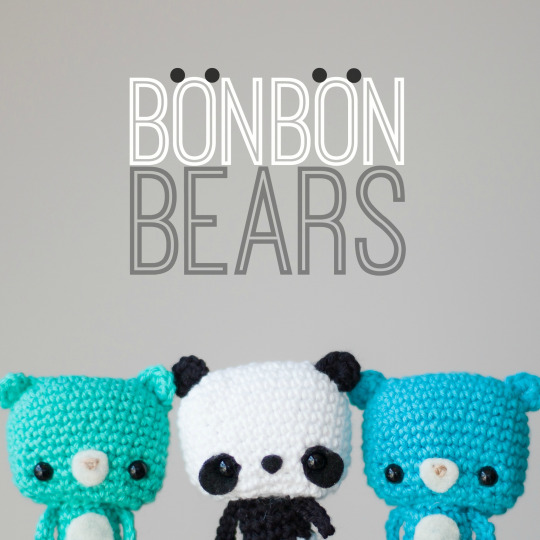
Here is the free pattern for my “Bonbon Bears”:
Materials:
- Fine or lightweight yarn, level 2 or 3 (I used Lion Brand Bonbons in the colour combo “Beach”); each bear requires about 6-7 grams of yarn!
- 2 mm Clover Amour crochet hook
- Yarn needle (bent tip helpful for attaching amigurumi parts- see HERE)
- Fiberfill
- 6 mm safety eyes
- Brown embroidery floss (for nose and belly button)
- White felt (for nose and belly), Black felt (for eye roundies and nose of panda)
- Clover lock ring stitch markers
- Glue gun
- Optional: Key ring with Snake Chain
HEAD:
Chain 11 (this is the foundation chain- see tutorial on how to crochet around a foundation chain HERE).
R1: Starting from second chain from hook, Sc 10 in back loops of foundation chain. Turn and Sc 10 in front loops of the foundation chain [we are making an oval by crocheting around the chain]. (20 sts)
R2: Inc, Sc 8, Inc x 2, Sc 8, Inc (24 sts)
R3: Inc x 2, Sc 9, Inc x 3, Sc 9, Inc (30 sts)
R4-11: Sc 30 (30 sts)
R12: *Sc 3, dec*, rep 6 times (24 sts).
R13: *Sc 2, dec*, rep 6 times (18 sts)
Add safety eyes. Position them between Rounds 10 and 11, about 6 stitches apart.
R14: *Sc 1, dec*, rep 6 times (12 sts)
Fasten off and leave long end for sewing. Move yarn end to one side of bottom of head. Stuff head. Pinch head flat and whip stitch opening shut.
Indentations: Create indentations at the corners and bottom of head. Thread yarn through the bottom of the head to the upper right corner and then back down with a tapestry needle. Repeat the process for the left corner. Tie the ends into double knots to create indentation on the bottom of the head, causing the cheeks to protrude slightly downwards.
BODY:
Chain 6 (this is the foundation chain)
R1: Starting from second chain from hook, Sc 5 in back loops of foundation chain. Turn and Sc 5 in front loops of the foundation chain [we are making an oval by crocheting around the chain]. (10 sts)
R2-7: Sc 10
Fasten off and leave long end for attaching. Stuff lightly by pushing stuffing with bottom of crochet hook. Attach onto bottom of head where indentation was created.
EARS (make 2):
R1: 6 sc in Magic Ring but do not join, creating a semi circle.
Fasten off and leave long end for attaching. Sew ears onto corners of head where indentations were created.
ARMS (make 2) & LEGS (make 2)
The limbs will be crocheted directly onto the body of the bear. We want both arms and both legs to curve towards the body. To achieve this, attach the left arm and left leg with the bear facing you. To attach the right arm and right leg, flip the bear backwards so that his back is facing you.
Left arm:
With bear facing you, insert your crochet hook into a stitch on the top left of his body. Create a slip knot with the yarn and pull that slip knot through the stitch on your hook. Chain 6.
R1: Starting from second chain from hook, Slip stitch 5 in bumps of chain. Sl st to where you first joined arm to body. Fasten off and weave in ends.
Right arm:
Flip bear backwards. With bear’s back facing you, insert your crochet hook into a stitch on the top right of his body. Create a slip knot with the yarn and pull that slip knot through the stitch on your hook. Chain 6.
R1: Starting from second chain from hook, Slip stitch 5 in bumps of chain. Sl st to where you first joined arm to body. Fasten off and weave in ends.
Left leg:
With bear facing you, insert your crochet hook into a stitch on the bottom left of his body. Create a slip knot with the yarn and pull that slip knot through the stitch on your hook. Chain 5.
R1: Starting from second chain from hook, Slip stitch 4 in bumps of chain. Sl st to where you first joined leg to body. Fasten off and weave in ends.
Right leg:
Flip bear backwards. With bear’s back facing you,
insert your crochet hook into a stitch on the bottom right of his body. Create a slip knot with the yarn and pull that slip knot through the stitch on your hook. Chain 5.
R1: Starting from second chain from hook, Slip stitch 4 in bumps of chain. Sl st to where you first joined leg to body. Fasten off and weave in ends.
NOSE:
Cut triangle out of white felt. Embroider upside down triangle using brown embroidery floss. Glue onto head.
BELLY:
Cut oval out of white felt. Embroider X onto belly using brown embroidery floss. Glue onto body.
Optional: Attach Bonbon Bear to key ring with snake chain.
Finished Dimensions: 3.5″/8.9 cm tall and 2.5″/6.3 cm wide at head
***PANDA MODIFICATIONS:
HEAD: Using white yarn, work same as above. Cut large eye roundies out of black felt and insert safety eyes into them. Cut triangle out of black felt and glue onto face.
EARS: Using black yarn, work same as above.
BODY:
Using white yarn, chain 6 (this is the foundation chain)
R1: Starting from second chain from hook, Sc 5 in back loops of foundation chain. Turn and Sc 5 in front loops of the foundation chain [we are making an oval by crocheting around the chain]. (10 sts)
R2: Sc 10
R3: Sc 10- when doing final yarn over of last stitch, switch to black yarn.
R4: For clean colour change, Sl st in first st. Sc around rest of stitches (10 sts)
R5-6: Sc 10 [Note that the panda’s body has one less round than the colourful bears.]
Fasten off and leave long end for attaching. Stuff lightly by pushing stuffing with bottom of crochet hook. Attach onto bottom of head where indentation was created.
ARMS (make 2) & LEGS (make 2): Using black yarn, work same as above.
********************************
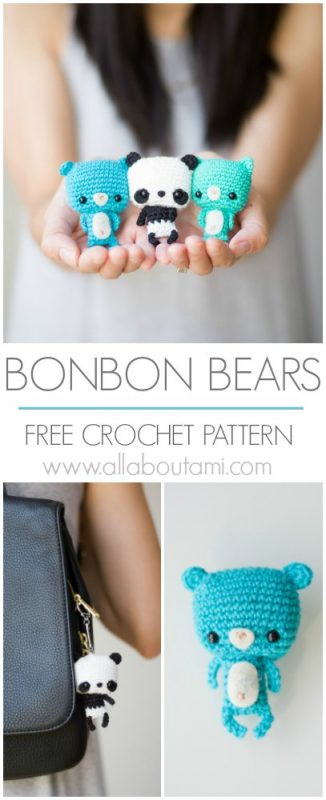
These Bonbon Bears are so sweet and adorable! I really love how you can make them in a variety of colours, and if you buy the Bonbons set, you can make 8 different bears! The colours are so vibrant!
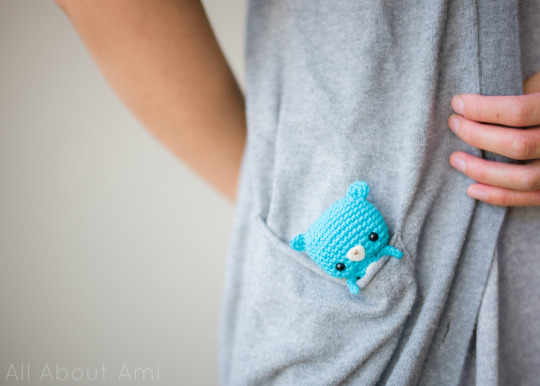
I wanted to name these bears after sweet treats and candy since the yarn they use is called bonbons! Here we have Bluebearie…
…Minty…
….and Oreo!
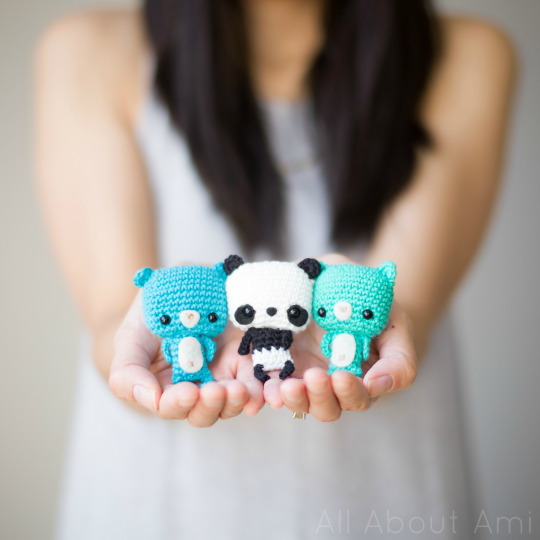
They are tiny enough to fit in your pocket! Wouldn’t these be a cute gift tucked away in a mug or small basket? This certainly would bring a smile to my face if I saw this adorable little teddy peeking out!
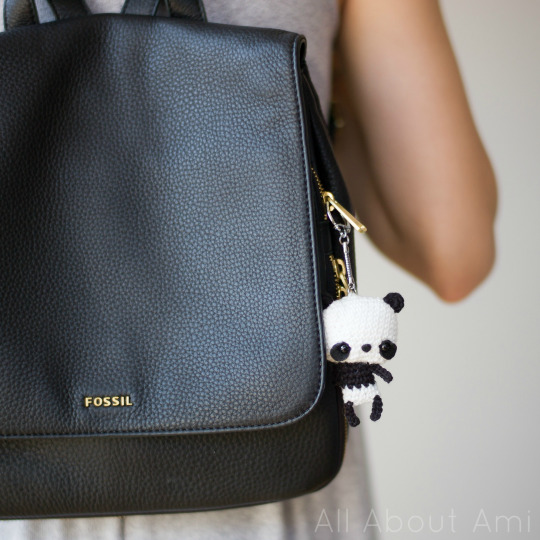
Once you’ve attached keyrings to the Bonbon Bears, you can bring them with you wherever you go! Here is my Panda attached to my favourite new accessory: my backpack!
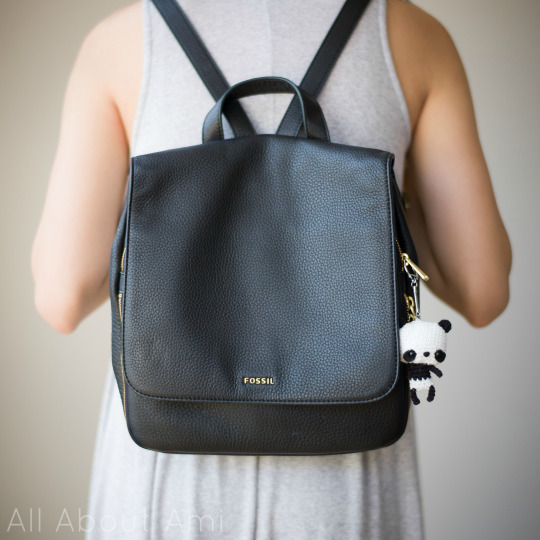
It’s so convenient being hands-free, and I love how chic and modern it looks too! I must say that I never thought I’d be wearing a backpack again after I finished school!
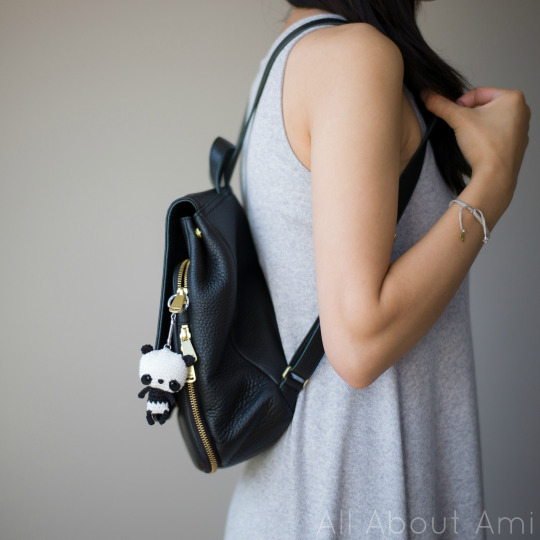
I adore being able to carry around such a kawaii crocheted creation with me all the time!
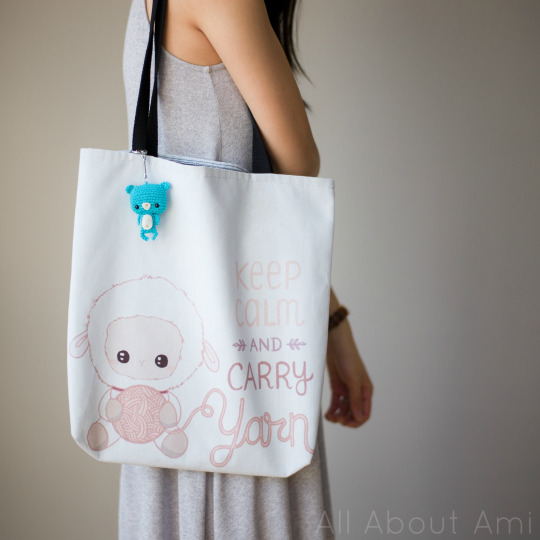
A year ago I introduced you to The Lambert Collection that I designed with Laura Uy– this collection includes tote bags, mugs, and apparel for yarn lovers! All profits made from this collection are being used to sponsor a classroom of children in Guatemala! Here is Bluebearie attached to my tote bag (see HERE)! Doesn’t he look so tiny?
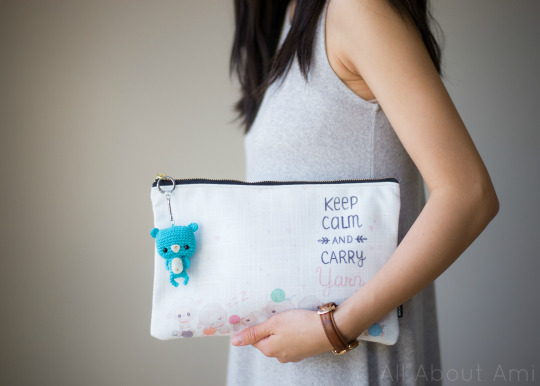
I am delighted to share that Society6 now offers cute Carry-All Pouches! They’re such a great way to store your crochet hooks and notions (stitch markers, tapestry needles, etc), and the largest size (pictured here) can store smaller WIP’s as well! Note that we ordered all three sizes, and the image definitely fits the largest size best (it was a bit cut off with the smaller sizes).
I hope you enjoy making these sweet Bonbon bears for yourself and as gifts for friends and family! Their tiny limbs and flat, block-like shapes make them very unique and extra cute. They can accompany you wherever you go when you attach them to your backpacks, purses, or tote bags! Not only are they a quick project, but they’re also a great way to use up scrap yarn! I’d love to see your creations, so use the hashtag #BonbonBears on social media and tag me! You can follow my work on my social media here: Facebook page, Twitter (@AllAboutAmi) and Instagram (@AllAboutAmi)I. You can also find concise PDF versions of my patterns in my Etsy store HERE (I recently surpassed 300 sales- thank you!). Read up about these bears in their feature on the Lion Brand blog HERE, and enter to win a pack of Bonbons HERE! Lion Brand has actually dropped the price of the Bonbons to only $5.99 for two weeks HERE, so now is a great time to check them out!
{This post is sponsored by Lion Brand Yarn! I’ve loved working with their yarn throughout the years and I’m thrilled that I get to collaborate with them every month!}
This pattern is an original pattern by Stephanie Lau of All About Ami. Please do not claim this pattern as your own. If you wish to share this pattern, you may link to this pattern but please do not reprint it on your site. You may keep a copy for your own personal use but please DO NOT sell the pattern or distribute it.
You may sell products made from this pattern but please clearly credit the design to me, Stephanie Lau of All About Ami, and provide a link to my blog www.AllAboutAmi.com. Permission is NOT granted for mass production or factory manufacturing of any kind. Thank you for being respectful and for your understanding!
Amazon Affiliate Link: