In Part 3 of our “Simple Knit Series“, we are learning how to knit the gorgeous seed stitch, one of my favourite knit stitches because of its amazing texture! The seed stitch is created by alternating knit and purl stitches within the same row. In subsequent rows, you knit all the purl stitches and purl all the knit stitches from the previous row which creates that gorgeous scattered seed effect! We will also slip a stitch at the beginning of each row to create clean and smooth sides for this headband!
The techniques you will need to know for this project are:
- Casting on stitches
- The knit stitch
- The purl stitch
- Slip a stitch knitwise
- Casting off stitches
Check out my full “How to Knit the Seed Stitch” tutorial HERE! The video below also shows all these techniques in action! You can also view this video on YouTube HERE!
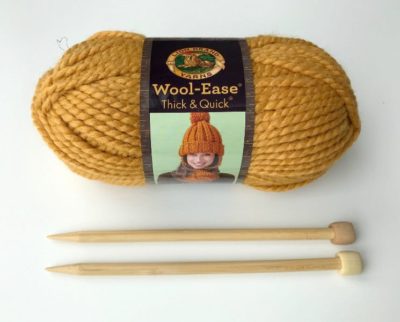
To knit this headband, you need 1 skein of Lion Brand Wool-Ease Thick & Quick in “Mustard” (on the Lion Brand site HERE) and Clover Takumi 9 mm knitting needles.
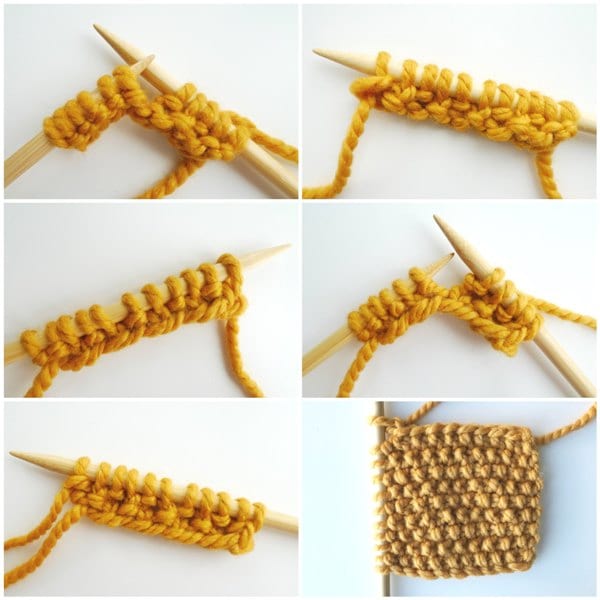
To begin, make a slip knot and use the long tail cast-on to cast on 11 stitches.
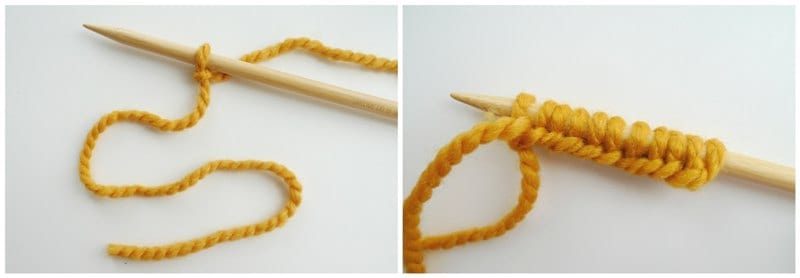
Slip a stitch knitwise by inserting your right needle into the first stitch as if you were going to work a knit stitch. Instead of yarning over and completing the stitch, simply pass that stitch onto the right needle.
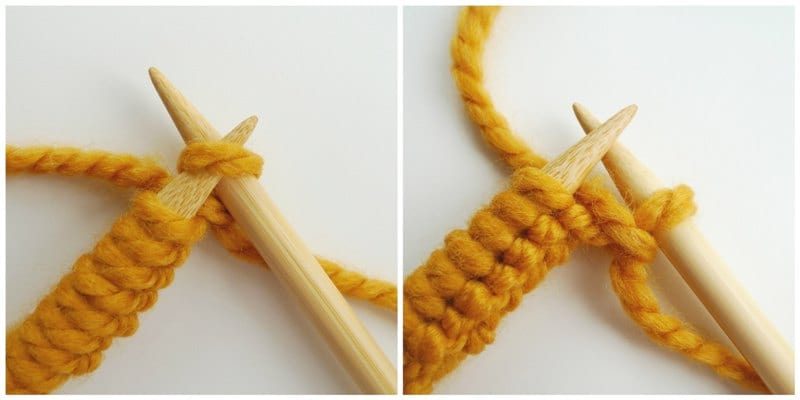
You then work alternating knit stitches and purl stitches (i.e. knit stitch, purl stitch, knit stitch, purl stitch) until the end of the row. Then you flip your work and repeat the exact same process till you have completed 77 rows. You always slip the first stitch knitwise at the beginning of every row. Since you are working with an odd number of stitches, always slipping the first stitch helps to offset the pattern so that in subsequent rows, you will always knit all the purl stitches and purl all the knit stitches from the previous row. If you knit all the knit stitches and purl all the purl stitches, you will get a ribbed effect instead!
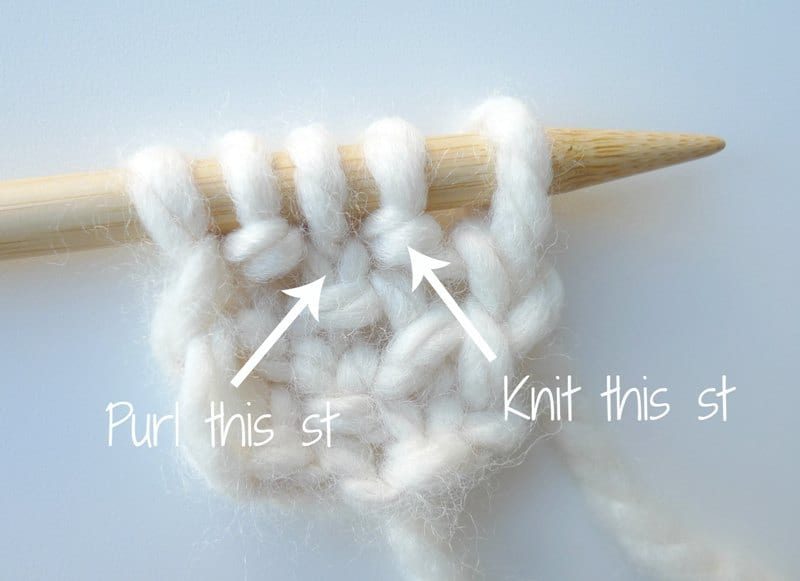
If you forget whether you are supposed to knit or purl the next stitch, check out this tip from my “How to Knit the Seed Stitch” blog post HERE! If you see a bump, you need to knit that stitch. If you see a V, you need to purl that stitch.
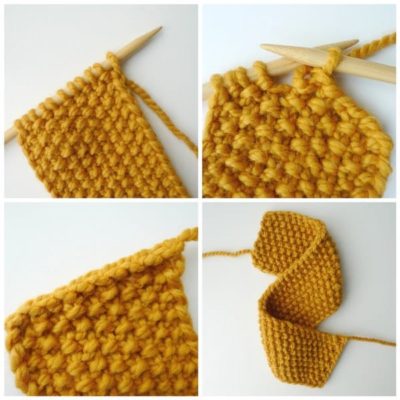
Once you have reached your desired length, cast off the stitches and leave a long tail for seaming.
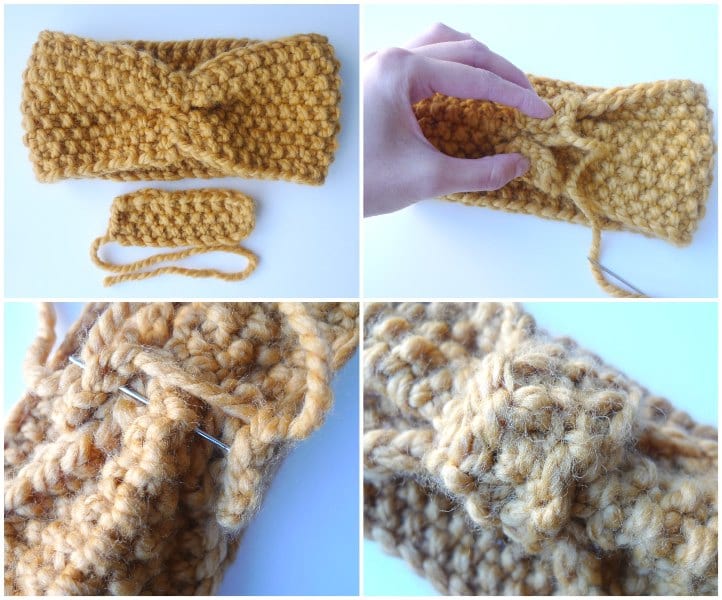
Whip stitch the ends together- do not worry if the seam does not look very clean as it will be hidden within the middle knot later on.
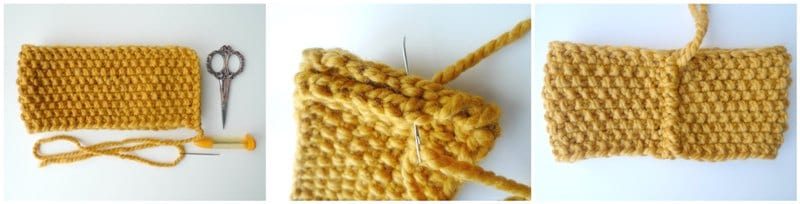
Pinch the middle of the headband and sew it together with a few stitches to emphasize the ruching.
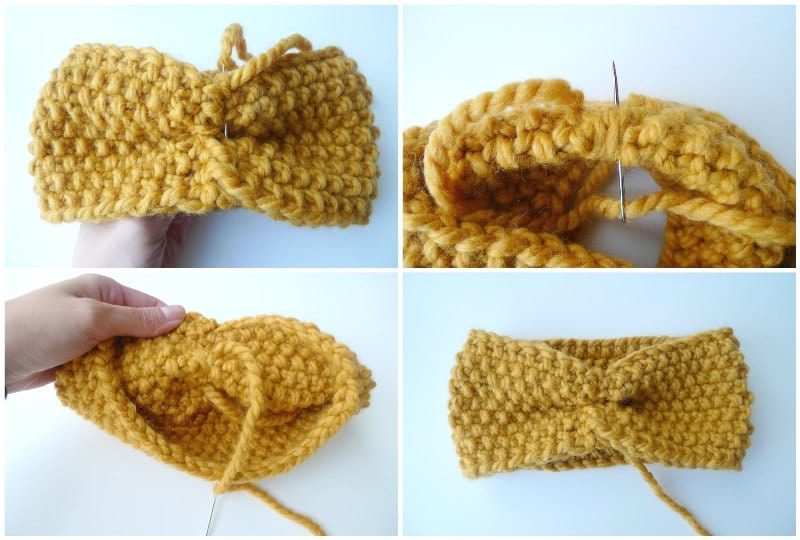
Knit a small and narrow strip using the same seed stitch. Wrap this strip around the seam of the headband and whip stitch the ends together. Thread the needle through some of the ruched middle of the headband so that the middle knot cannot shift when worn!
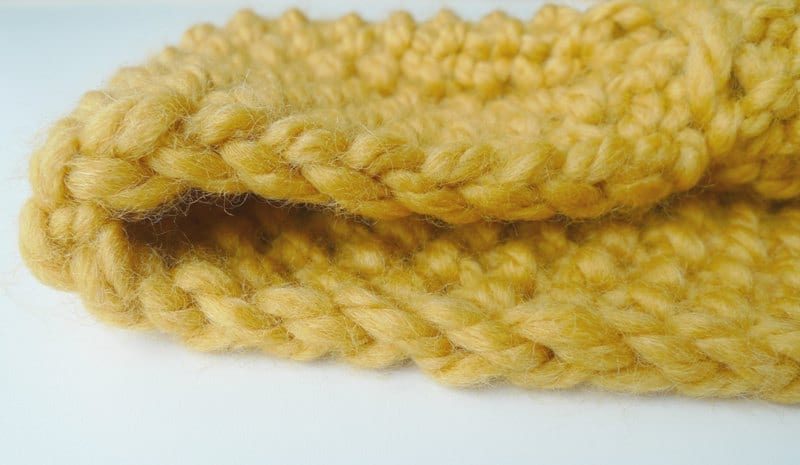
By slipping the first stitch of every row, a beautiful clean edge is created as shown below!
*******************
Here is the free knitting pattern for my “Simple Seed Stitch Headbands“!
***You can purchase an INEXPENSIVE AD-FREE PDF of this pattern on Etsy HERE and on Craftsy HERE! This beautifully formatted PDF includes the step-by-step pictures and is a total of 4 pages including the cover page!
![]()
Materials:
- 1 skein of Lion Brand Yarn’s Wool-Ease Thick & Quick in Mustard (super bulky level 6 yarn). Adult headband requires about 62 g of yarn.
- 9 mm Clover Takumi Bamboo Needles
- Yarn needle (bent tip recommended)
- Large Point Protectors (optional)
Notes:
- To increase the width of the headband, cast on more stitches and keep it an odd number (e.g. 13, 15, 17 sts, etc).
- To increase the length of the headband, knit more rows (more than 77).
- Keep in mind that the headband will stretch over time with repeated wear and use!
PATTERN:
Adult Headband:
Cast on 11 sts using the long tail cast-on (leave 16″ tail).
R1: Slip a stitch knitwise. *K1, P1* till end.
R2-77: Repeat R1.
Cast off stitches. Leave long end for sewing. Whip stitch sides of headband together. Pinch middle of headband and sew it together with some stitches.
(Size approximately 19″ x 4″.)
Adult Middle Knot:
Cast on 5 sts using long tail cast-on.
R1: Slip a stitch knitwise. *K1, P1* till end.
R2-15: Repeat R1.
(Size approximately 4″ x 1.5″):
Cast off stitches. Leave long end for sewing. Wrap strip around seam of headband. Whip stitch ends together and thread needle through some of the ruched middle of the headband so that the middle knot cannot shift when worn. Weave in ends.
Finished Adult dimensions: 19″/48.3 cm x 4″/10 cm
![]()
Child size (sized for my 4 year old):
- Headband: Cast on 9 sts, work until R74.
- Middle Knot: Cast on 5 sts, work until R13.
Finished Child dimensions: 18″/45.7 cm x 3.5″/8.9 cm
Toddler size (sized for my 2 year old):
- Headband: Cast on 7 sts, work until R72.
- Middle Knot: Cast on 5 sts, work until R12.
Finished Toddler dimensions: 17″/43 cm x 2.5″/6.4 cm
Baby size (suggested):
- Headband: Cast on 7 sts, work until R60.
- Middle Knot: Cast on 5 sts, work until R12.
******************
I adore my beautiful new Simple Seed Stitch Headband! This apricot colour is absolutely gorgeous, and I think it contrasts so nicely against my hair colour!
![]()
It may be March, but the weather is still chilly! During a recent snowfall, we ran outside to take some pictures of me wearing my brand new headband! It was actually very difficult to keep my eyes open as snow kept flying in my eyes haha! Headbands are great transitional pieces from the winter to the spring when you still want to wear something to keep your head and ears warm, but not a full hat!
![]()
The girls were so excited when I showed them our matching headbands in the exact same colour! Brie loves copying whatever Myla does, and Myla loves copying what I do! It’s amazing how you can knit so many headbands with just a single skein of yarn! These headbands work up very quickly, and you can whip up a bunch in no time- I love projects that can be completed in one sitting!
![]()
I love this photo with their big smiles! They are at such fun ages right now at 4 and 2 and they are so playful with their creative imaginations! Sometimes they like picking up yarn and wrapping it around my hooks and needles to pretend like they are crocheting or knitting!
![]()
I hope you’ve enjoyed the Simple Knit Series and that you found it helpful! I know most of you know how to crochet, but I strongly encourage you to try picking up some knitting needles and giving knitting a try! It’s so wonderful being able to use yarn in a different way and to learn even more techniques and stitches. A whole world full of new knitting patterns and possibilities opens up! If you end up trying any of my patterns, please tag me on social media (#AllAboutAmi or @AllAboutAmi ) as I would absolutely love to see! I get so excited whenever I see that someone has been inspired to learned how to knit and gained confidence in their skills by following one of my designs! Thank you for journeying along with me, and I’ve had so much fun planning out and designing all the items in my Simple Knit Series!

Note: Thank you to Lion Brand Yarn for sponsoring this post and for providing the yarn! Thank you to Clover USA for providing the knitting needles!