I was so excited to begin working on my first amigurumi. But what would I make? I was in the process of moving from my family’s house to my new house, and I only had pink and black yarn with me. Hmmm….who could I make that was pink? I narrowed it down between two round, pink Nintendo characters: Kirby or Jigglypuff. I ended up choosing Jigglypuff.
I used to play Pokemon Red on my Nintendo GameBoy back in 1996. I used to love collecting and training my pokemon and watching the Pokemon anime series as well. Jigglypuff was always so cute when she puffed up with anger and put people to sleep with her mesmerizing songs.
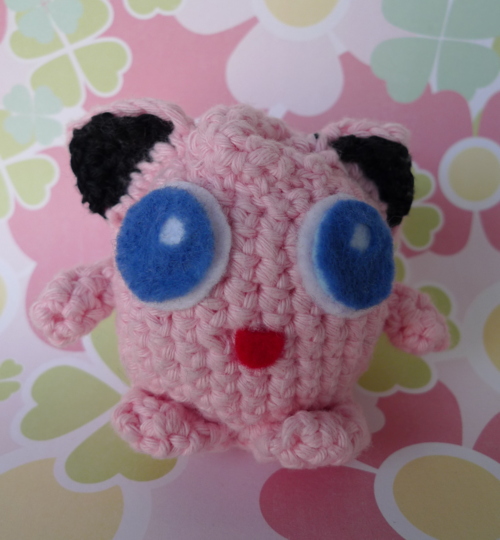
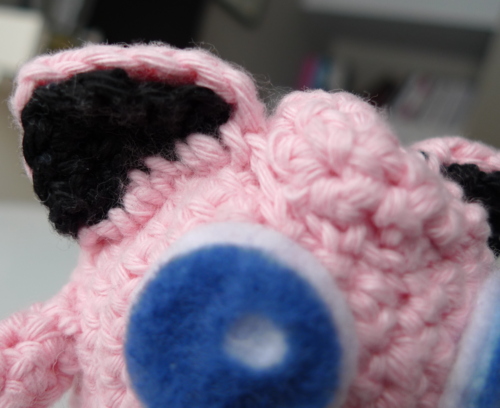
And so, I found this great Jigglypuff pattern on WolfDreamer’s blog. I ended up altering the pattern here and there because I wanted to make a smaller Jigglypuff. Here is how my Jigglypuff turned out:
And these are the materials I used to make Jigglypuff:
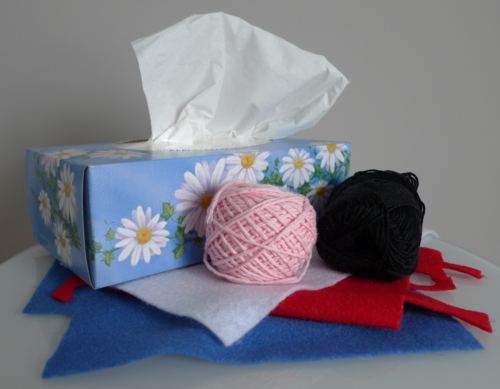
Pink and black yarn for crocheting. White, red and blue felt for the eyes and mouth. And kleenex?!? Yes, that is what I used to stuff Jigglypuff. I did not yet have polyster fiberfill, and I did not want to wait another day to go out and buy it or get it from my family’s house (the same polyester fiberfill I used to make my original amigurumi in 1995). I was too eager to start assembling Jigglypuff. So I used the only thing I could find around the house – kleenex. That means it’ll be bye bye Jigglypuff if she ever gets dunked in water :S
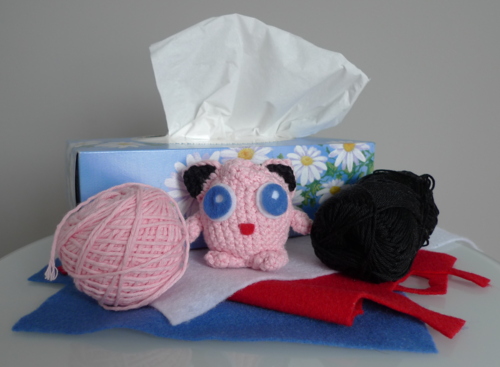
Here’s a pic showing what was made out of the above materials:
Crocheting the parts was simple enough, particularly since the single crochet stitch is the only stitch that is typically used to make amigurumi. Reading the crochet patterns came back to me. However, assembling the parts together was a different story. Placing and sewing the body parts together is key, and at times I got frustrated.
Curving and attaching the tuft of hair onto Jigglypuff’s head was challenging.
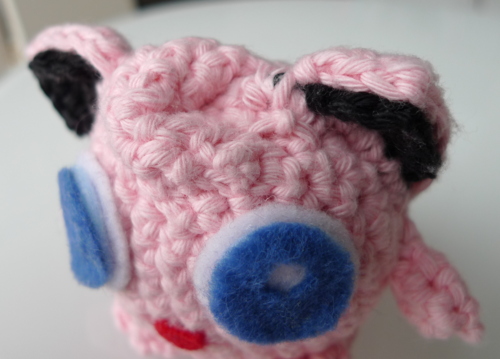
Sewing the black inner ear to the pink outer ear (without showing the black stitches and yarn from behind) was also difficult.
I was very happy with how Jigglypuff turned out though! Ryan helped me cut the eyes and mouth out of felt (he’s very precise!) and used a glue gun to glue them to Jigglypuff’s face. I was so proud after making my very first amigurumi as an adult! There was no doubt in my mind that taking up crochet again to make these cute stuffed animals was going to be a fun challenge.
A dog first aid kit is one of those things you hope you never need—but when you do, it must be ready. Like human first aid kits, your pet’s kit should be stocked, current, and tailored to their health needs. But how often should you really check it? And what exactly should be in it? In this blog, we’ll walk you through everything you need to know to keep your dog’s emergency care kit up to date and useful.
Why is it important to regularly check your dog’s first aid kit?
Items in your dog’s first aid kit can expire, leak, or get used up without you realizing it. If an emergency strikes and you grab the kit only to find expired antiseptic or missing gauze, that delay can make a big difference. Regular checks ensure everything works when needed.
- Prevents using expired medical items
- Ensures supplies are fully stocked
- Keeps items clean, dry, and organized

How often should I check my dog’s first aid kit?
It’s recommended to check your dog’s first aid kit every 3 to 6 months. Mark it on your calendar or pair it with a routine like grooming appointments or vet visits. If your dog has medical conditions, travels often, or hikes with you, check it more frequently.
- Every 3 months for active dogs or frequent travelers
- Every 6 months for household pets with basic needs
- After any use, immediately restock the items used

What should be included in a dog’s first aid kit?
A good kit should include wound care supplies, tick/flea tools, medications, gloves, and basic grooming tools. You should also have copies of your dog’s medical history, vet contact info, and any personal medication they’re currently taking.
- Gauze pads, wraps, antiseptic wipes
- Styptic powder, tweezers, scissors
- Hydrogen peroxide (for emergency vomiting under vet guidance)
- Gloves, digital thermometer, saline solution
- Your dog’s medications and emergency contacts

How do I know if items are expired or need replacing?
Most supplies will have an expiration date printed on them. Look for dates on ointments, wipes, solutions, and medications. Check for broken seals, dried-out wipes, or packaging damage. Even non-expired items should be replaced if they appear used or compromised.
- Check the date on everything, especially liquids
- Inspect bandages and tapes for dryness or discoloration
- Replace anything that’s been opened or looks unsanitary
Where should I keep the first aid kit?
Store your kit in a cool, dry place that’s easy to access. Avoid damp bathrooms or garages where humidity might ruin supplies. Many dog owners keep a small version in the car and a full kit at home. If you hike or camp with your dog, a portable pouch is ideal.
- Keep kits at home, in the car, or in your dog’s travel bag
- Avoid direct heat or humidity
- Label it clearly so others can use it if needed

What’s the difference between human and dog first aid kits?
While some items overlap, dogs have specific needs. Human painkillers can be toxic to pets, and dog-safe antiseptics or tick tools are essential. Never substitute a human item unless your vet confirms it’s safe. It’s always best to have a pet-specific kit.
- Dog kits include pet-safe antiseptics and medications
- Contain tools designed for fur, claws, and tick removal
- Include pet care instructions and emergency contacts
What should I do after using the kit in an emergency?
After any use, take a few minutes to replace what you used and check for any other items that might be low or outdated. You should also clean any tools, like scissors or thermometers, before putting them back. This keeps your kit ready for the next time.
- Clean reusable items with pet-safe disinfectant
- Restock any missing items immediately
- Make a note of what was used for future vet visits