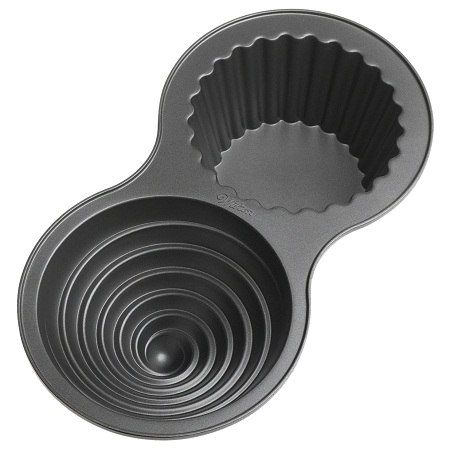
Last year I saw the “Wilton Giant Cupcake Pan” at Michaels and purchased it when a 50% off coupon was available. We were originally thinking of making a giant cupcake for Myla’s 1 Year cake smash, but ended up using another cake for it. With Myla’s 2nd birthday approaching, I knew it would be the perfect opportunity to put this cake pan to use for the very first time, and I did a lot of research into the best way to use it. I thought I would blog about it and show you all the resources I looked up in case any of you are interested in this cute pan too! This is what it looks like below:
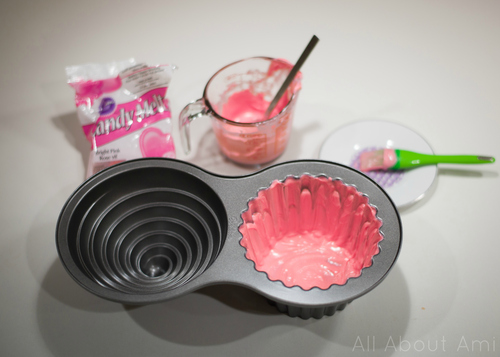
We were originally just thinking about icing the top of the cake (the “cupcake part”), but we were worried that it might overpower the bottom part or that the bottom might look too “naked” without any decorations. I did some research to see what other people did, and I found this great tutorial HERE on how to make a giant cupcake liner. We used 1 bag of Wilton pink candy melts although we did buy extra in case the liner cracked and we needed to make another one. This wasn’t the case though as the liner turned out perfectly, so no more candy melts were needed. After melting the candy melts in the microwave, Ryan applied the first layer with a brush…
After letting it harden in the fridge, Ryan then applied a second layer…
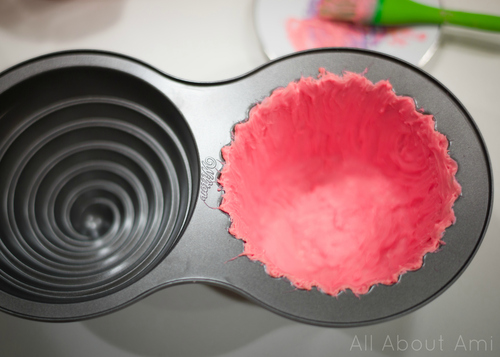
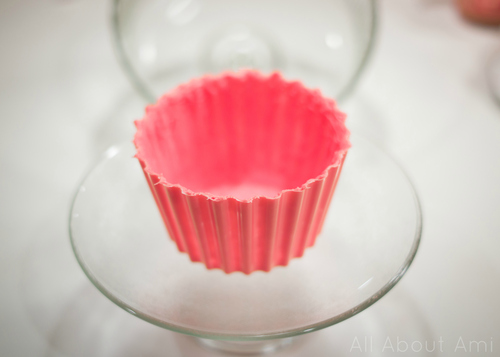
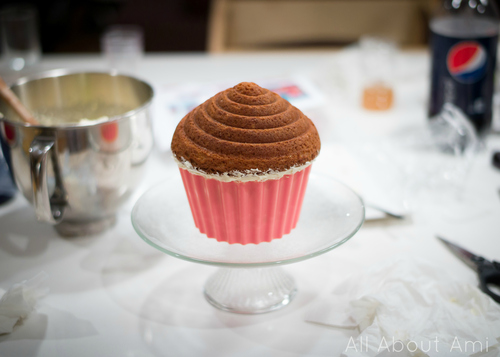
We were surprised with how easily the cupcake liner slipped out of the pan after it hardened! Note that we didn’t need to spray or grease the pan at all, and since the candy melt liner shrinks in the fridge slightly after cooling, it slips out perfectly. Doesn’t it look so cute?
Since this is such a large cake pan and you need to assemble the two parts together, a denser cake works best. I read this very helpful blog post HERE, watched the video in that blog post, and read all the accompanying comments to see exactly what cake recipe to use and how to assemble it. In summary:
- I used the “Duncan Hines Yellow Pound Cake” recipe found HERE and doubled the recipe as you need 6 cups of batter in total.
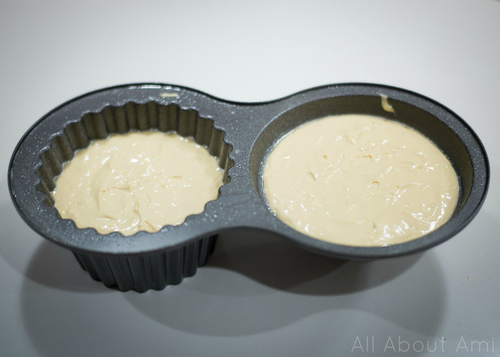
- It is crucial that you fill each cavity with the correct amounts of batter or else they will bake unevenly. The top part of the cake (cone-shaped cavity) requires 2.5 cups of batter while the bottom part of the cake requires 3.5 cups of batter.
- Spray your pan VERY WELL so that the cake will come out cleanly as you don’t want chunks sticking to the pan when it’s time to take them out!
- There will be left-over batter if you use this recipe, and I managed to make a whole pan of mini cupcakes and about 10 regular sized cupcakes with what was left-over!
- You bake the cake for 1 hour at 325 degrees and turn the pan halfway through baking.
- Let the cake cool in the pan for 15 minutes. Then remove the cake and let it cool completely on a cooling rack.
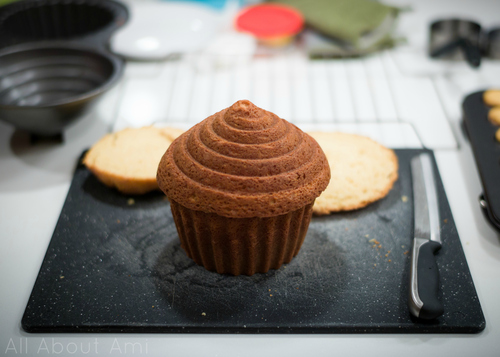
Once the cake has cooled completely, you need to level both sides of the cake so that you can fit them together properly (once baked, both sides puff out).
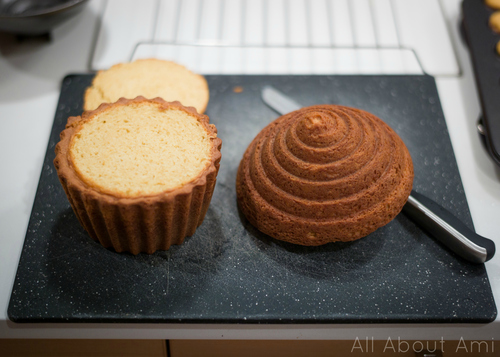
With both sides now flat, they fit together well!
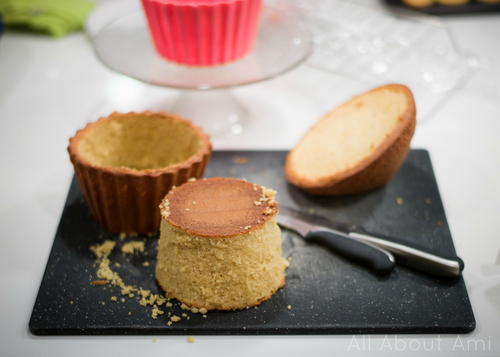
Since we opted for a candy melt cupcake liner to decorate the bottom, we needed to shave off some of the sides of the bottom part of the cake so that it would fit into the liner. Simply sticking the bottom part of the cake into the liner would not work since they are the same size, and this would crack the liner! As you can see, we had quite a bit of left-over cake (from the leveling and from shaving off the sides), so we crumbled the remaining cake and used it to make a delicious layered trifle (see recipe HERE). No part of this cake went to waste! You could also use the left-over cake to make cake pops too!
Ryan spread icing on the bottom and sides of the cupcake liner to provide a cushion for the cake. He then carefully placed the bottom part of the cake inside the liner.

Next Ryan put icing on both sides and then pieced the two parts together. He also filled any visible gaps with icing.
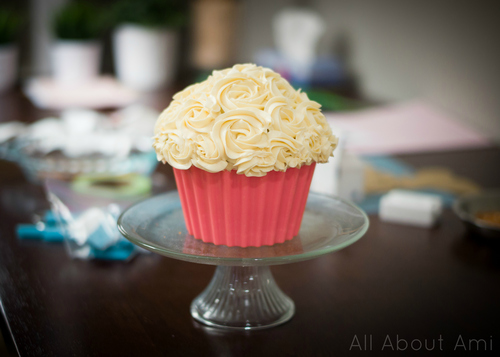
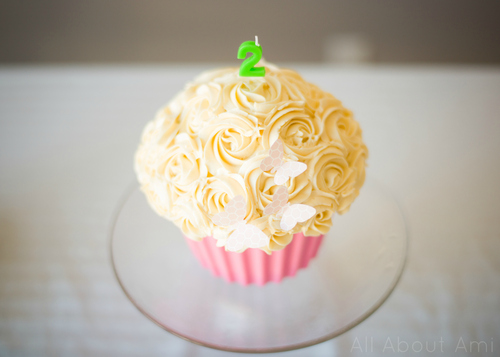
Ryan then used a big piping bag and a Wilton 1 M tip and piped these beautiful roses onto the cake! Would you believe that this was his first time piping? We searched how to do this technique on YouTube (for example see HERE) and Ryan practiced on a few cupcakes before doing it on the real thing! For the icing, I used this “Swiss Meringue Buttercream” recipe found HERE on Sweetapolita’s blog. Prior to this, I had only made traditional icing using icing sugar, but on the recommendation of my friend Connie of Mirabelle Macarons, I tried this new recipe out. Let me tell you, this icing tastes DIVINE as it is not too sweet and it has a beautiful glossy shine to it.
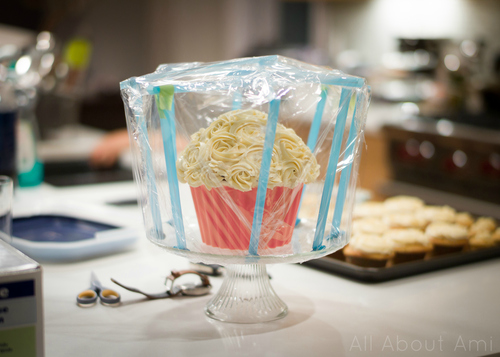
We iced the cake the night before Myla’s birthday party, and we wanted to leave it out overnight just in case the cake dried out or if something went wonky with the icing. Ryan and his dad made this contraption out of bubble tea straws so that we could at least keep it covered with saran wrap haha…
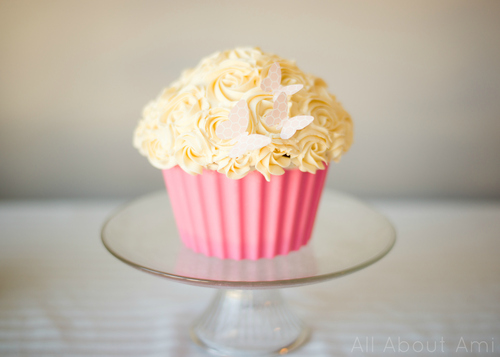
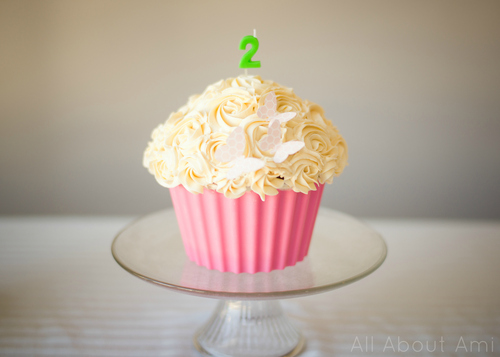
For the final touches, Ryan cut these beautiful pink butterflies out of scrapbook paper, hot glued them onto toothpicks and then added them to Myla’s giant cupcake!
The giant cupcake with the candle in it! I should mention that this cake not only looked pretty, but tasted delicious too. The pound cake recipe was wonderful as it tasted very moist and was not dry at all. The pound cake with the swiss meringue buttercream was a wonderful combination, and all the mini and regular sized cupcakes were a hit too. If you want a chocolate cake recipe to use with this pan, check out this recipe HERE– I’m definitely going to be trying it in the future.
When Myla came downstairs the morning of her birthday, her eyes widened with delight when she saw the cake that we had made for her! She LOVES cupcakes, so she was astonished to see such a giant one! It absolutely melted our hearts and we were so happy that we had made this cake for our sweetie from scratch 🙂
This giant cupcake and the butterflies we added ontop fit perfectly into Myla’s garden-themed 2nd birthday party! You can read more about her party and see what food and decor we prepared to tie in with this theme HERE in case any of you are interested in throwing a party like this too 🙂 We hope you enjoyed seeing the step-by-step making of this giant cupcake! I am really happy that we purchased this cake pan and I know that we will be getting a lot of use out of it in the future. You can decorate this cupcake for different occasions (Christmas, Valentine’s Day) and even flip the bottom part of the cake so that it becomes a barn or a fairy house (see HERE)! Love the different possibilities 🙂 Let me know if you have this cake pan too and how you’ve used it for your special occasions!
Amazon affiliate link: