***You can purchase an INEXPENSIVE AD-FREE PDF of this pattern on Etsy HERE – this beautifully formatted PDF includes the step-by-step pictures and is a total of 9 pages including the cover page! The free full written-out pattern for this cape can be found HERE! The Lion Brand Kit HERE includes the pattern and all the Truboo yarn needed to make this cape!
I am so excited to walk you through the process of how I crocheted the Dusk Cape! The Dusk Cape is the crocheted counterpart of the knitted Dawn Cape, characterized by its beautiful drape, ridged texture, and subtle ruching at the arm openings. I wanted to design the crochet version with these same features, and I will show you how I tried to achieve this. I used the exact same gorgeous Truboo yarn that is a lightweight level 3 yarn (100% rayon from bamboo) and used the colourway called “Silver” (the knit version uses the “Tan” colourway also pictured below).
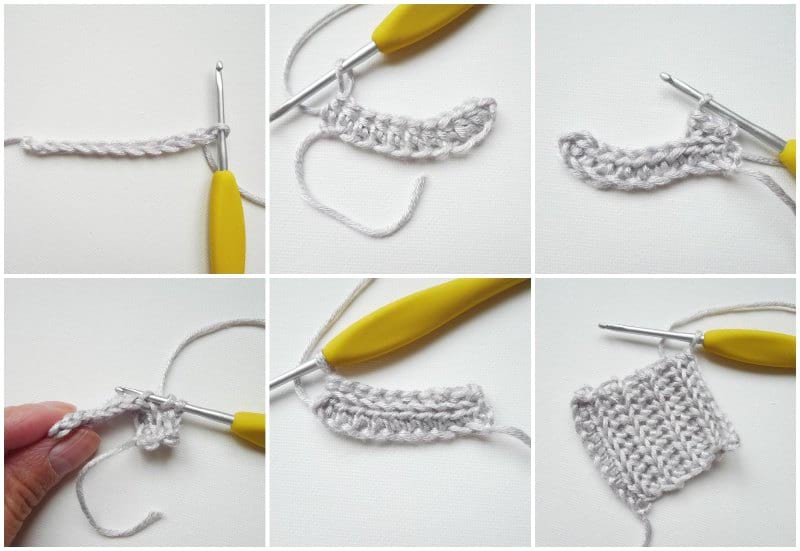
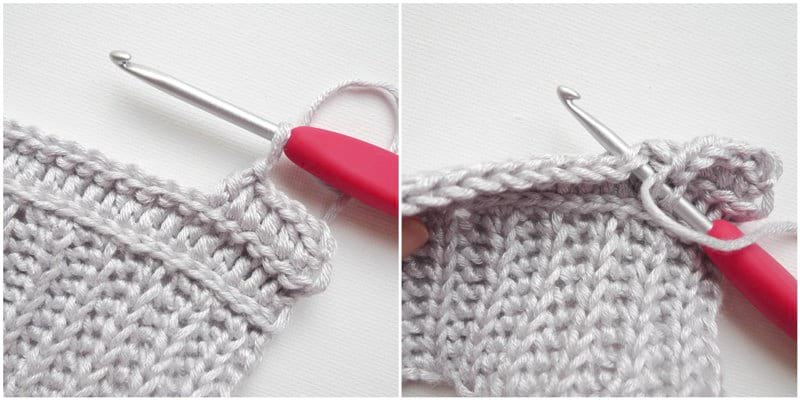
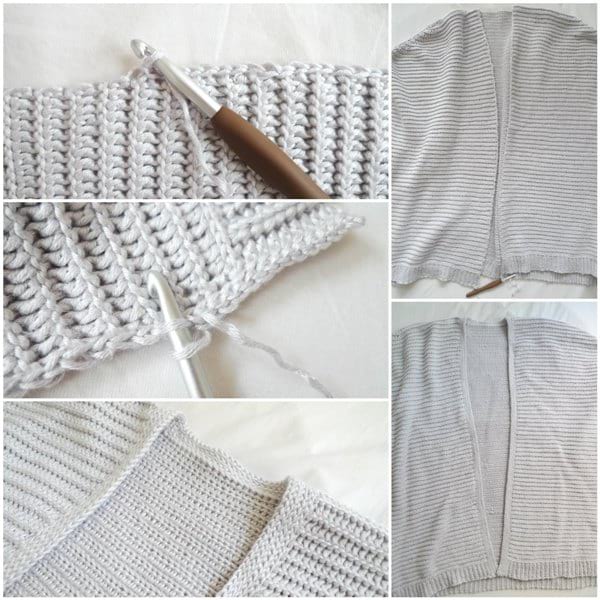
To begin, I started crocheting the ribbing for the bottom panels using my 2.75 mm hook. I used a new ribbing technique that I have not used before in previous designs – it involves a stitch called the “Half double crochet slip stitch back loop only” (HDC-SL-BLO). I started off by chaining 11 stitches and working 10 half double crochets for the first row. For all subsequent rows, you work the HDC-SL-BLO. You yarn over and insert your crochet hook into the back loop only of the next stitch (as if you were going to work a regular half double crochet). Then you yarn over and pull up a loop. Then you pull that same loop that you just created down through the bottom two loops still on the hook (you do not yarn over again). If you were working a regular half double crochet, you would yarn over and pull through all three loops on the hook. However, what differentiates this stitch is that you are pulling the loop just created and already on your hook down through the remaining two loops. You can watch my video demonstration at the end of this blog post. This stitch creates a beautiful ribbed “V” texture (resembles knitting) that is the same on both sides.
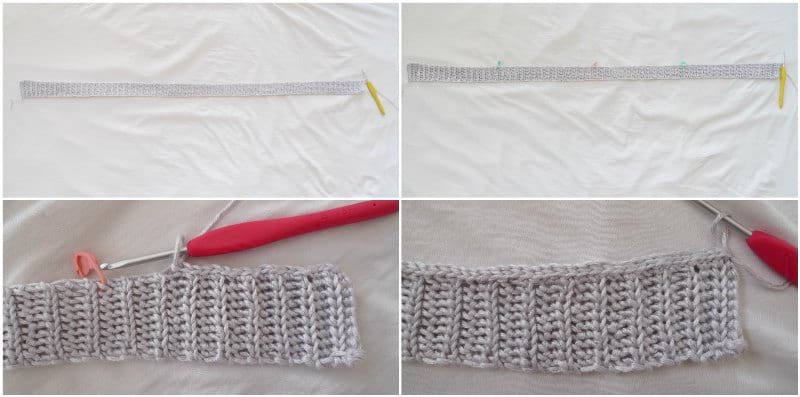
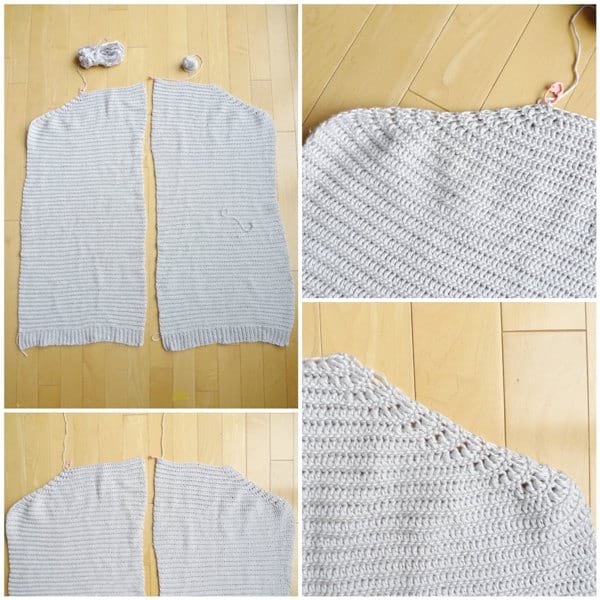
As you continue building up the length of the ribbing row by row, this will equate to the width of the front and back panels. When you have achieved your desired length (the pattern states exactly what length you should be working towards for the various sizes), it will be time to pick up stitches to begin building up the body of the panels (you do not need to cut the yarn as you will continue crocheting). You will need to pick up a certain number of slip stitches across the top of the ribbing. To make it easier, I like to divide up the ribbing into chunks by using stitch markers. For example, using 3 stitch markers, I have divided up the ribbing into 4 chunks in the picture below. If this is the front panel of the XS/S size, I know that by the end, I will need to pick up 82 stitches. That means that within each chunk, I should have 20-21 stitches (82 divided by 4 equals 20.5). If this is too tricky, you can also crochet the body of the panel separately and whip stitch the ribbing onto the bottom of the panel. However, this technique of picking up slip stitches across makes it more seamless and clean. Once you have finished working one row of slip stitches across, work another row of slip stitches back the other way so that you can start from the right side again (the V’s of the ribbing should be pointing upwards when you have reached this point – this is the right side of the panel).
Now you will begin the two row repeat for the rest of the body of the panel. Work regular half double crochets across (right side).
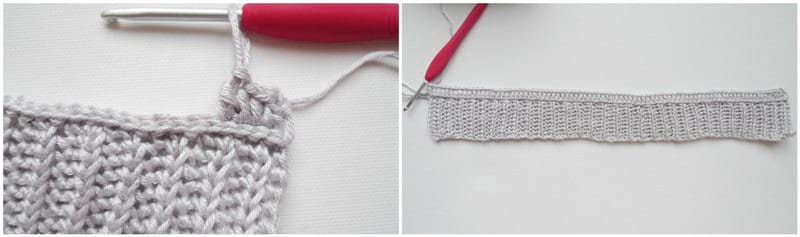
On the subsequent row (wrong side), work slip stitches in the back loop only. Slip stitches can become quite tight, so I consciously crochet looser to prevent these stitches from becoming too tight and dense.
Next, work half double crochets across once again. Since we left the front loops untouched from the previous row, you will see these beautiful ridges appearing. To me, they resemble garter bumps and are like the garter ridges of the knitted Dawn Cape!
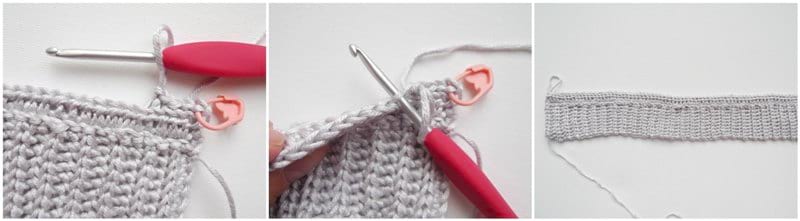
Once you have built up the body of the panel (in this case, the back panel), it is time to work the decrease rows. For the back panel, each decrease row decreases the stitch count by 8 stitches, with 4 decreases on each end. The half double crochet decreases are stacked closely together to form this slight ruching and decorative design. This ruching will be visible at the arm openings, and these decreases help to provide a tapering so that you do not get a sharp right angle as the panels bend downwards towards the arm. The decrease rows are only worked during the half double crochet rows (right side), and never the slip stitch rows (wrong side).

To mirror the decreases of the back panel, the left and right front panels will have decreases on their respective sides. When following the pattern, be sure to differentiate between the decrease rows of the Left Front Panel and the Right Front Panel!
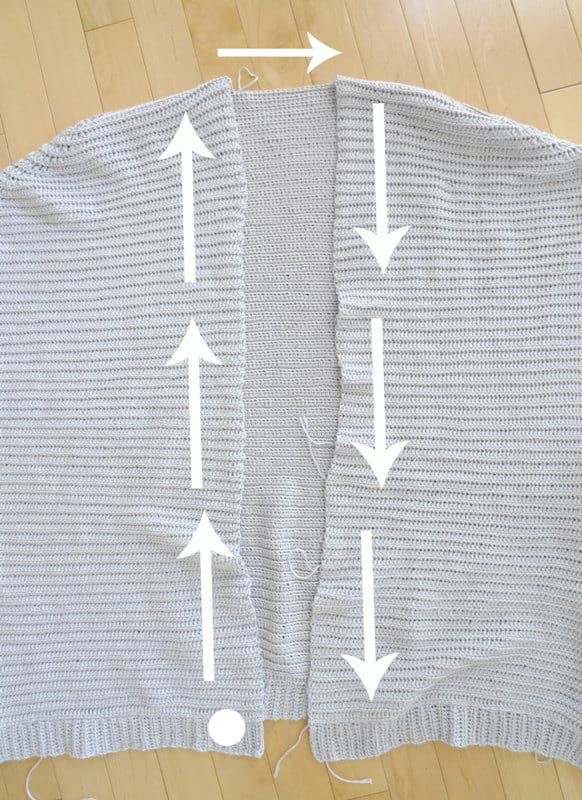
Next, it is assembly time! Place the front panels onto the back panel, ensuring that the decreases line up accordingly (there should be an 18 stitch gap in the middle of the back panel). Whip stitch all the areas as indicated by the white lines: you will whip stitch the top of the front panels to the back panel (the flat parts at the top and the slanted decrease section). You will also be seaming the sides of the panels together, leaving a space for the arm holes.
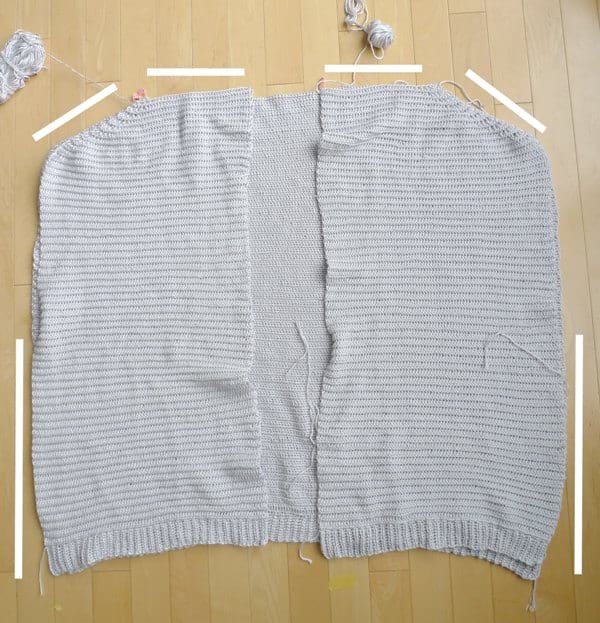
Whenever I whip stitch pieces together, I like to seam the wrong sides together so that the seam is less visible on the right side. I recommend using stitch markers to hold the panels together during the seaming process, and you can use the slip stitch ridges as a reference point when seaming the panels together to ensure that they are lining up correctly.
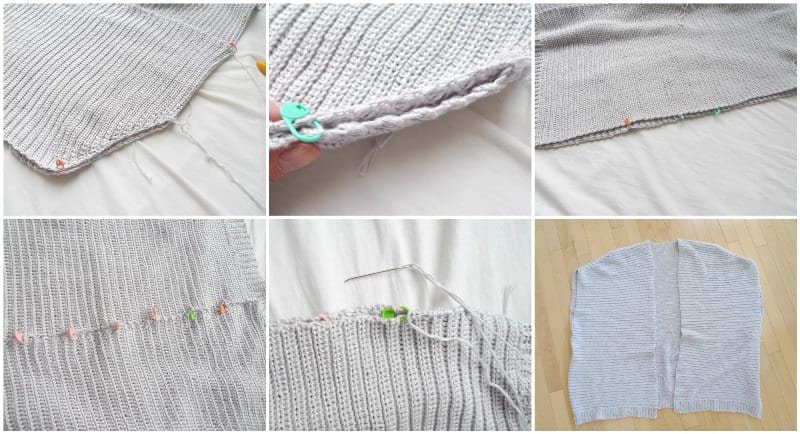
Once the seaming has been completed, it is time to work on the collar ribbing! The collar is comprised of solely slip stitches, so I used a larger crochet hook (6 mm) to prevent the stitches from getting too tight. I picked up slip stitches going up the first front panel, across the back panel, and down the other front panel. I tried to pick up two slip stitches for every two rows (1 hdc row and 1 slip stitch row).
To build up the ribbing, I worked slip stitches in the front loops only, rows after row. 7 rows later, I was happy with the width of my ribbing!
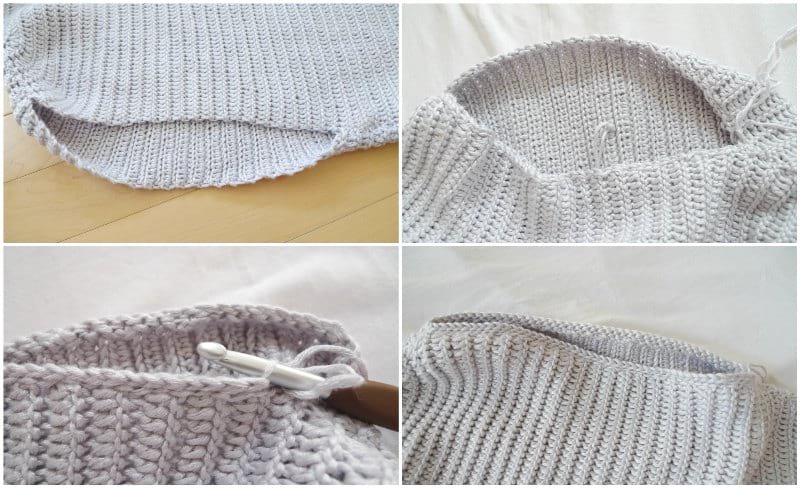
Lastly, it was time for the arm opening edging! Once again, I picked up slip stitches around the arm hole using my 6 mm hook. Since I worked in continuous rounds, I worked slip stitches in the back loops only for this edging.
I was incredibly excited to try on my newly crocheted Dusk Cape after adding all the ribbed edgings! Look how gorgeously the Dusk Cape drapes and how clean, modern, and delicate the stitches look! I hope you enjoyed reading about how I constructed and crocheted this garment, and you can find the formal, written-out pattern with all the numbers HERE! The convenient Lion Brand Yarn kit containing all the Truboo yarn required can be found HERE as well. Thank you for following along with this step-by-step tutorial!
If you would like a VIDEO DEMONSTRATION of the stitches used in the Dusk Cape, please watch this video below. I demonstrate how to crochet: the HDC-SL-BLO, slip stitches in the back loop only, half double crochets, and the half double crochet decrease!