When we first saw “Despicable Me” back in July 2010, we absolutely fell in love with the movie. We didn’t really know what to expect going in to see it, but we were delightfully surprised with how heart-warming and thoughtful the movie turned out to be. We found ourselves laughing out loud all throughout, usually because of the antics of the hilarious minions.
Fast forward more than a year later, some good friends asked if I could crochet a minion for them. I took on the challenge as it was somewhat of a departure for me: I was so used to making my teddy bears and bunnies, and the only other major “character” that I had previously made was Link.
Ryan and I searched on-line for pictures and patterns of crocheted minions and found numerous ones as they are indeed very popular (see Wolfdreamer’s version here and Sweet N’ Cute Creation’s version here). It’s wonderful to see that everyone has a different take on these little guys. We decided to make our own pattern and to make him quite large so that we could include plenty of detail.
Warning: this is a very picture-heavy post, but bear with me if you want to see the detailed step-by-step making of one of Gru’s minions!
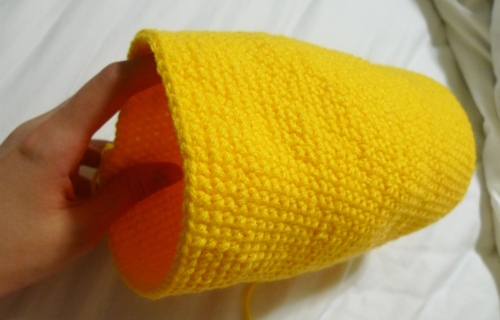
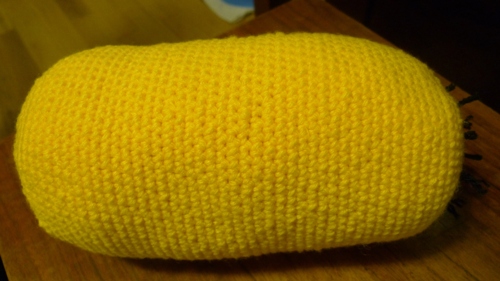
I started off by crocheting his head/body. It looked like I was crocheting a giant yellow pill!
Before closing him up, we added hair by cutting strands of black yarn and tying knots on one end. We threaded the yarn from underneath so the ends stuck out. We trimmed the strands to our desired length, and it felt like we were giving him a hair cut!
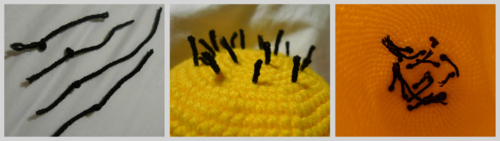
To prevent the ends from fraying and to ensure that each hair was more defined, we rubbed each strand with white glue.

Next we stuffed him and closed up his body.
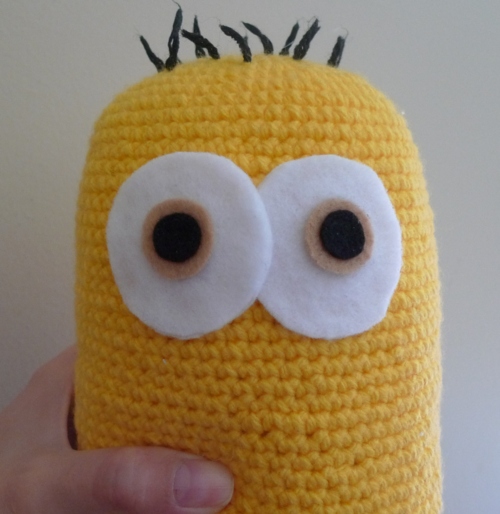
Ryan cut out circular pieces of white, brown and black felt for the eyes…
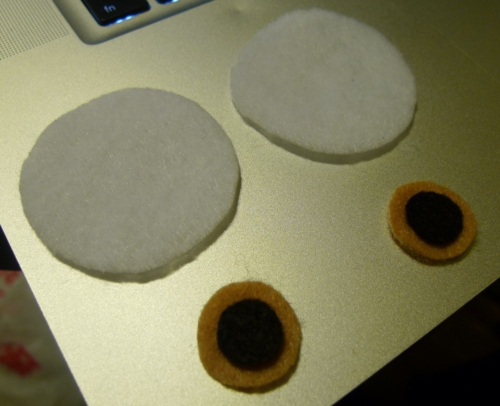
And glued them to his face!
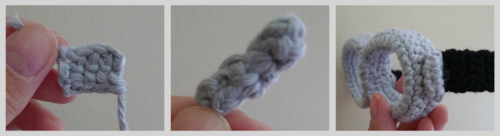
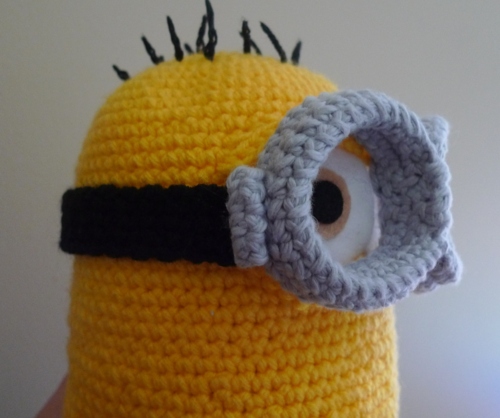
Ryan noticed that in many pictures, the minion’s upper and lower eyelids are visible under the goggles they wear. So, we crocheted some narrow strips to add above and below the eyes!
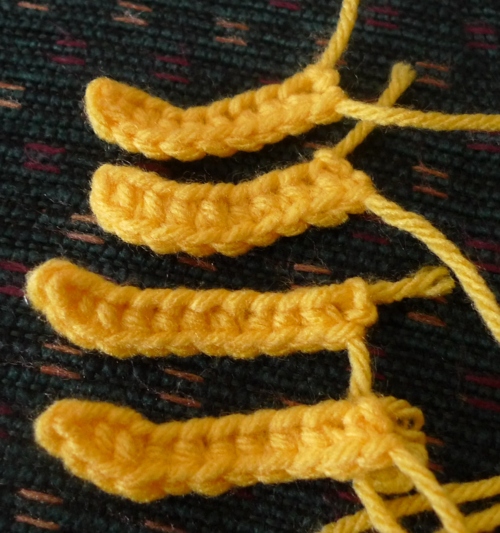
I really like this series of pictures that shows us adding the eyelids, one by one!
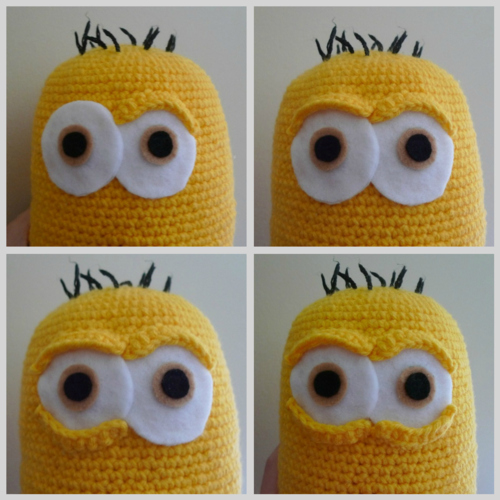
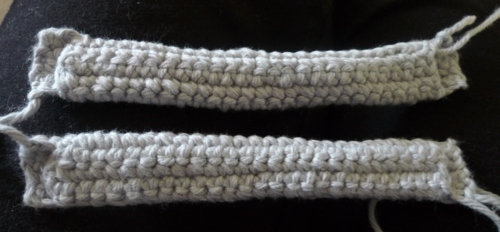
Next, we worked on the goggles. This turned out to be quite the ordeal as we tried to figure out how to make them look realistic and more three-dimensional. It took us a while to get the right size, but in the end we figured it out. I crocheted a long strip (longer on the bottom and shorter on the top) and sewed the ends together lengthwise to form a tube.
We were left with these tubes with flat ends on either side:
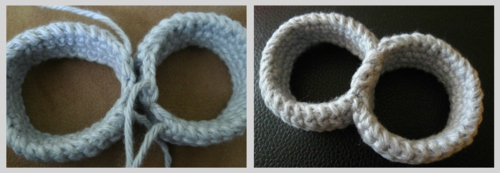
We bent the tubes to form a circle by sewing the flat ends together.

Then, we sewed the two circles together, with the junction being where the flat ends were sewn together. This ensured that the thickness of the goggles was consistent throughout (if we had just sewn two regular circles together, the junction would have been twice the thickness).
Then I attached a long black crocheted strap..
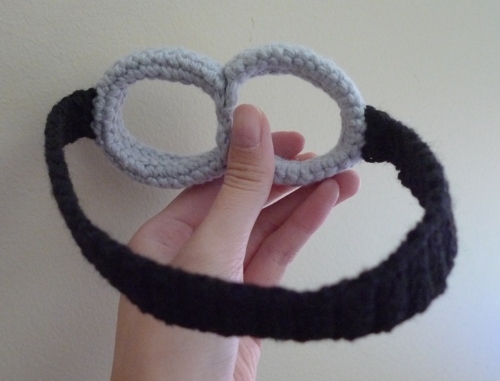
And added some side detailing to the goggles as well!
His goggles are looking pretty intricate!
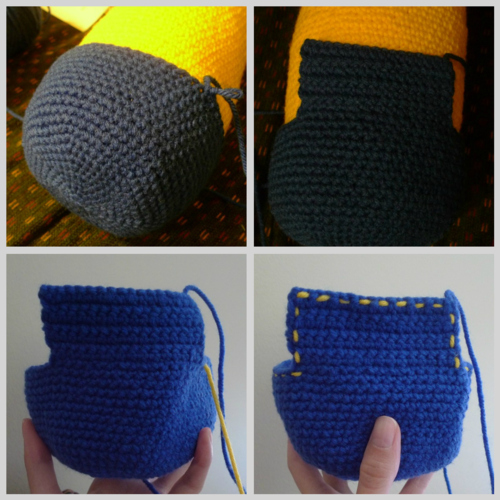
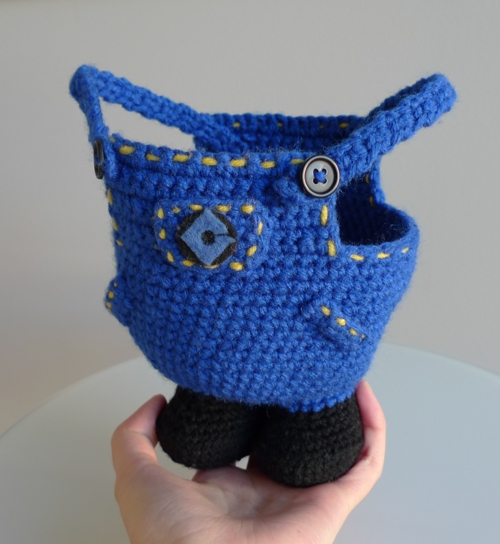
Next I worked on his blue overalls. I started off as though I was crocheting a blue body (same pattern when making yellow body/head). Then I started working in rows (vs. in a circle) to create the front and back parts of the overalls. Ryan used yellow yarn to add stitching to the edges 🙂
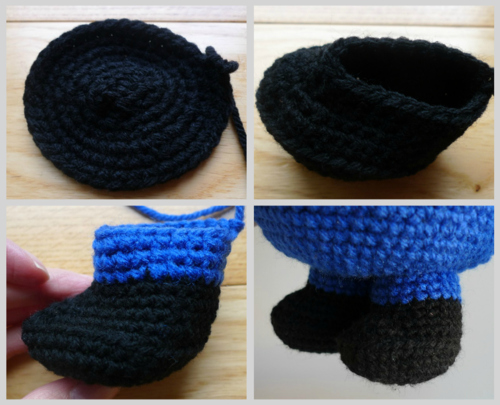
Next came the minion’s boots! I decreased unevenly around the oval to create the front foot part and then switched to blue yarn for his pant legs.
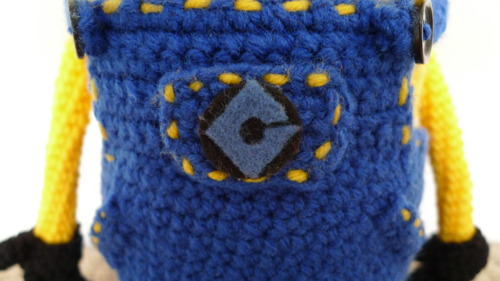
We added some more detailing to his overalls by adding front and side pockets, also embroidering them with yellow yarn.
He’s looking good!
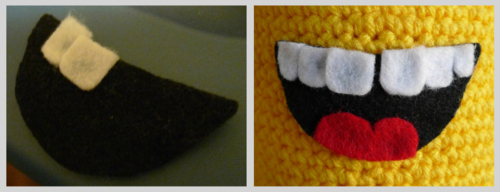
We decided to make this little guy really expressive with a wide open smile! Ryan cut out the mouth, teeth and tongue using black, white and red felt.
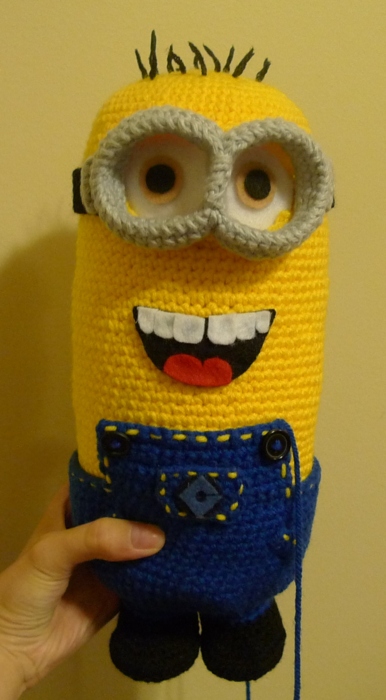
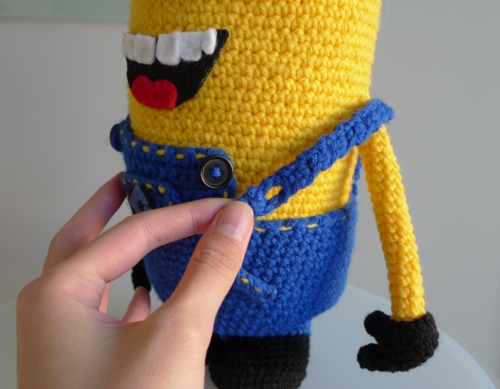
He looks pretty happy even though he’s still missing limbs! We also added little black buttons to the front of the overalls for the straps to loop through.
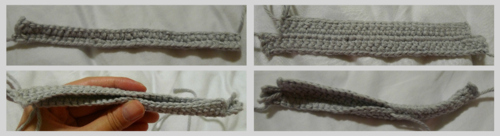
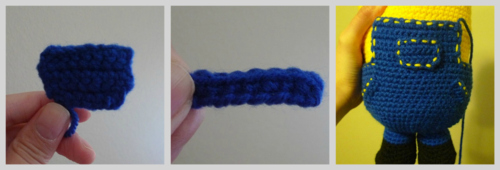
Here we have the skinny blue overall straps with a hole on the end for the button!

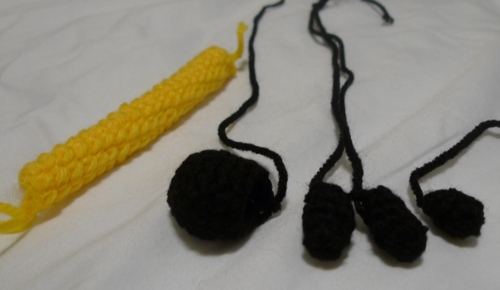
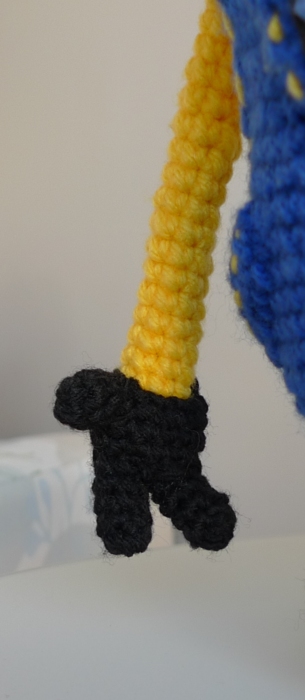
The last part to make were the arms and gloves. I crocheted a skinny yellow tube for the arm, a black ball for the glove base and three black tubes for the fingers. Betcha didn’t know that minions only had three fingers!
Ryan did a fantastic job with the gloves as he positioned and sewed each finger onto the glove base. It looks like he’s ready to grab something or do some of Gru’s bidding!
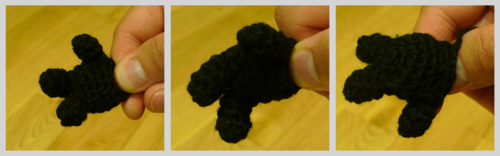
We then inserted the yellow arm into the glove.
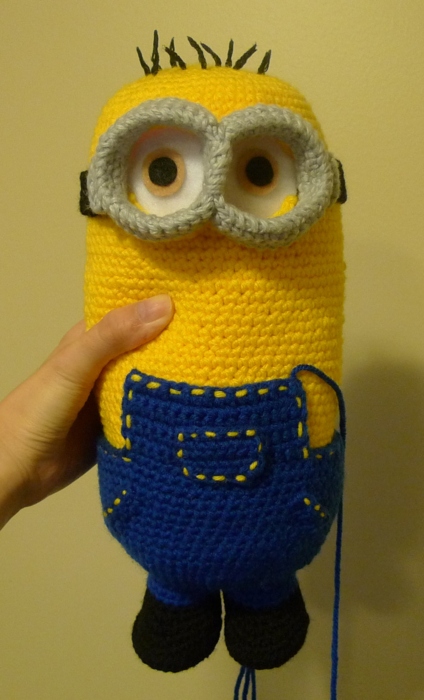
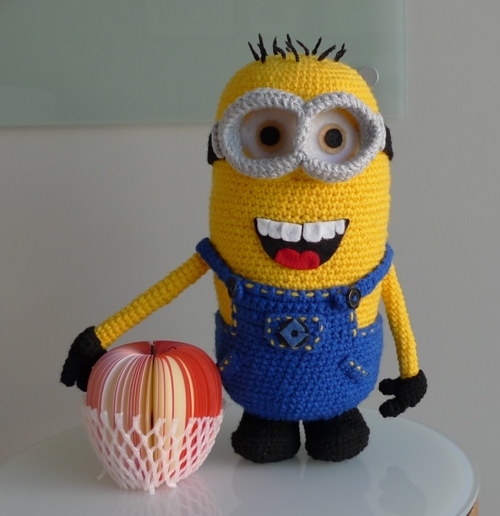
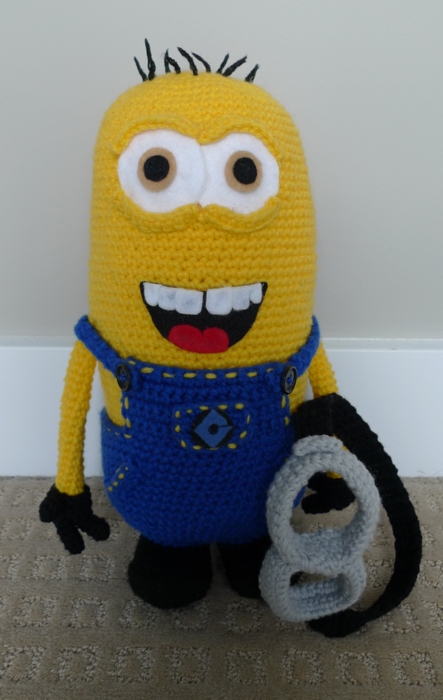
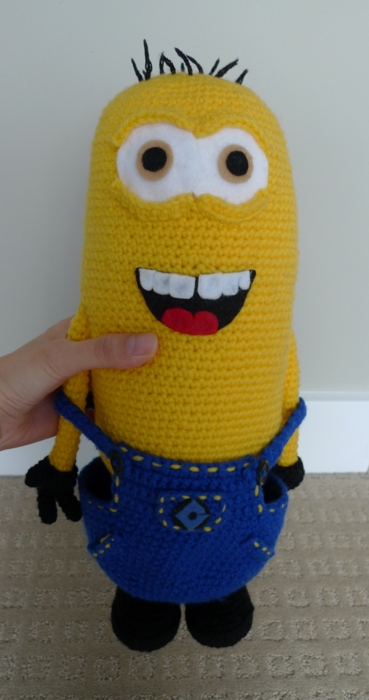
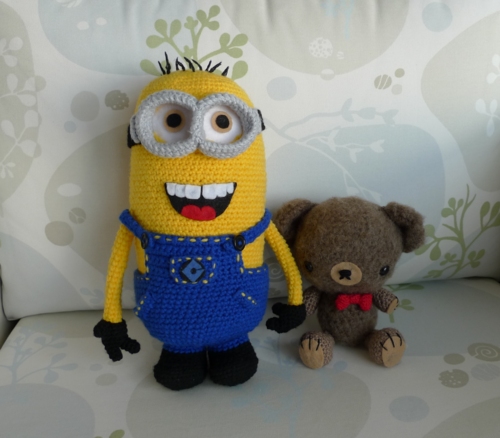
Finally, after hours upon hours of hard work, the finished product!
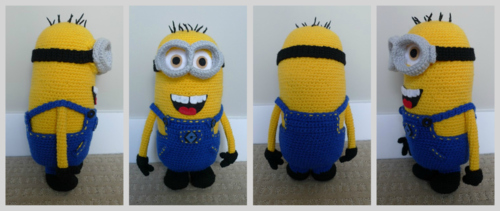
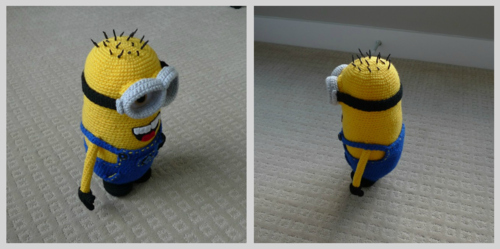
Here you can see what he looks like from either side and from the back. We positioned his arms higher so that the straps of the overalls curved upwards and then downwards.
We were so happy with how he turned out!
What’s amazing is that he can also stand by himself! His boots have a wide enough base to give him support 🙂 Wouldn’t you be surprised if you walked into a room and were greeted by this minion?
And, of course, his goggles can come off! This is probably what minions look like after a hard day’s work, for example after stealing the Statue of Liberty (the small one from Las Vegas), finding unicorns for little girls, you know…the usual 😉
His overalls can be removed too!
Here is Minion with all his removable parts!

Don’t his overalls look awesome? Ryan did such a great job adding all the detail!
I love that his straps are functional too…
Here is Gru’s logo: a blue “G” ontop of a black circle.
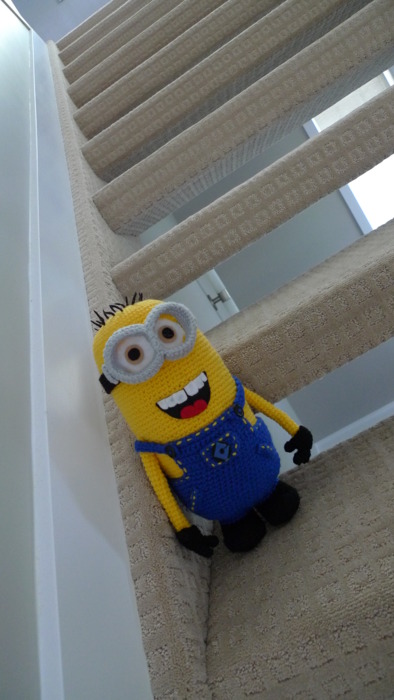
Here is Minion displayed in my room…

Up till this point, Valentine Teddy was the biggest amigurumi I ever made. However, as you can see, Minion is much bigger!
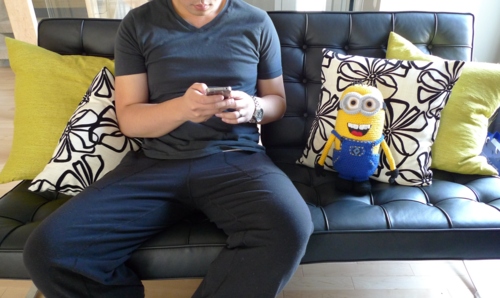
Before we had to give him away, we took some quick photos with him. Here he is chilling next to Ryan. Minions make great company 😀
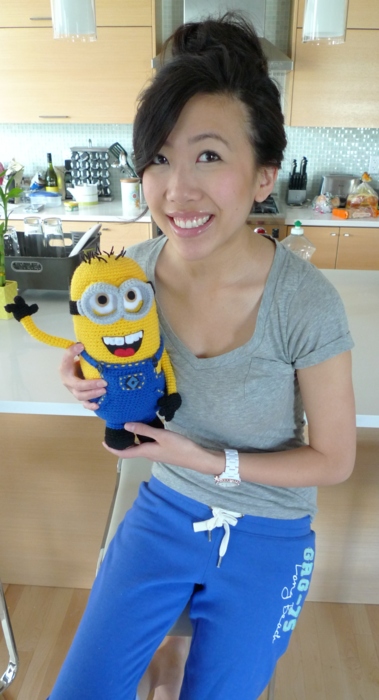
I was sad to see him go, so I had to snap a picture with him! P.S. I did not intentionally try to match with Minion…it just so happened I chose to wear grey and blue that day 🙂
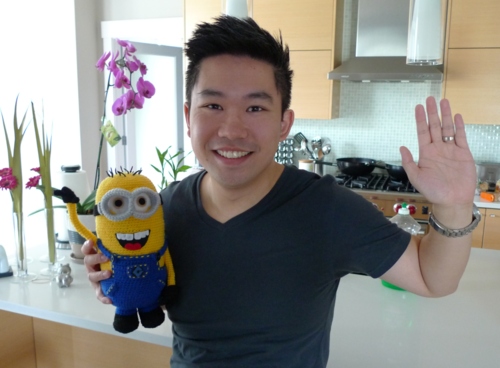
Haha, love how Ryan is mimicking Minion’s friendly wave 😀
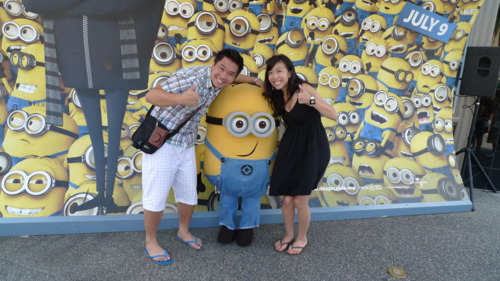
It’s awesome that there are so many different minions, each with a different personality and different facial expressions. You can totally customize your own minions and make them personalized! See all the different minions depicted in this picture below? On our honeymoon, Ryan and I went to Disney World and Universal Studios. As soon as we saw this minion, we made a beeline to take a picture with him!
Thanks for journeying with us to see how we made this minion! It was definitely a challenge trying to figure out how to make each part, but Ryan and I had a lot of fun working on this together. He is the biggest and one of the most intricate projects we’ve worked on, and we are so proud of how he turned out. I tried to take as many photos as I could and be diligent in writing out the pattern I made so I could share it with you all. The detailed pattern can be found HERE. Let me know what you think by leaving a comment below! Thanks 🙂