***You can purchase an INEXPENSIVE AD-FREE PDF of this pattern on Etsy HERE and on LoveCrafts HERE! This beautifully formatted PDF includes the step-by-step pictures and is a total of 8 pages including the cover page. The Lion Brand Yarn kit HERE includes the pattern and all the Coboo yarn needed to make this cardigan (4 different colour options available)!
- The free crochet pattern with exact written numbers and row/round counts can be found HERE.
- Join our Rosewood Cardigan Crochet-Along on Facebook HERE!
- Add this design to your Ravelry queue HERE!
Ever since the release of my knitted Uptown Cardigan, I have received countless requests to design a crochet version! Thankfully I was already working on a crochet version before I even officially released the Uptown Cardigan, and I am excited to show you how I tried to translate the same beautiful drape, slouch and relaxed fit into crochet.
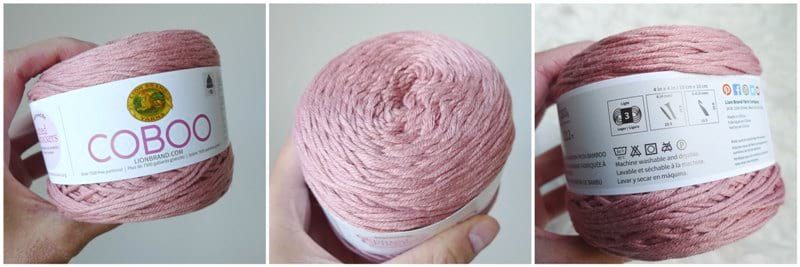
I used the same lovely Coboo yarn that is a lightweight level 3 yarn made of 50% cotton and 50% rayon from bamboo. As soon as I saw this “Mauve” colourway, I immediately fell in love and knew that I had to make a wearable design with it. This dusty pink is one of the most beautiful shades of pink I’ve seen, and it can definitely be worn year-round!
For this design, it is important to know the difference between the front and back loops of a stitch. When you look at the top of a stitch, it looks like a V composed of two loops. The front loops (in white) are the ones closest to you when you are crocheting. The back loops (in red) are the ones farthest away from you when you are crocheting.
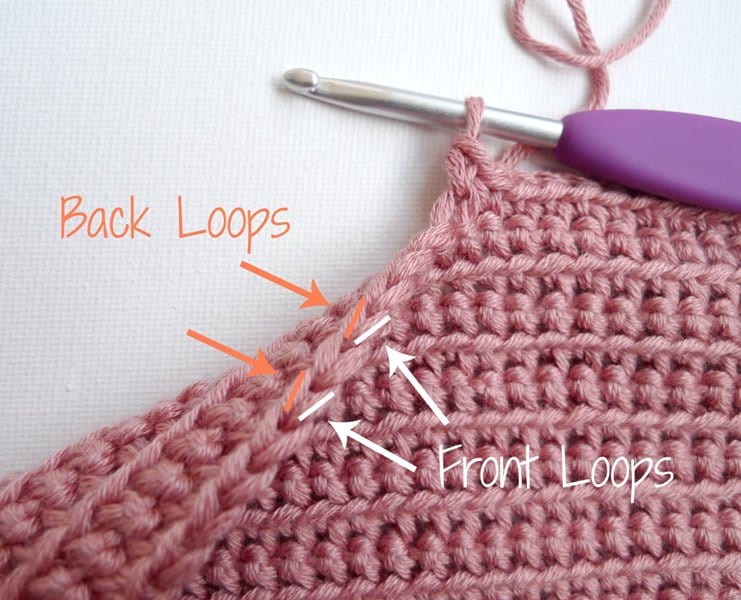
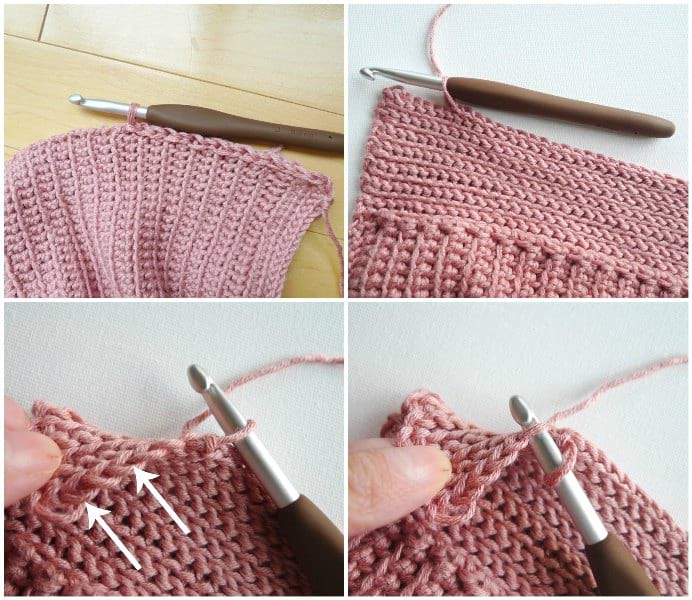
The majority of the Rosewood Cardigan is worked by crocheting in the front loops only. By working in the front loops only, this leaves the back loops untouched, which creates delicate horizontal lines. This also makes the garment less dense since single crochets are worked in only one loop rather than both loops.
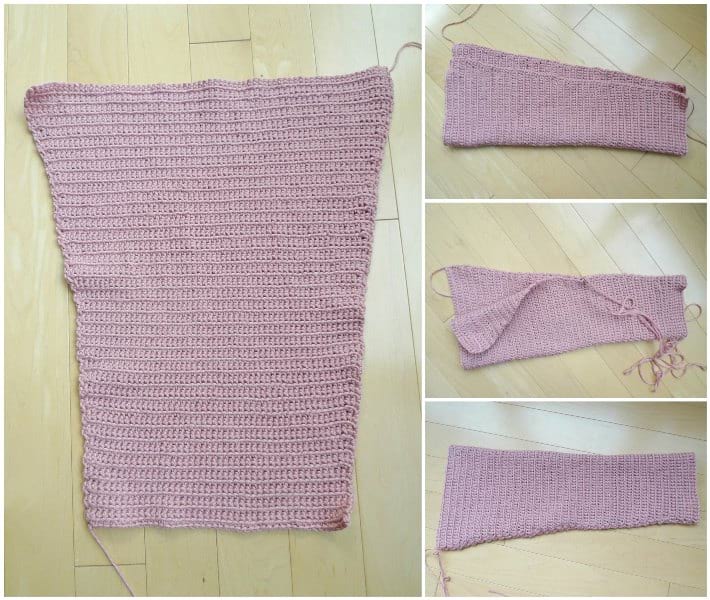
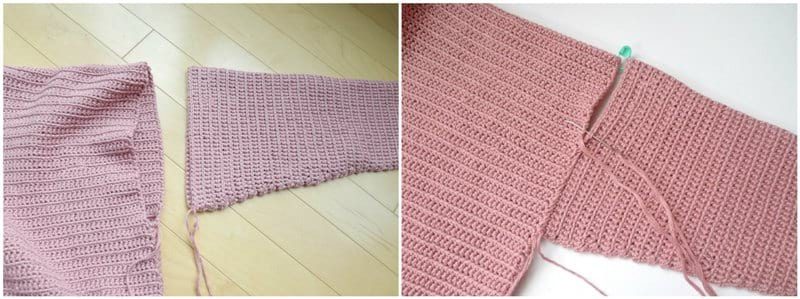
The back and front panels are simple rectangles crocheted by working single crochets in the front loops only. This is the perfect project to work on while watching tv, commuting, or traveling on planes since very little focus is required. You do not need to remember stitch counts and you can pick back up right where you left off!
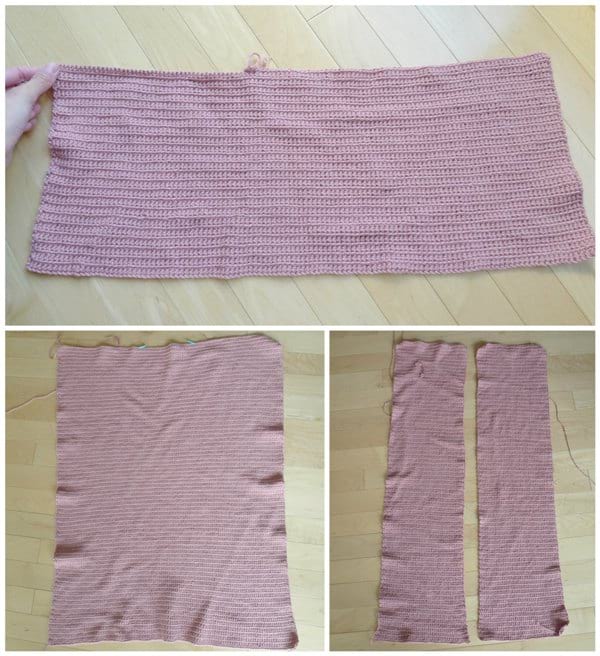
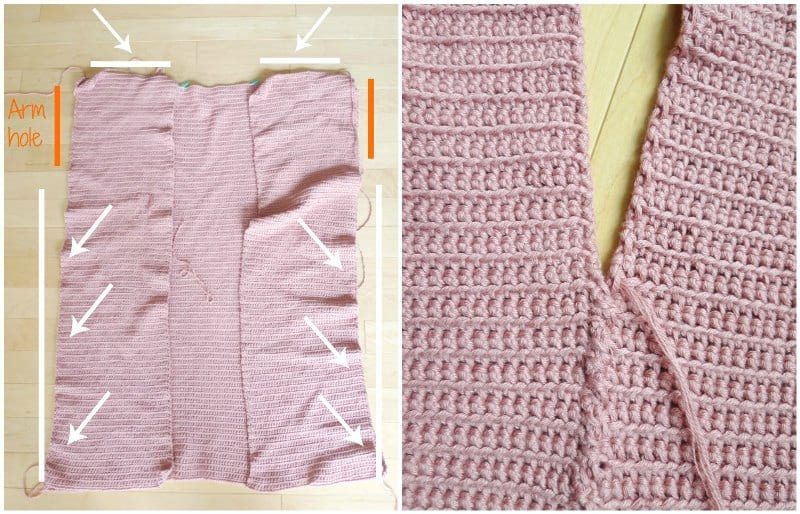
Seam the tops and sides of the front panels to the back panels using the whip stitch, being careful to leave a space for the arm holes on either side. When whip stitching pieces together, I like to seam the wrong sides together and then flip them inside-out at the end as this results in a cleaner seam.
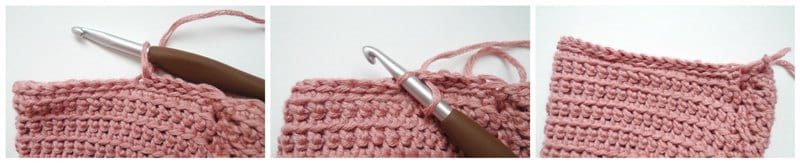
To add a delicate bottom edging and help cinch it in a bit, flip your piece upside down and ensure your front panels are facing you. Starting from the red dot, pick up slip stitches around using a 3.5 mm hook (smaller hook than the rest of the garment).
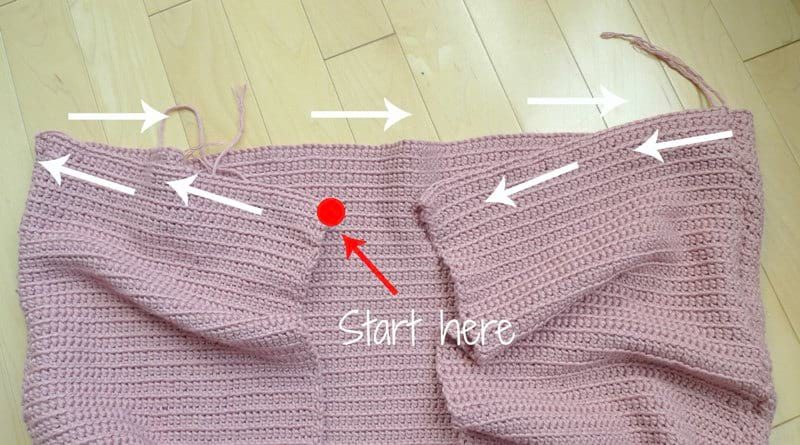
For the second row, you will work slip stitches in the back loops only. Don’t these two extra rows give such a delicate finish to the bottom?
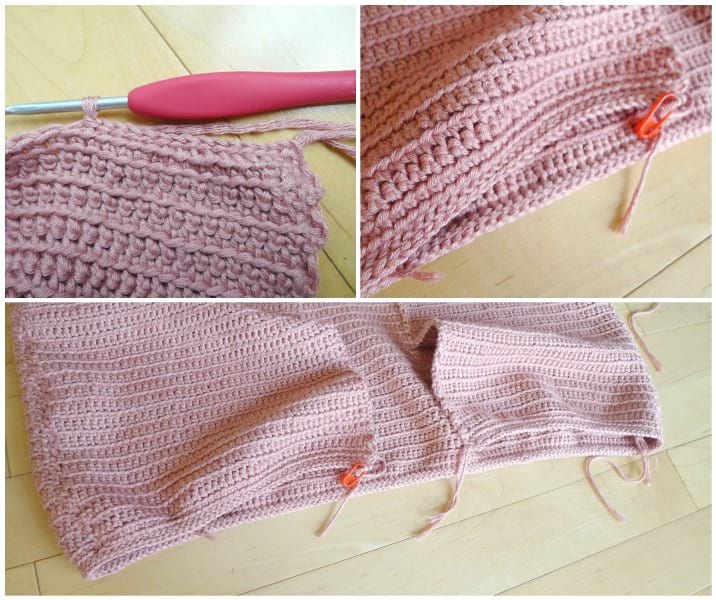
Next it is time to crochet the sleeves! This is the only part of the garment that involves some increases. During an increase row, the increases are worked in the second stitch and second to last stitches of the row, resulting in an increase of two stitches per increase row. Once the sleeve is complete, fold it in half lengthwise and whip stitch along the edge.
Next, it is time to attach the sleeve to the arm hole by whip stitching these pieces together.
Watch this video below to see me demonstrating: how to single crochet in the front loops only (FLO), how to whip stitch the sleeve edges together, and how to whip stitch the sleeve to the arm hole!
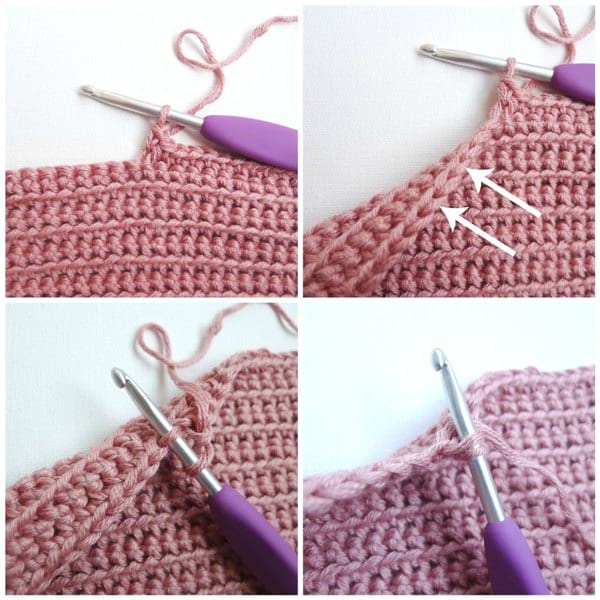
To add a delicate sleeve edging, insert your crochet hook into both loops of a stitch near the seam. Add the slip knot and pull through. Yarn over and chain 1. Insert your hook into both loops of the next stitch, yarn over, and pull through the work and the loop on the hook, creating a slip stitch. Keep repeating this process to pick up slip stitches around the entire opening.
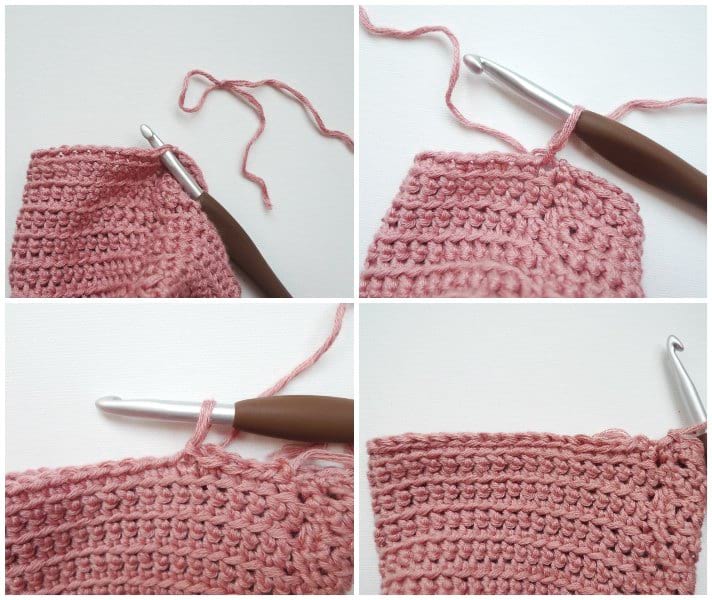
For the second round, work slip stitches in the back loops only.
Next, it is time to add a beautiful collar to your cardigan! Starting at the bottom left corner as indicated by the red circle in the picture below, begin picking up slip stitches along the length of the front panel, across the back panel, and down the length of the other front panel. The number of stitches you pick up should approximately equal: # of front panel rows + 31 + # of front panel rows.
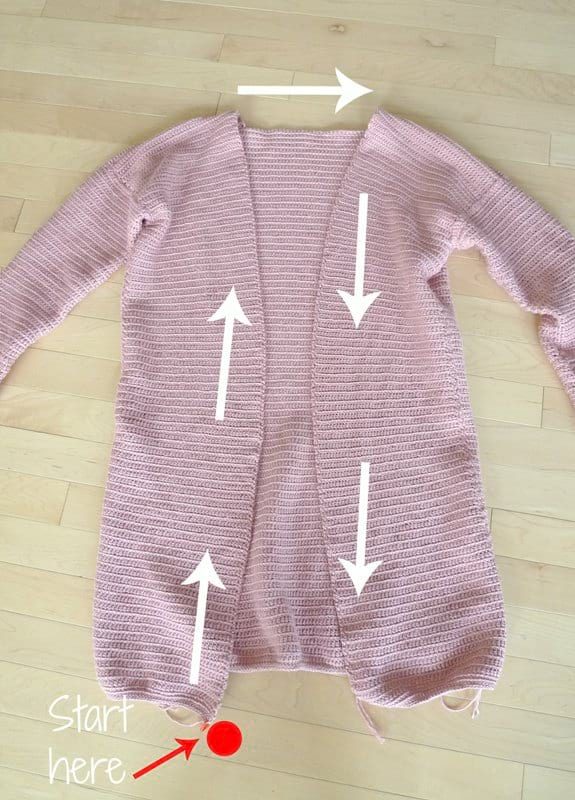
Each subsequent row of the collar is worked by crocheting slip stitches in the front loops only. This gives a beautiful texture that looks almost knit. You can increase the width of your collar by adding more rows as you desire. Be sure to use the larger 6 mm crochet hook and to work loosely so that your slip stitches do not get too tight! I played around with different stitches and hook sizes before coming up with this collar that I absolutely love.
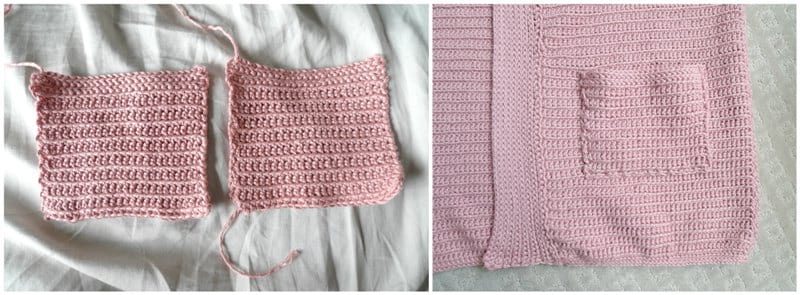
I adore cardigans with pockets as there is always somewhere comfy and cozy to place your hands! The pockets are crocheted by working single crochets in the front loops only and then slip stitches in the front loops only towards the top. I used the running stitch to attach the sides and bottom of the pockets to my front panels.
Here is my finished Rosewood Cardigan! As you can see, the simple stitches look very classic and elegant in this gorgeous design. Coboo yarn drapes beautifully, and the collar and delicate edges add such a sophisticated touch. Click HERE to get the free crochet pattern with all the stitch and row counts, as well as sizing from small – 5XL!