***You can purchase an INEXPENSIVE AD-FREE PDF of this pattern on Etsy HERE! This beautifully formatted PDF includes the step-by-step pictures and is a total of 6 pages including the cover page! You can also check out my Chinese New Year Zodiac Amigurumi Bundle HERE as it includes ALL my special zodiac designs to date at a discounted price!
***Note that this is the step-by-step blog post – the free pattern can be found HERE!
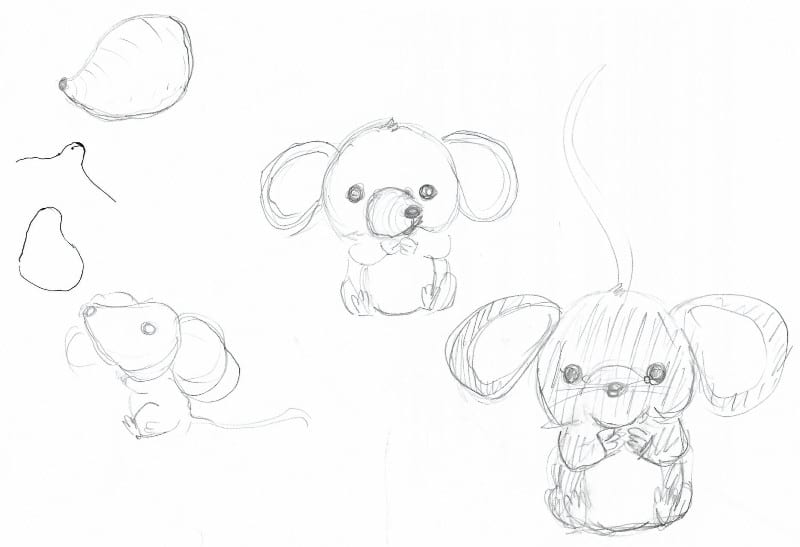
It has been our tradition to design a zodiac animal every year since 2011, and it is the Year of the Rat for 2020! As usual, Ryan sketched out a design to help guide our process – I love how Ryan included large ears, a protruding snout, and an adorable sitting position with arms tucked inwards.
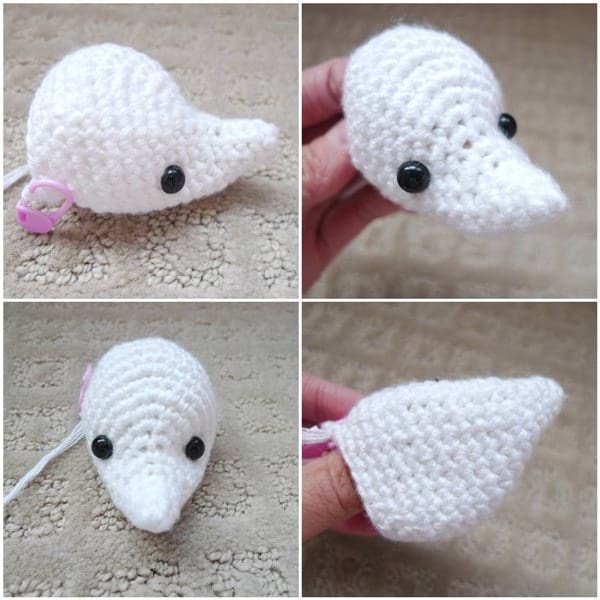
We decided to use the same Coboo yarn (lightweight level 3 yarn) that we used for 2019’s Chinese New Year Pig. We used pink and white Coboo for our rat, and I started off by attempting to shape the head, starting from the protruding nose. It took plenty of trial and error and frogging, but we finally got the shape we were looking for!
We used the same eye indentation technique that we used with the pig! We placed the safety eyes where we wanted them and before snapping in the washers, we tied a strand of white yarn around each post with knots. Then, we snapped in the washers. We had these yarn strands point downwards and exit the head as shown below.
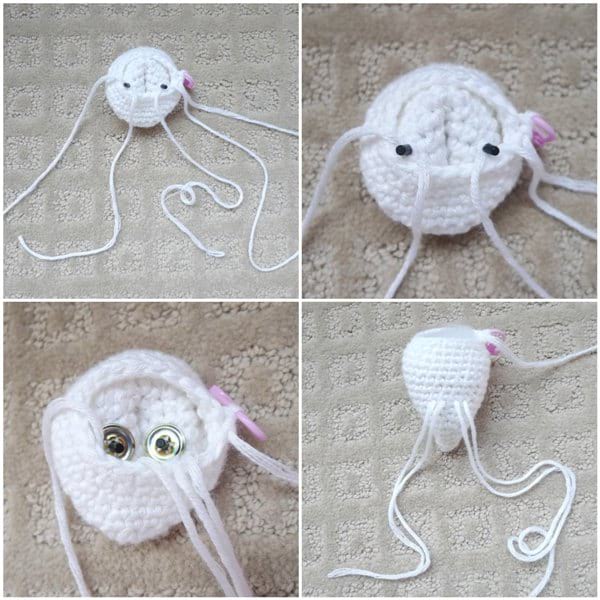
After adding some stuffing and closing up the last few rounds, the head was complete! We tied the yarn strands into tight knots at the bottom to pull the safety eyes inwards.
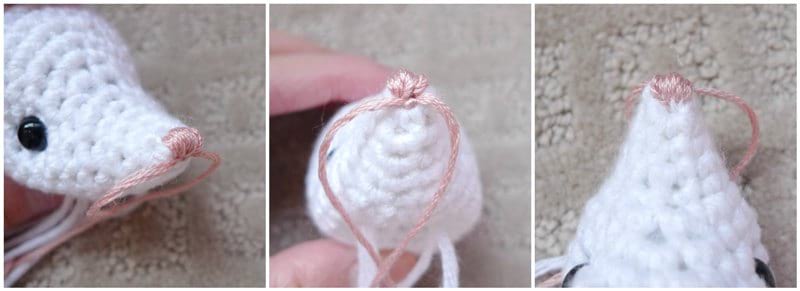
In order to add the pink nose, we used pink embroidery floss and embroidered the upper half of the magic circle as shown below.
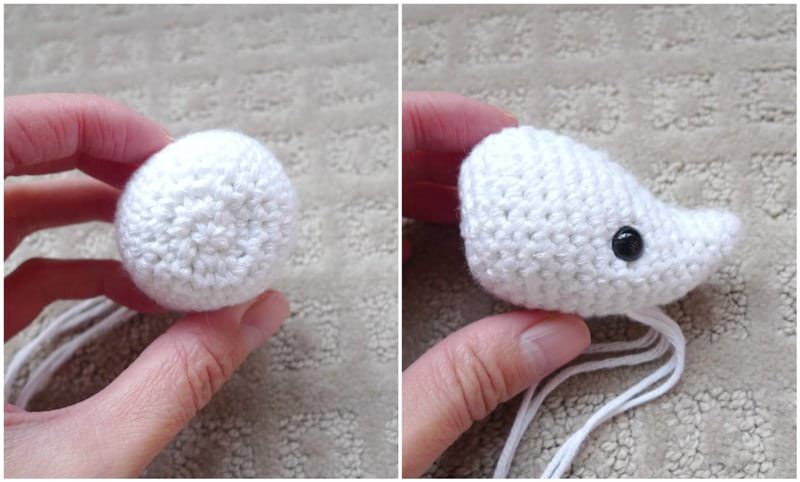
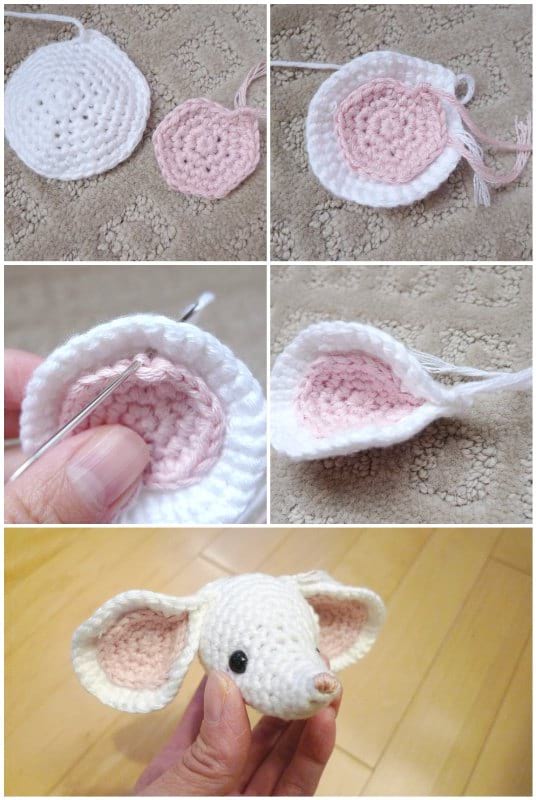
We created two circular shapes for the ear: a white outer ear and a pink inner lining. The pink lining was placed ontop of the white outer ear so that the wrong sides were touching (right sides are both on the outside). We used white yarn to attach the pieces together, picking up the pink loops behind the front and back loops of the last round of the pink piece (leaving the front and back loops untouched). We pinched the tip, seamed it shut, and then attached them to the sides of the head.
We then crocheted the body, and in order to get a flat base so that the rat could sit well, we used a special technique. Threading the yarn end through a yarn needle, we inserted the yarn needle downwards through the inside of the body and all the way through the bottom. We then inserted the needle back upwards through the bottom and back through the inside (a couple of stitches apart). Pulling the yarn tail pinches the bottom upwards so that a flat base is achieved. The round where we left the front loops untouched (Round 5) signifies where the base of the body ends and the upper body begins.

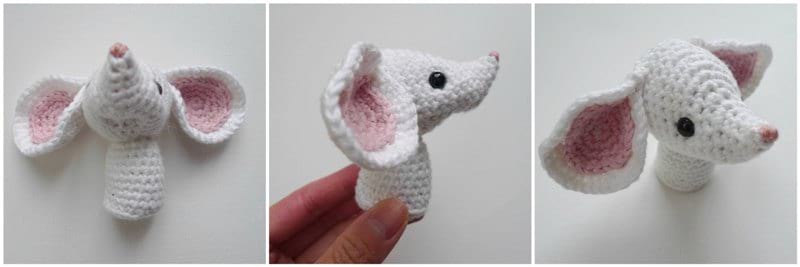
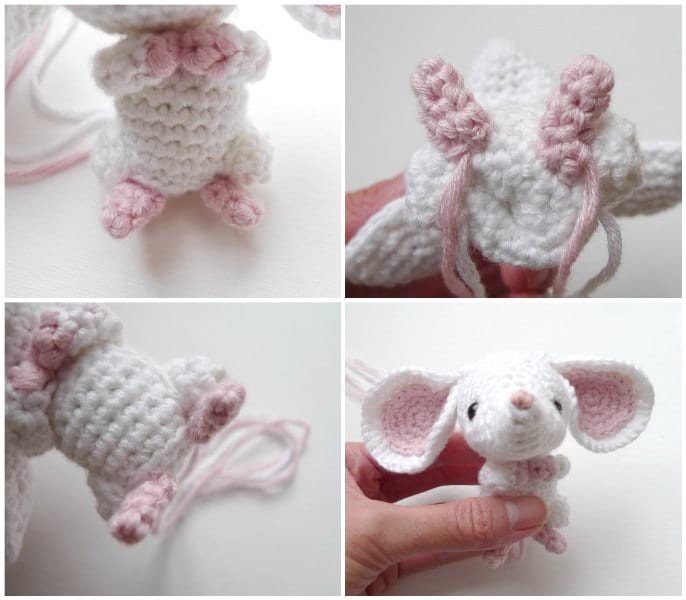
We attached the head onto the body so that the head is tilted upwards so that our rat is looking up!
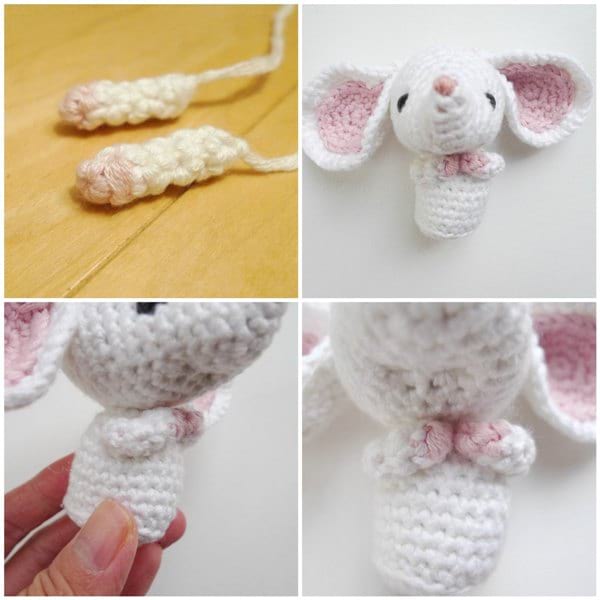
To crochet the little arms, I started off with pink yarn and then switched to white. We positioned and attached them in this particular position so that the arms are bending inwards towards the body and the pinks tips are touching each other. It gives such a sweet look!
To create the little legs/thighs, I crocheted these two shapes and then attached them onto either side of the bottom part of the body as shown below.
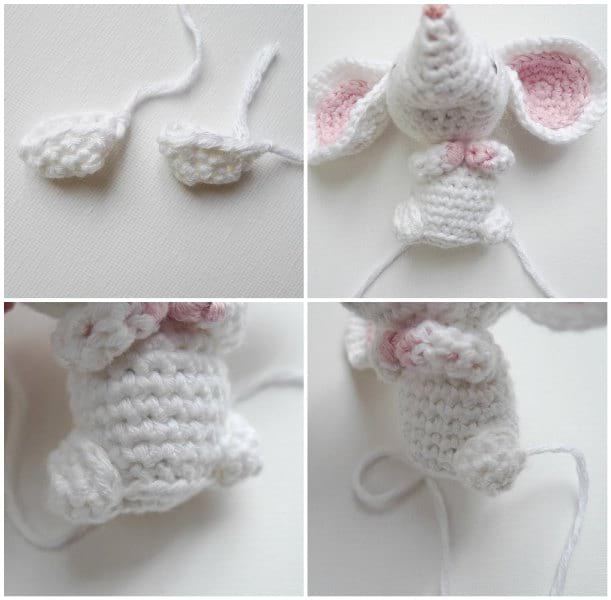
Two little pink feet were then attached to the bottom of the body, positioning them near the legs. The rat looks like he is sitting when you position the legs and feet as demonstrated!
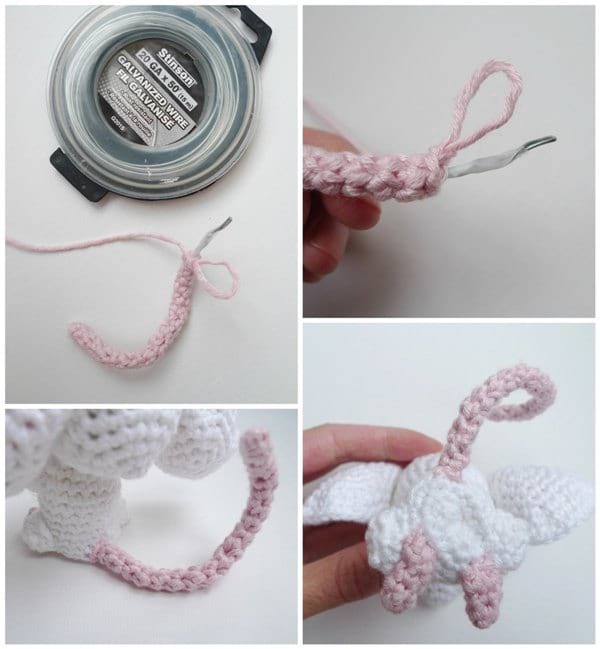
To complete the rat, I crocheted a long skinny tube using pink yarn. To help make the tail flexible and poseable so that it can curve upwards, we used some wire (note that if this amigurumi is for a small child, you can omit the wiring). Ryan bent both tips of the wire and wrapped them with tape so that there were no pointy ends. He inserted the wire into the pink tail and then inserted the protruding wire end into the bottom back of the rat. Using pink yarn, we seamed the tail into place and then hid the ends.
We love how our sweet amigurumi rat turned out! He is perfect for rat and mouse lovers, and such a great way to celebrate the Year of the Rat. Please click HERE to check out the free pattern with the exact numbers in crochet terminology! You can also check out the ad-free PDF HERE if you want an easy to save and print version! Happy crocheting, everyone!