***You can purchase an INEXPENSIVE AD-FREE PDF of this pattern on Etsy HERE and on LoveCrafts HERE! This beautifully formatted PDF includes the step-by-step pictures and is a total of 7 pages including the cover page! The free full written-out pattern for this cardigan can be found HERE! You can also purchase a kit HERE on the Lion Brand Yarn website that includes the pattern and all the Superwash Merino needed to make this cardigan!
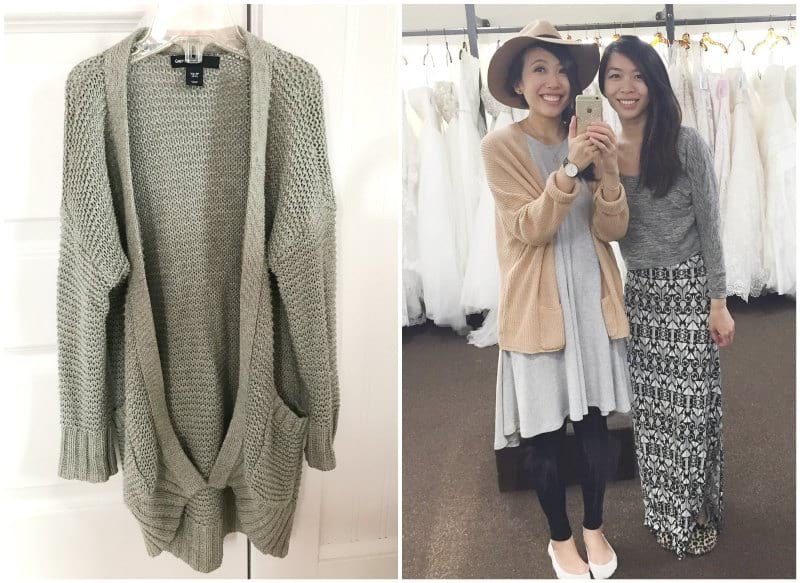
Cardigans are a staple in my wardrobe as they are versatile garments that can be worn year round! In the fall and winter, I typically wear cardigans over long tops and leggings, and in the spring and summer, I wear them over t-shirts and summer dresses during the cooler nights or indoors when the air conditioning can make it a bit chilly! One of my favourite cardigans is this lightweight pink cardigan shown below from Asia- it is relaxed and so easy to throw on (in the pic below, we were shopping for wedding dresses for my sister’s wedding!). A couple of years ago, we also bought this grey cardigan for Myla from the Gap. Whenever she wore it, people would always ask me if I made it! I was taken aback that people thought that I could actually make such a pretty cardigan as I did not have the knitting skills back then- however, I vowed that one day I would try and make some sort of cardigan using the garter stitch inspired by Myla’s cardigan! With more knitting experience under my belt, I thought it was time to try knitting my own stylish cardigan! I took inspiration from both Myla’s cardigan and my pink cardigan: I wanted a lightweight cardigan using the garter stitch with pockets, and I based the measurements on my oversized and loose pink cardigan!
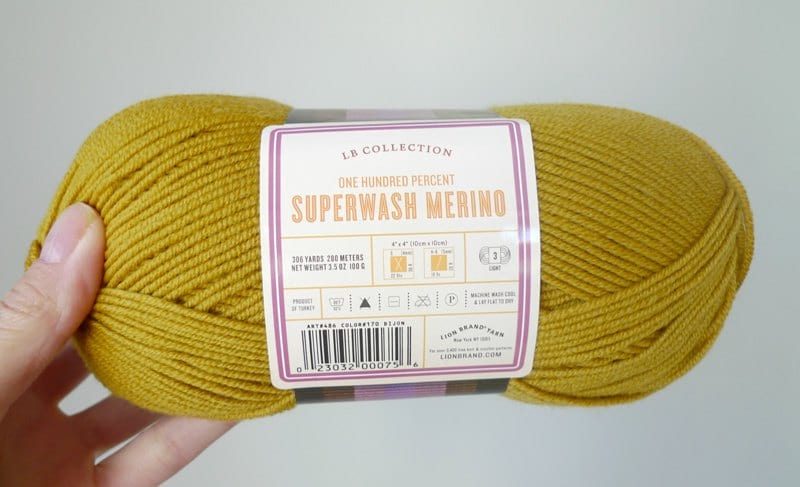
I found the perfect yarn to knit my first cardigan: Superwash Merino from the LB Collection! The LB Collection is Lion Brand’s luxury line, and they offer some beautiful natural fibres at very affordable prices. Superwash Merino is incredibly soft and comes in a vast array of stunning colours with 26 different options available! I love mustard yellow as it is such a deep, rich and Earthy colour that can match well with many of the items in my wardrobe! I chose the “Dijon” colour to work with and am so happy that I did! Superwash merino is a lightweight DK (level 3) yarn that has 306 yards and 100 grams. As you can see in the picture below, this yarn is not fuzzy (does not pill easily), is cool to the touch, and feels very soft and not itchy against the skin (there are some yarns that I would absolutely not be able to wear directly against my skin, but this yarn feels amazing). If you are allergic to wool or are looking for a non-wool yarn substiution, I would recommend Vanna’s Style found HERE which is a 100% premium acrylic yarn that is also level 3 DK lightweight (there are 18 colours available, including a beautiful similar “Mustard” colour).
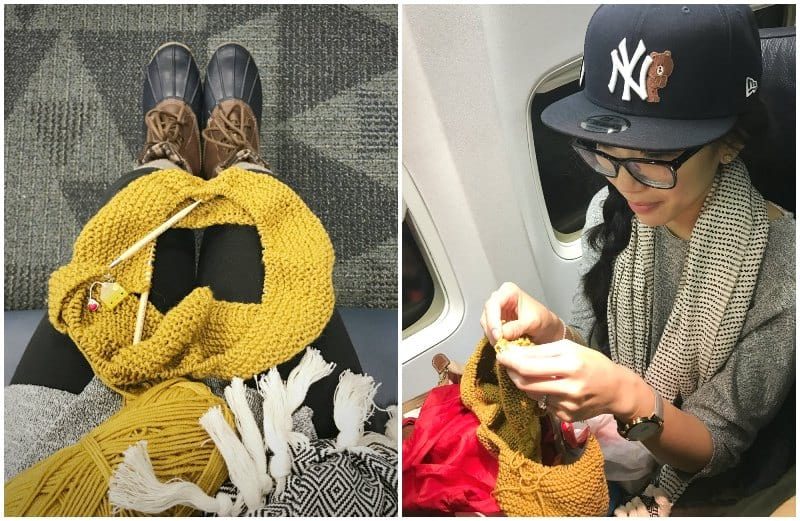
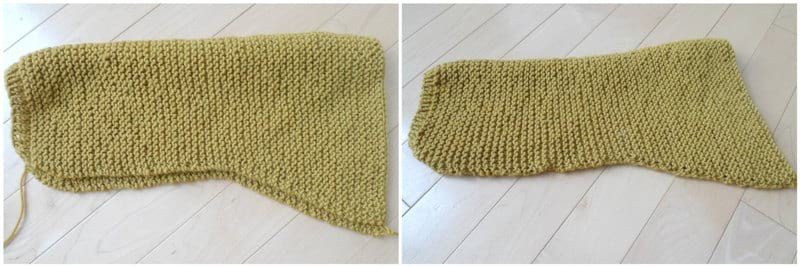
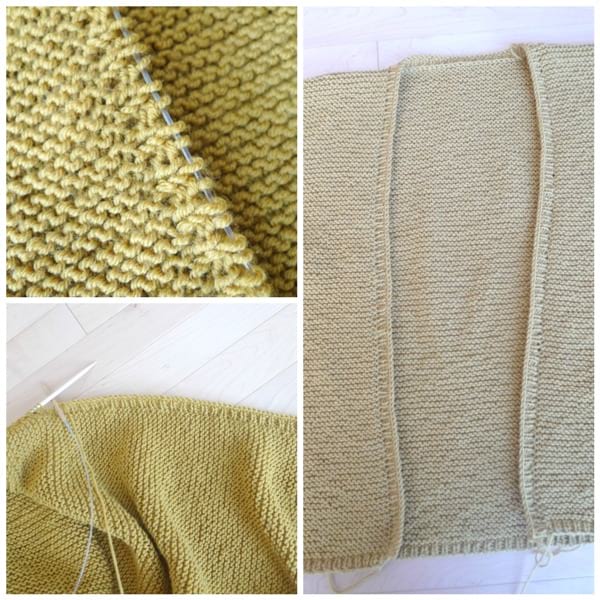
I started working on this cardigan right before embarking on our New York City trip for the Lion Brand Yarn Blogger Bash in January 2018. I wanted to bring a project that did not require too much concentration so that I could pick it up and put it down easily in the airport and on the airplane. We also planned a Sip and Stitch in New York City, and I wanted to be able to chat with people while also working away. I didn’t end up knitting at the Sip and Stitch as I wanted to move around and talk with people, but the project was ready to go if I needed! Here are some early pictures of my progress when I was working through the initial rows of the back panel. I excitedly showed the other bloggers and some of the Lion Brand yarn staff what I was working on while in New York! Since knitted projects take me a lot longer than crochet projects, I knew it would be a while before this cardigan reached completion (especially since I had the Chinese New Year Dogs and the other cold winter projects to finish up and blog about)!
I wanted the emphasis of this cardigan to be on the classic and beautiful garter stitch: a simple stitch with such gorgeous texture! Thus, I used minimal ribbing- I did three rows of ribbing at the bottom, and the rest was worked in garter stitch. If you are new to knitting or need a refresher on the garter stitch, I highly recommend you check out my “Simple Knit Series“! I created this 3-part series to work through the basic knitting stitches (garter, stockinette and seed stitch) with step-by-step photos, video tutorials, and accompanying projects. You can learn how to knit the garter stitch HERE!
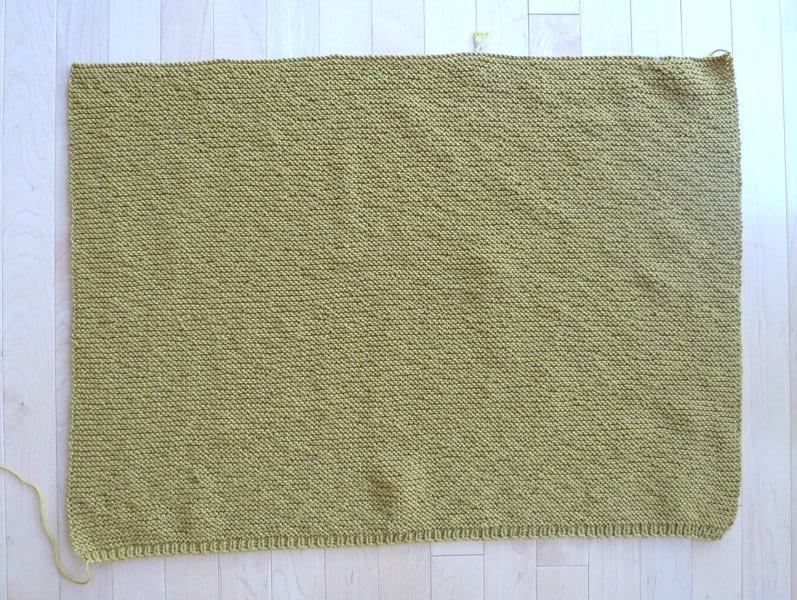
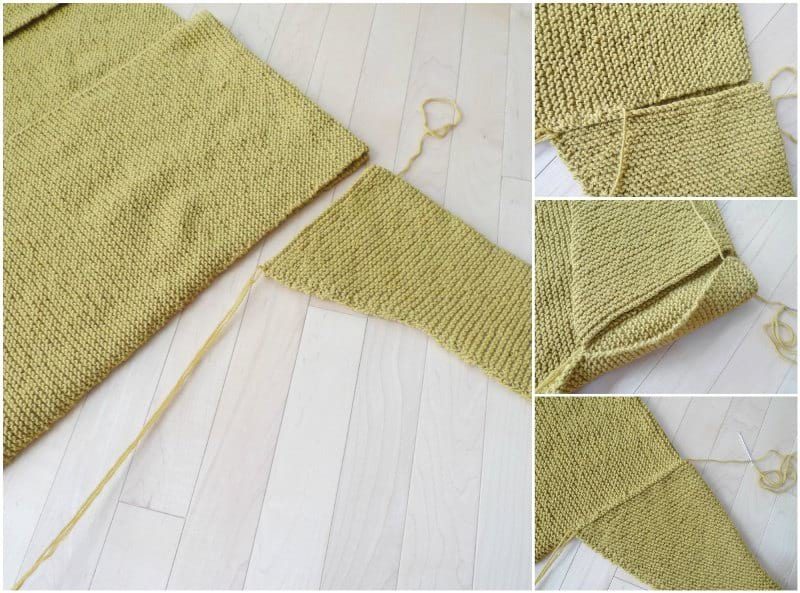
Next, I knitted the two front panels, leaving about a 28 stitch gap for the collar and neck.
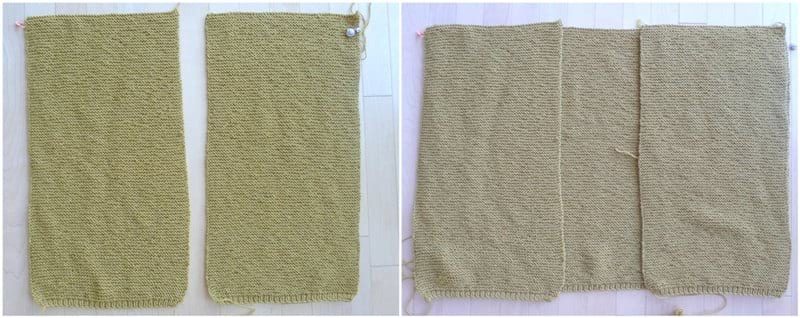
I whip stitched the top of the front and back panels together for the shoulder seam. Whenever I did any seaming, I whip stitched the wrong sides together and then inverted the piece to make the seam less visible.
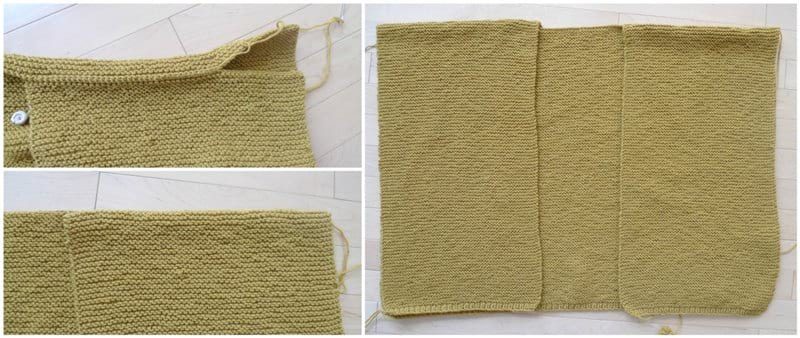
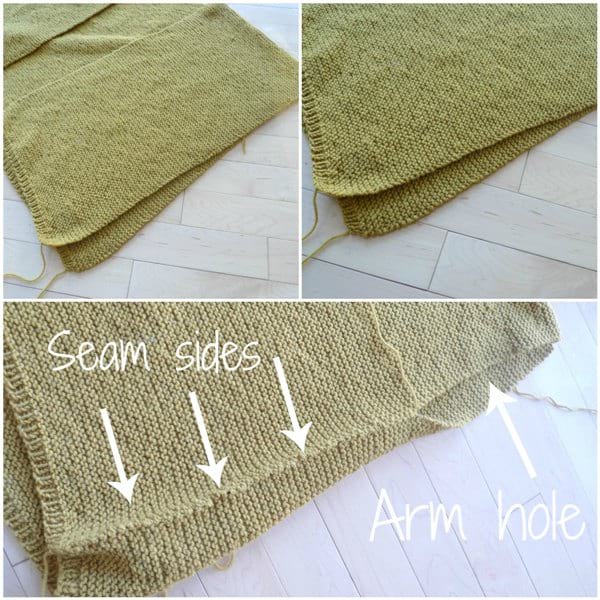
Next, I whip stitched the sides of the front and back panels together, leaving a space for the arm hole.
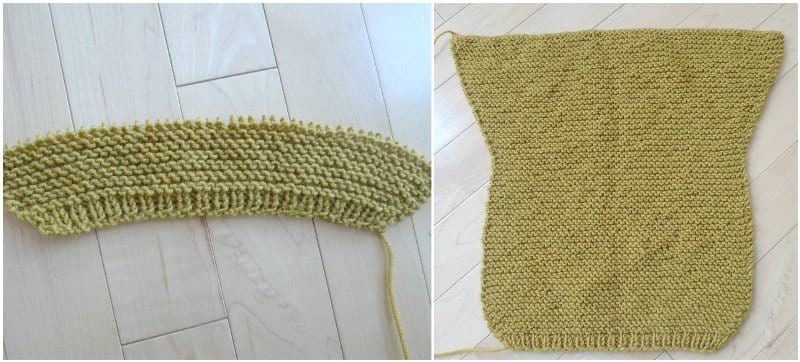
It took me a couple of tries to get the sleeve shaping right! I wanted a loose and baggy sleeve that was not too tight. My first tries were expanding too rapidly, but I eventually got the look I was going for! Once again, I started with three rows of ribbing and then increased on the sides towards the later rows.
I then folded the sleeve in half and whip stitched the sides together.
I positioned the sleeve near the side of the cardigan where we left the arm hole. I whip stitched the opening of the sleeve to the opening of the arm hole, going all the way around. I made it extra secure near the armpit area by adding some more whip stitches.
After attaching one sleeve to make sure everything was looking alright, I could not resist trying my cardigan on! It was looking so good, and I eagerly tried to finish the second sleeve as fast as I could! I love blazing through the second sleeve when I’ve already figured out and written down the pattern for the first sleeve!
![]()
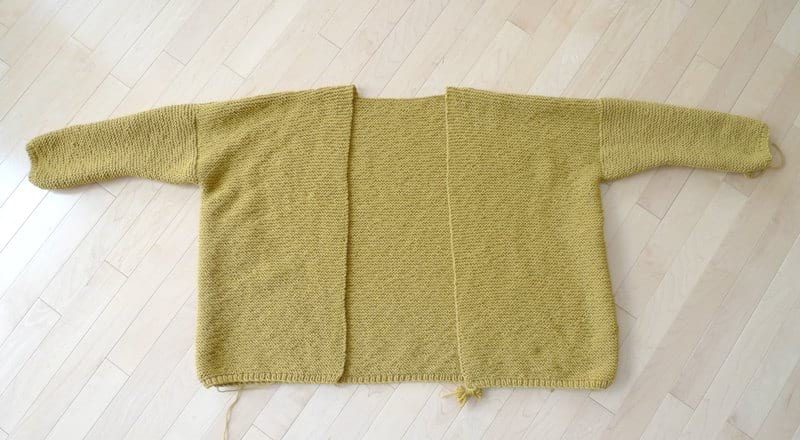
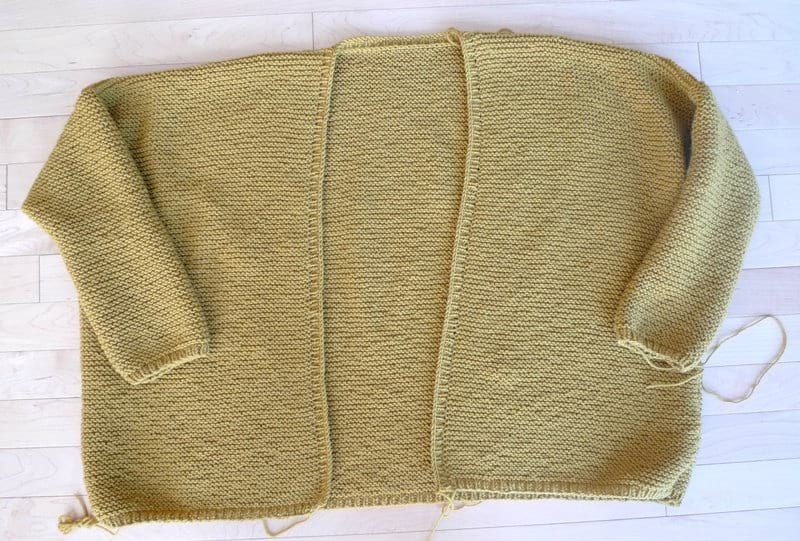
This is how my cardigan looked with both sleeves attached! With this drop sleeve design, you’ll notice that part of the front and back panels curve and bend past the shoulders to become part of the sleeve. That is why the panels are so wide and the sleeves appear smaller. This cardigan is a slouchy and loose cardigan rather than a fitted and tight one!
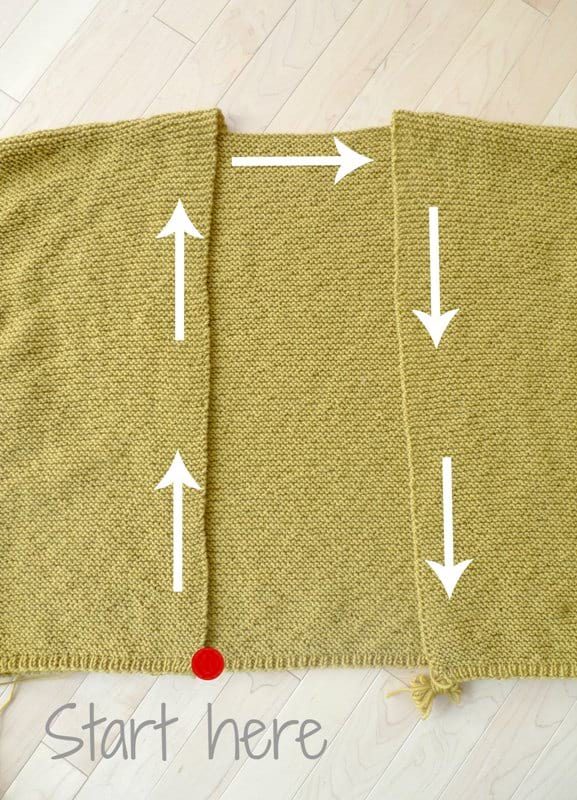
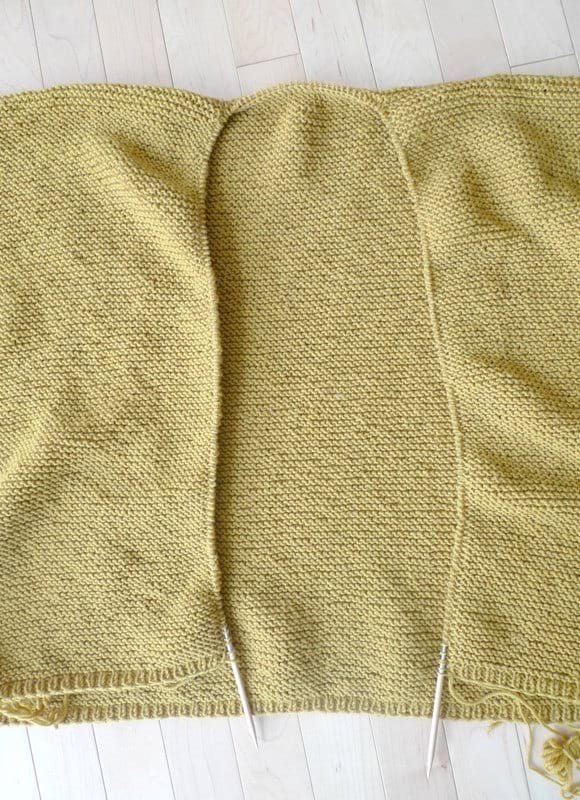
Next it was time to pick up stitches along the collar! I had to look up how to do this as I had never picked up stitches for such a large collar before! I started in the bottom left corner (where the red dot is located in the picture below) and picked up stitches upwards along the front panel, across the back panel, and then downwards along the other front panel. You will need a long cord to pick up all the stitches around the collar, so I used my 48″ cord! For reference, I learned how to pick up stitches using this video HERE!
To pick up stitches, insert your needle into the first stitch along the edge. Yarn over, then pull up a loop. You keep inserting your needle into the next stitch, yarning over, and pulling up a loop.
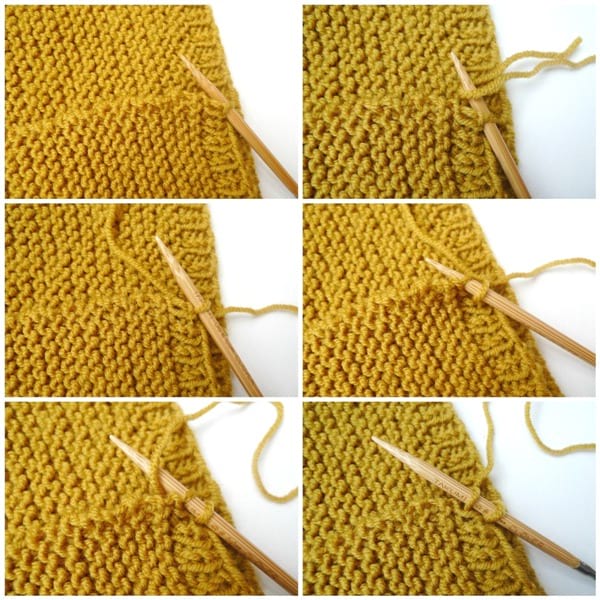
As you approach the garter stitch section, you will pick up stitches BETWEEN THE RIDGES! I have also put together a video where I demonstrate this technique later on in this blog post!
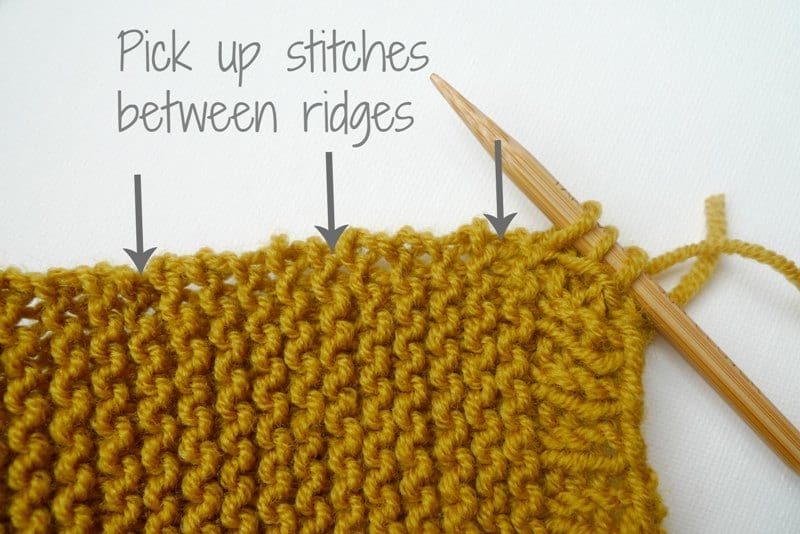
You insert your needle in a stitch between the garter stitch ridges, yarn over, and pull up a loop. When you approach the back panel, you can insert your needle into the front and back loops of a stitch and treat them as one.
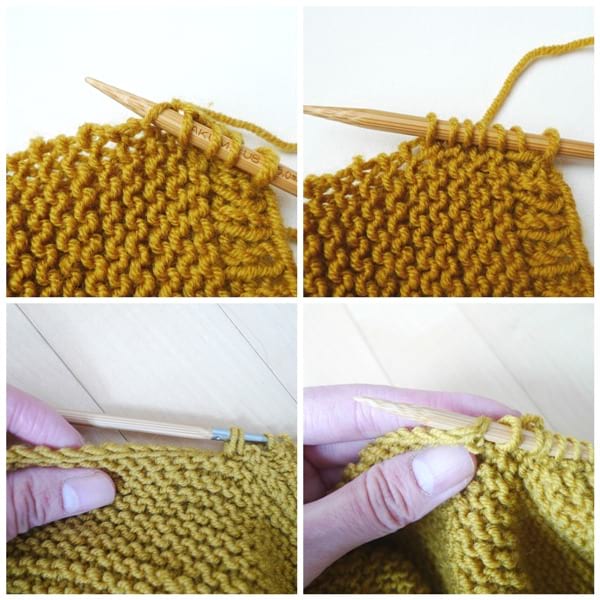
This is what it looked like after I picked up all the stitches along the collar! For my size small, I picked up approximately 98 stitches along the front panel (which is approximately the number of rows divided by 2), and 32 stitches along the corners and back panel.
I worked three rows of ribbing for a simple and clean collar. I then casted off loosely.
My finished cardigan with the ribbed collar!
I wanted to add some small pockets as well! I made two pockets with garter stitch at the bottom and ribbing at the top!

I tried to take some videos of my knitting process along the way! In the below video, you will see me demonstrate how to Knit Front Back (increase), seam the edges of the sleeve together, seam the sleeve to the panel, and pick up stitches along the collar!
I was ecstatic to finally wear my finished cardigan complete with pockets and an ultraleather garment tag! We decided to take some final photos of our beautiful cardigan while we were in Banff, Alberta recently for a Family Life Marriage Conference! Look at those gorgeous mountains in the back!
![]()
I styled the cardigan casually over a loose white t-shirt tucked into a pair of belted jeans! This cardigan looks so effortlessly chic and the colour really pops!
![]()
I decided to call this design “The Midtown Cardigan” since I was working on this project on our travels to New York City, and I associate this project with the Blogger Bash! It was amazing seeing all the different yarns with the other bloggers, including the gorgeous shades of Superwash Merino available in the Lion Brand Yarn Studio! We stayed in Midtown and had such a blast walking around, eating the food and sneaking in a Broadway Show while in New York City!
![]()
For the second outfit, I styled my cardigan over a summer dress with a straw hat! Cardigans are such a staple in any wardrobe, and it’s amazing being able to make your own and choose your favourite colours!
![]()
The Midtown Cardigan is one of my favourite handmade garments as it is so wearable year round and has such a classic sophistication to it. I’ve always wanted to knit a piece like this, and I’m so proud that I’ve finally been able to accomplish that!
![]()
Our marriage conference was at the Banff Springs Hotel, and we had such a blast during our weekend getaway! The speakers were wonderful, and there were many activities that facilitated discussion and gave practical tips. We wrote love letters to each other that brought me to tears! The whole weekend talked about striving for ONENESS: relational, emotional, physical and spiritual oneness! Learning how to put someone else’s best interests in front of our own is key, and we can do this through the strength and grace of God!
![]()
Our weekend culminated in Afternoon Tea at the Banff Springs Hotel with the most stunning views as we were seated right by the window! All the savoury and sweet treats were delicious along with our organic creamy earl grey tea! The tower of treats was beautiful, and Ryan and I were reminiscing about our dating and married years, and how surreal it is that we have two daughters who are no longer babies!
![]()
I hope you enjoyed reading about the background of my Midtown Cardigan! You can get the full free written out pattern HERE! The concise PDF includes the written pattern as well as all the step-by-step photos HERE! The kit is currently on sale for 20% off and such an amazing deal for the luxurious yarn you are getting (a size small is $35.96)- purchase your kit HERE!