***You can purchase an INEXPENSIVE AD-FREE PDF of this pattern on Etsy HERE and on LoveCrochet HERE! This beautifully formatted PDF includes the step-by-step tutorial and the full pattern for BOTH the Snow Puff Ribbed Beanie AND Snow Puff Ribbed Scarf! It is a total of 6 pages including the cover page! You can also purchase a kit HERE on the Lion Brand Yarn website that includes the pattern and all the yarn needed to make the scarf and beanie (as well as the yarn pom poms)!
I love the idea of holding two different strands of yarn together for a beautifully textured look and blend of colour! I held two different types of yarn together for my “Simple Garter Stitch Scarf“, and this time I wanted to try using the same type of yarn but different colours for a project! The shades of colours available in Lion Brand Yarn’s New Basic 175 are so beautiful, and the 25% wool composition (75% acrylic) gives it a warm and slightly fuzzy effect. I used New Basic 175 in my Granite Cardigan and most recently with my Chinese New Year Dogs! I wanted to blend the shades “Peony” and “Cream” together as pictured below!
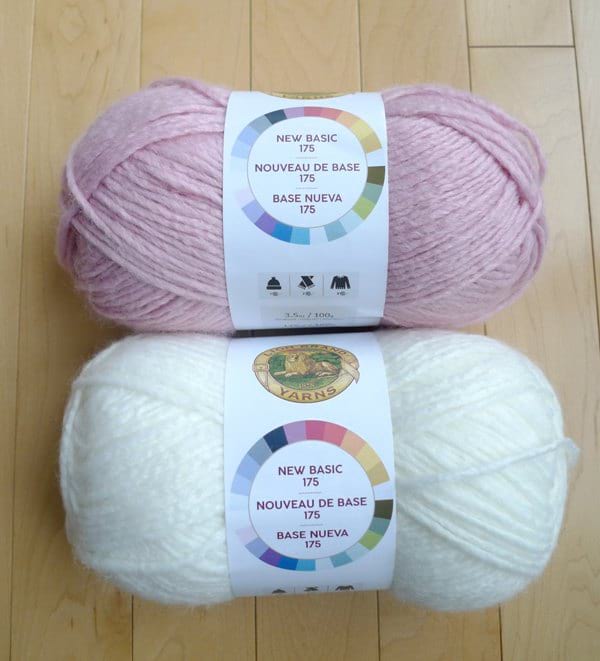
Here is a close-up of New Basic 175! It is classified as a worsted weight (level 4) yarn, but it’s definitely on the plumper side! I adore how this yarn works up with its softness and richness! I knew it would be perfect to create a warm and cozy beanie and scarf set that was on the whimsical side with the flairs of pink. I have recently fallen in love with double brim hats such as the knitted ones by Teresa of Debrosse, Jess of Make and Do Crew’s Everywhere Beanie, and my Braided Cabled Slouchy Beanie too!

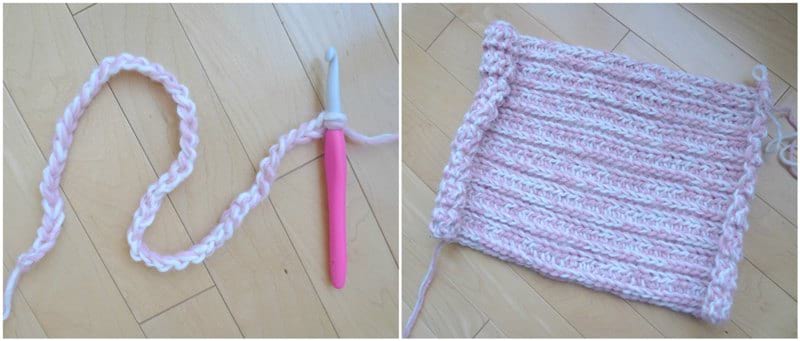
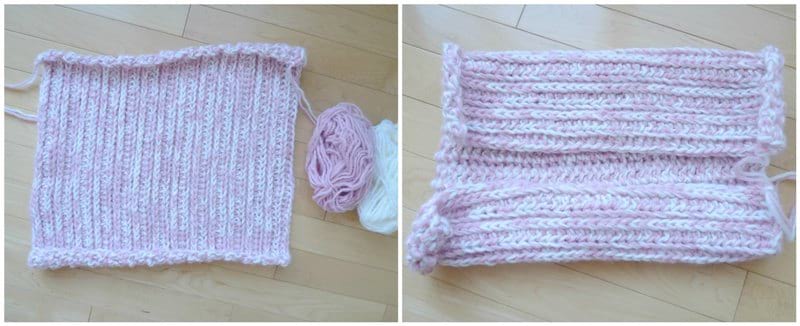
Since I held two strands of yarn together at the same time, i used my 8 mm Clover Amour hook! I started off with a series of 41 chain stitches which serve as the height or length of the hat (this may seem long, but it’s because I wanted to create a double brim later on)! I worked my favourite ribbing pattern: alternating half double crochets in the back and third loops! This is the same ribbing I used for my Cabled Legwarmers, Granite Cardigan, and Jumbo Alpaca Crochet Scarf! It creates a ribbing on one side and a completely different look on the other side, which you’ll see further below. This ribbing has a tendency to curl, but all the edges will be seamed up so this is not a problem!
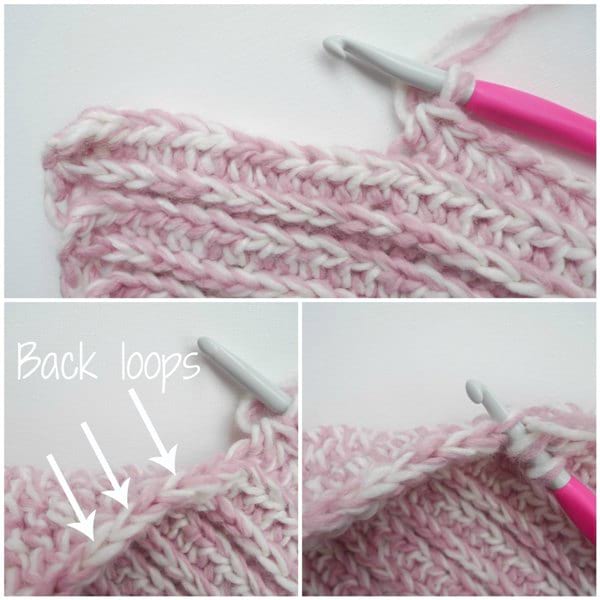
When the ribbing or V stockinette-type stitches are facing you, you work half double crochets in the back loops as shown below.
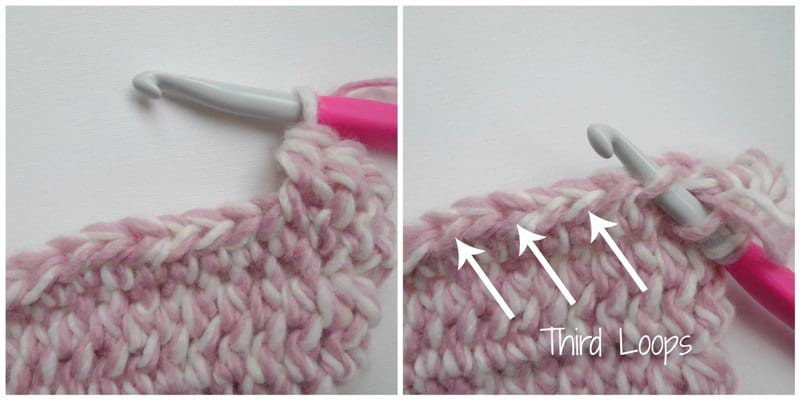
When the other side (wrong side) is facing you, you work half double crochets in the third loops that were created from the previous row.
Once I was happy with the width or circumference of the hat (determined by number of rows), it was time to seam the edges together!
I seamed the edges together by whip stitching the third loops of one edge to the back loops of the other edge!

Once the edges were seamed up, I then inverted my tube so the wrong side was facing me. Next, I folded up the bottom of the hat to create a double brim. If you want the V stockinette-type stitches to be facing upwards when you wear the hat, you want to make sure that the V’s are facing downwards for the brim part when the wrong side is facing you (see below). I whip stitched the edge of the brim to the body of the hat to secure it in place. I tried to pick up stitches close to the surface of the wrong side of the body (rather than going through all the way to the other side) to prevent the seam from being visible on the right side!
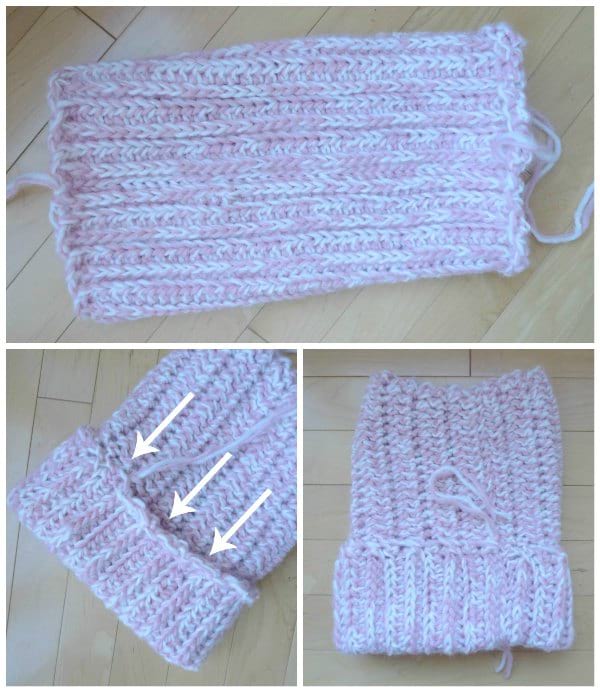
Next, it was time to close up the top of the hat! I single crocheted opposite ends together until the opening was completely shut (see video below for demonstration).

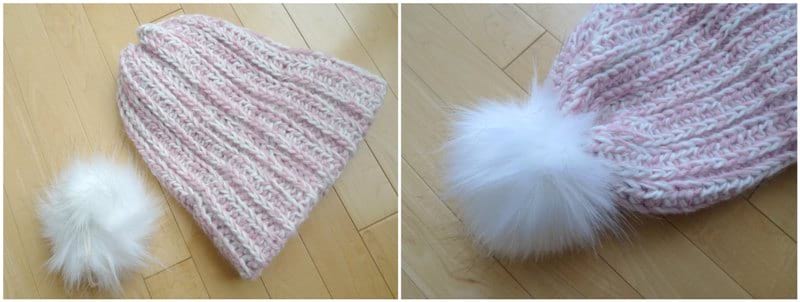
As a final touch, I secured this beautiful white faux fur pom pom into place!
To see the making of the Snow Puff Ribbed Beanie in action, please watch this video that I put together!
**************************
Here is the free pattern for my “Snow Puff Ribbed Beanie“:
***You can purchase an INEXPENSIVE AD-FREE PDF of this pattern on Etsy HERE and on Craftsy HERE! This beautifully formatted PDF includes the step-by-step tutorial and the full pattern for BOTH the Snow Puff Ribbed Beanie AND Snow Puff Ribbed Scarf! It is a total of 6 pages including the cover page! You can also purchase a kit HERE on the Lion Brand Yarn website that includes the pattern and all the yarn needed to make the scarf and beanie (as well as the yarn pom poms)!
![]()
Materials:
- New Basic 175 yarn (worsted, level 4): 2 skeins (~164 grams) required – I held two different colours together for a beautiful effect- I used “Peony” and “Cream“; on the Lion Brand site HERE
- I used the remainder of the yarn for the matching scarf project – if you are making both the beanie and scarf, you will need a total of 6 skeins of yarn.
- 8 mm Clover Amour hook
- Clover lock ring stitch markers
- Yarn needle
- Optional: pom pom – yarn pom pom (Clover pom pom maker) or faux fur pom pom (similar HERE)
- Ultraleather label by BrickBubble
Notes:
- A beautiful ribbed pattern is created by working half double crochets in the third and back loops.
- This ribbing has a tendency to curl, but all the edges will be seamed, so the resultant hat will not have any curling.
- A rectangle is formed by working in turned rows.
- The rectangle is seamed along the sides to create a tube.
- A double brim is created by folding the bottom of the tube upon itself and sewing in place.
- The top of the hat is closed up by single crocheting opposite ends together.
- To make this beanie smaller in circumference, decrease the number of rows of the rectangle (i.e. less than 27 rows)
- To make this beanie larger in circumference, increase the number of rows of the rectangle (i.e. more than 27 rows).
- To make the beanie slouchier, increase the number of initial chains (i.e. more than 41 initial chains).
- To make the beanie less slouchy, decrease the number of initial chains (i.e. less than 41 chains).
- To make a thicker double brim, fold the bottom of the tube more.
Gauge: 10 hdc and 7 rows = 4″
Ribbed Rectangle:
Ch 41
Row 1: Hdc 1 in 2nd chain from hook and across. (40 sts)
R2: Chain 1, turn. Hdc in third loops across. (40 sts)
R3: Chain 1, turn. Hdc in back loops across. (40 sts)
R4-27 (or until desired width): Repeat Rows 2-3.
Fasten off and leave long end for sewing. Seam ends of rectangle together by whip stitching back loops of one row to third loops of the other row.
Invert tube created so wrong side is facing you. Flip bottom of tube up to create double brim (mine measured about 4″). Sew double brim into place by whip stitching edge of brim to the body of the hat. If you want your final hat to have the “stockinette-inspired V stitches” facing upwards, ensure that they are facing downwards when you are sewing the double brim into place on the wrong side. Try to pick up stitches close to the surface of the wrong side of the body (rather than going through all the way to the other side) when seaming the double brim in place to prevent the seam from being visible on the right side!
Close up top of hat by single crocheting opposite ends together until beanie is completely closed up. Fasten off and weave in end. Add a faux fur pom pom or yarn pom pom ontop. If making a yarn pom pom, I would recommend using embroidery floss to tie center knots of pom pom as New Basic 175 can break if pulled with great force. Pictured below is the Snow Puff Ribbed Beanie with a yarn pom pom rather than a faux fur pom pom- it is so cute!
![]()
Finished Dimensions: 10.5″ tall, 9″ wide (when flat), 20″ in circumference
************************
I adore my statement hat and how it is a bold and chunky look while the pretty pink brings a touch of softness and romance to it too!
![]()
It has the perfect amount of slouch and looks so adorable with the pom pom ontop! I think the pink and white blend so beautifully together! I’d also love to see how the colour combinations grey/white, black/white, and beige/white look together!
![]()
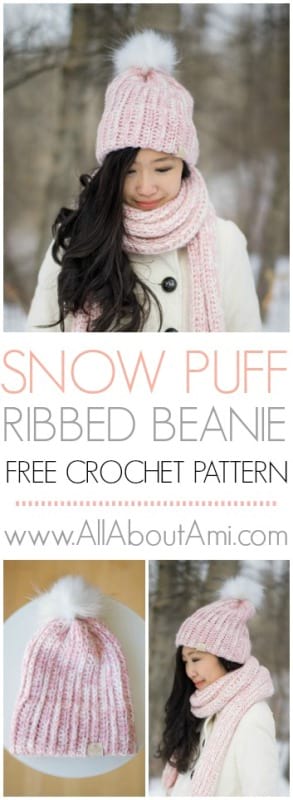
As you can see in these final pictures, I have designed a matching Snow Puff Ribbed Scarf to go with the beanie! This stunning scarf can be wrapped twice around the neck and looks so whimsical with pom poms attached to either end! I feel like a snow princess wearing this gorgeous set! Get the free pattern for the scarf HERE, and don’t forget that the concise PDF I’ve put together contains BOTH the beanie and scarf pattern!
![]()
{This post is sponsored by Lion Brand Yarn! I’ve loved working with their yarn throughout the years and I’m thrilled that I get to collaborate with them every month!}
This pattern is an original pattern by Stephanie Lau of All About Ami. Please do not claim this pattern as your own. If you wish to share this pattern, you may link to this pattern but please do not reprint it on your site. You may keep a copy for your own personal use but please DO NOT sell the pattern or distribute it.
You may sell products made from this pattern but please clearly credit the design to me, Stephanie Lau of All About Ami, and provide a link to my blog www.AllAboutAmi.com. Permission is NOT granted for mass production or factory manufacturing of any kind. Thank you for being respectful and for your understanding!