[Please note: The formal, written-out crochet pattern can be found for free in this blog post HERE! An INEXPENSIVE AD-FREE PDF of this pattern can also be found on Etsy HERE and on Craftsy HERE. This is the step-by-step blog post to accompany the formal pattern so that you can see the making of our Chinese New Year Monkey!]
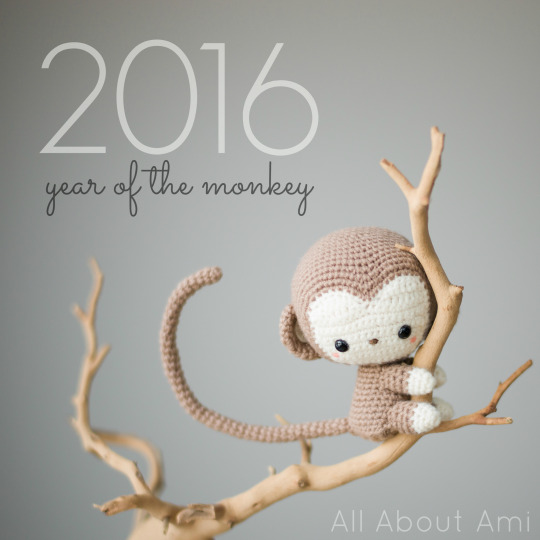
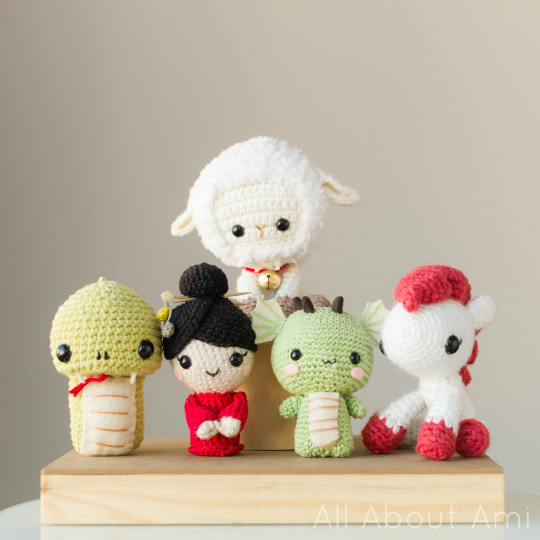
It’s been an annual tradition for us to design a special amigurumi for Chinese New Year since I started my blog in January 2011. Our Chinese New Year Doll (our very first original design) kicked off this tradition, and then Dragon, Snake, Pony, and Lambert the lamb followed! 2016 is the Year of the Monkey, and we were excited to begin designing our very own little monkey at the beginning of January!
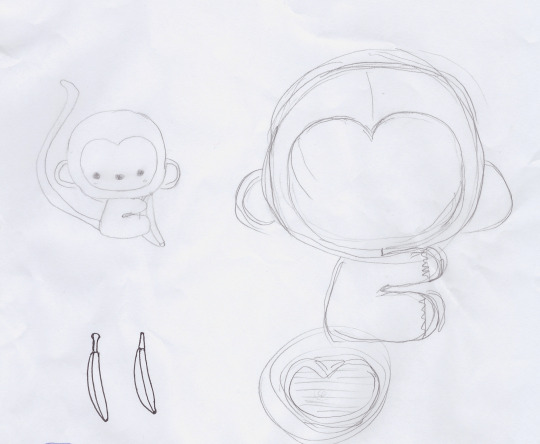
Ryan came up with the below sketches showing an adorable monkey with a heart-shaped face and a long curved tail! I thought the body positioning was very unique since his body is turned to the side and he is hugging a banana!
To begin bringing our sketch to life we picked up some “Patons Astra” in “Medium tan” and “Aran” at our local Michaels. It is a lightweight level 3 yarn, and you may remember that I actually used the same Medium tan colour with Lambert last year too!

I began working row by row with the beige yarn slowly increasing. Then, I divided my last row into two, placing Clover lock ring stitch markers in the middle two stitches.
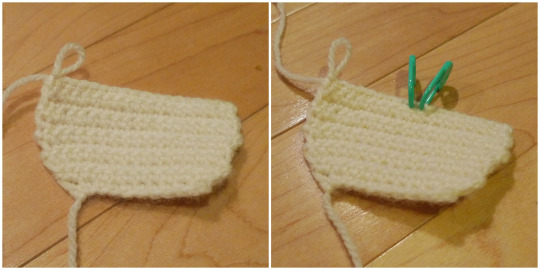
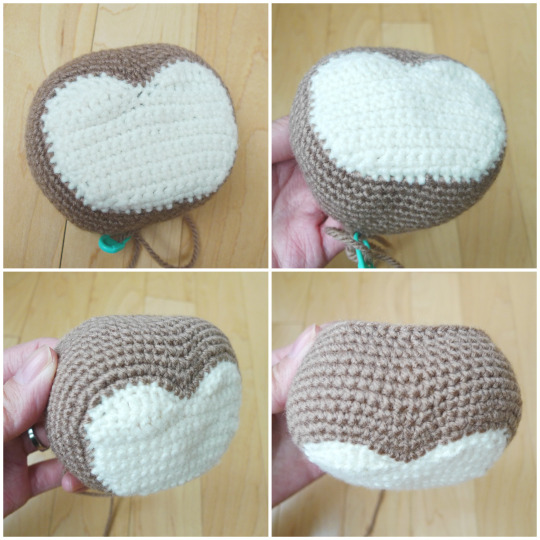
This is when I began shaping the face into a heart! I used a combination of single crochets, half double crochets, and double crochets to vary the height of the next rows to get that nice curve.
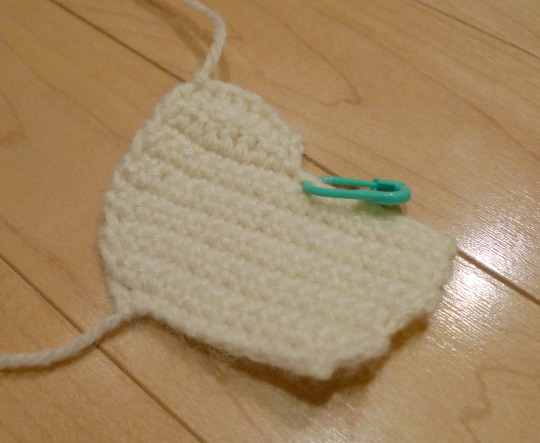
I then fastened off and rejoined my yarn on the far right side as indicated below. I worked the same pattern as on the left side to form the second half of the heart shape!
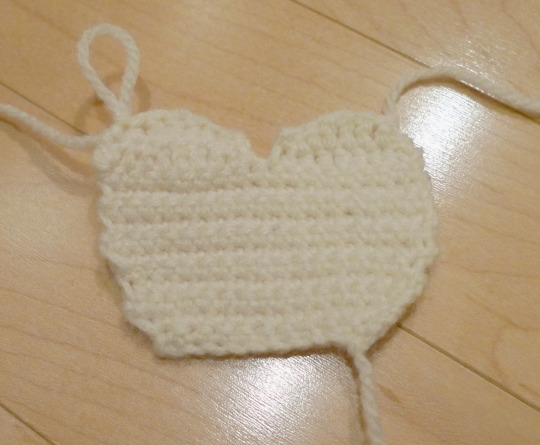
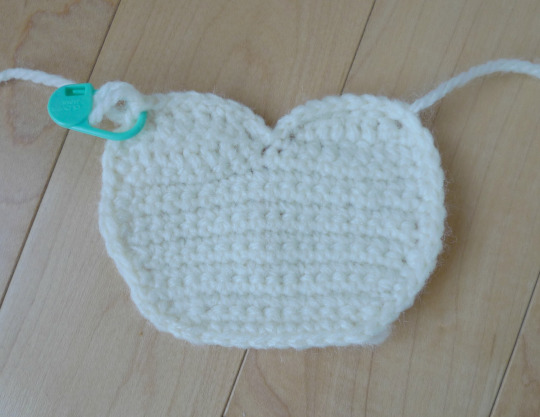
The heart shape is complete with two curves!
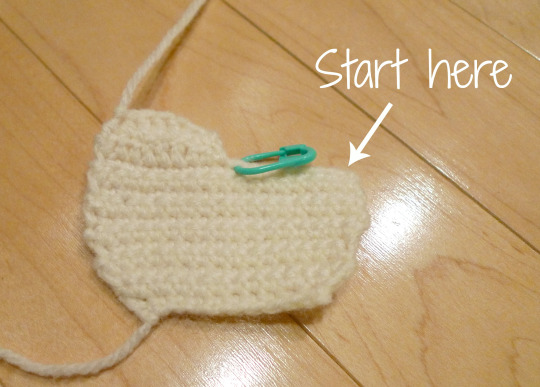
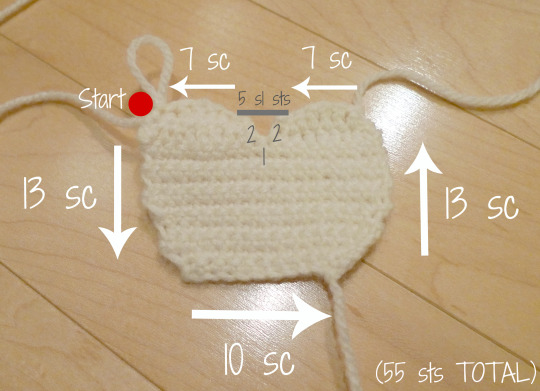
Next I crocheted around my heart-shaped face, smoothing out the edges. I started at the red dot (where my working yarn was) and went counter-clockwise doing 13 sc down the side, 10 sc across, 13 sc up the side, 7 sc around the curve, 5 slip stitches in the area between the dip of the curves (2 sl st, 1 sl st, 2 sl st), and then 7 sc around the other curve. In total, I had 55 sts around the perimeter of the face!
This was the completed heart-shaped face after the edges had been smoothed over!
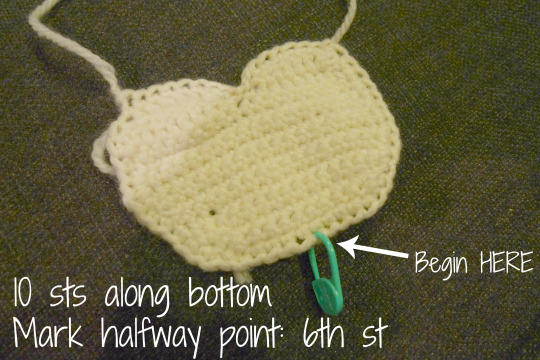
Next I fastened off and got ready to work with the brown yarn. The bottom of the face consists of 10 sts. I divided this into two and placed a stitch marker on the 6th stitch (one of the halfway points)- this is where I rejoined with my brown yarn and began crocheting around. I apologize in advance for all the changes in lighting during these progress photos- Ryan and I primarily worked on our monkey at night when the girls were sleeping!
I wasn’t sure how it would work out with the top of the heart shape when I switched to the brown yarn. I wanted it to form a spherical shape in the end rather than continuing on with a heart shape. I worked some increases towards the top portion of the head so that the top of the head would expand but worked some decreases between the two curves to help it smooth out eventually.
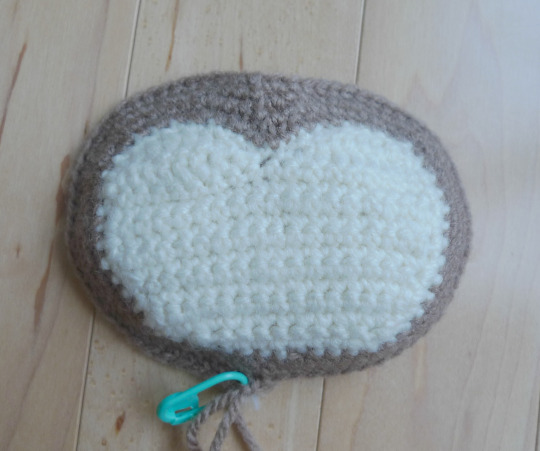
This is what the other side looked like!
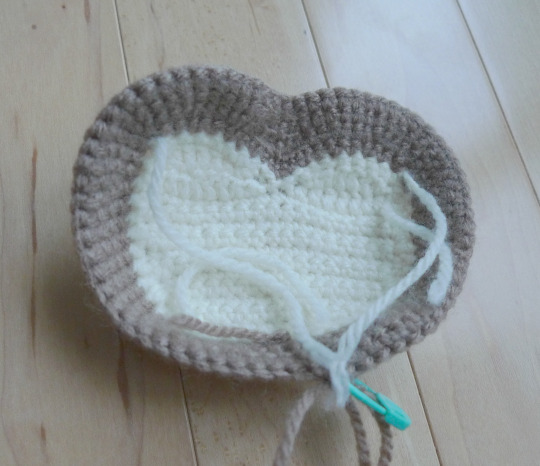
I was very happy with how the head was shaping up with my increases and decreases!
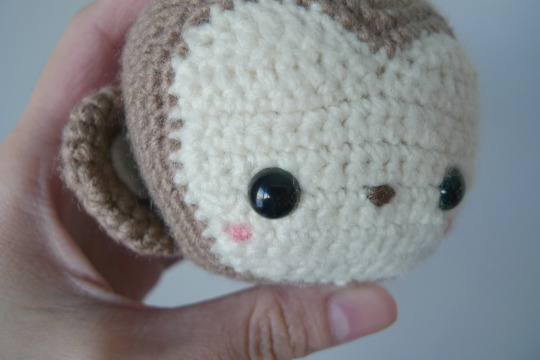
Ryan then added 9 mm safety eyes between Rows 7-8 (when counting from the bottom) about 8 stitches apart. He then embroidered this cute little nose using brown embroidery floss!
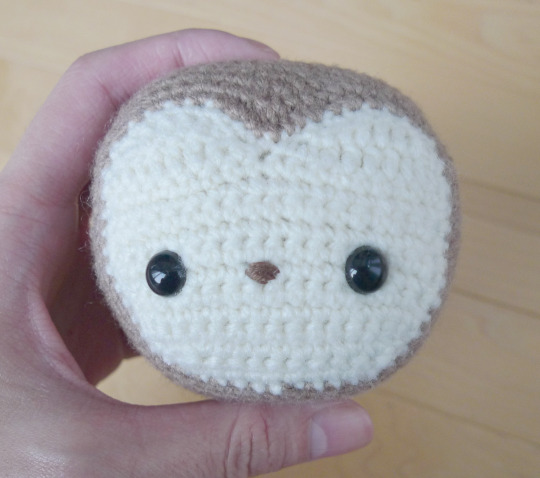
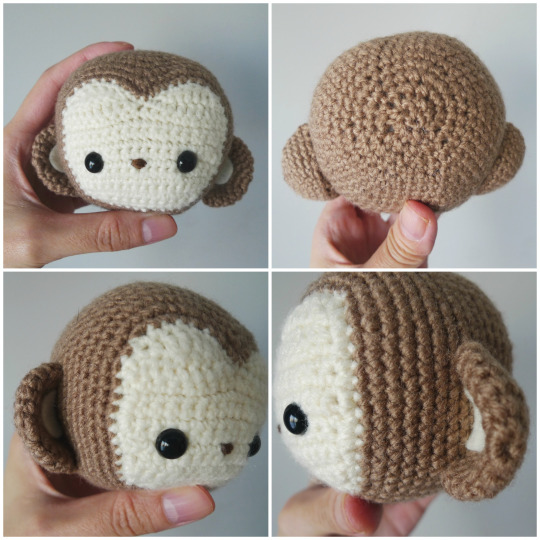
After stuffing and closing up the head! This monkey head is different than most of my other amigurumi since the last rounds are located at the back of the head rather than the bottom of the head. Usually the last rounds are hidden when you attach the head to the body. Thus, I wanted a really clean finish with no visible hole, so when I was left with my last round of 6 single crochets, I used a yarn needle and drew through all the front loops and pulled tight!

Here is another close-up of the adorable face!

Next I crocheted the ears! I started crocheting a ball/sphere and then flattened and pinched them shut!
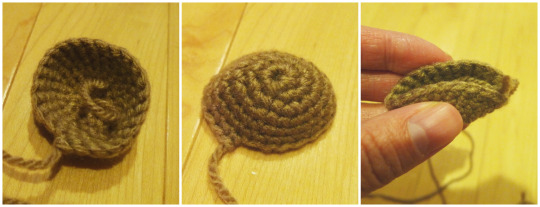
I sewed them shut by whip stitching the sides together!
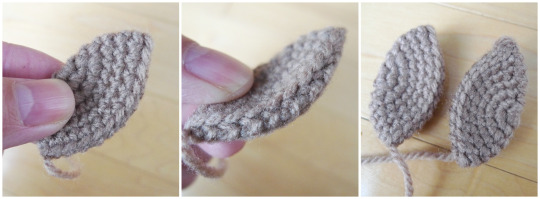
Next Ryan attached the ears to the sides of the head while curving them. He cut little semi-circles out of beige felt and glued them inside. The ears are placed around Rounds 8-10 of the brown yarn!
Ryan then used a sharpie marker to add some pink cheeks to our monkey! You could also try adding pink brads, pink paint, or actual pink blush too!
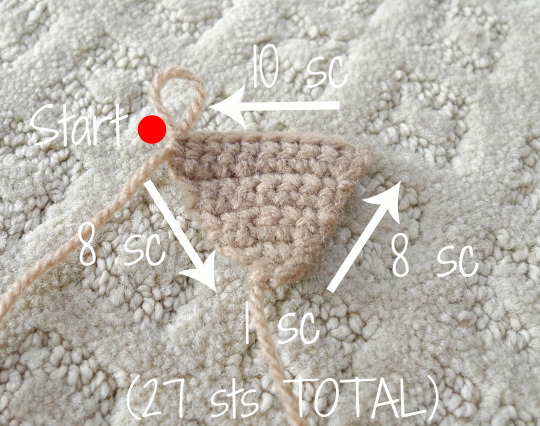
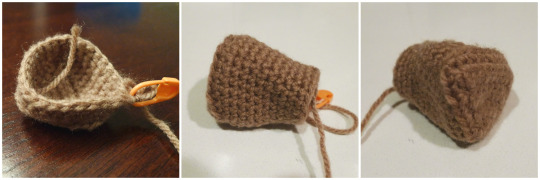
Next I started crocheting the bottom of the body which is a triangle shape! I then crocheted around the perimeter of the triangle as follows: 8 sc down the side, 1 sc at the bottom, 8 sc up the other side, 10 sc across the top.
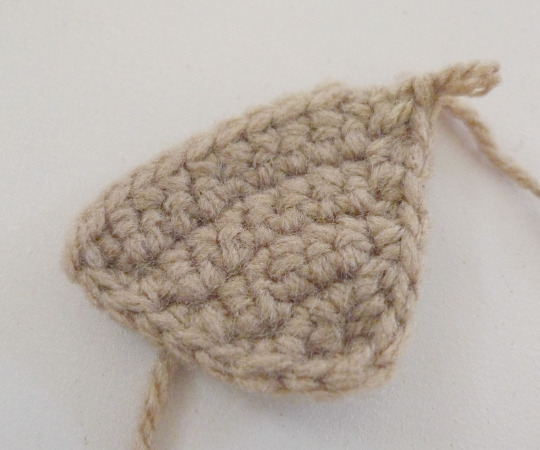
Here is the bottom of the body complete with the edges smoothed over!
Then I crocheted around and around to build up the height of the body, slowly decreasing towards the top.
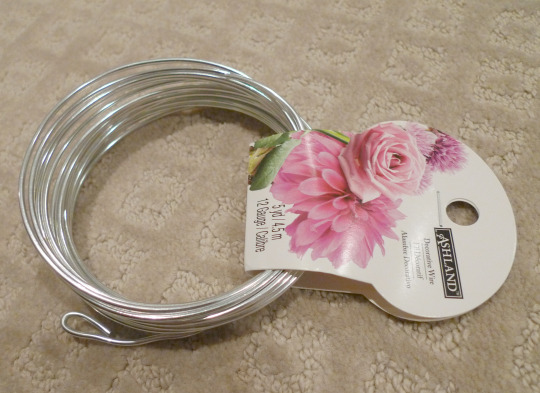
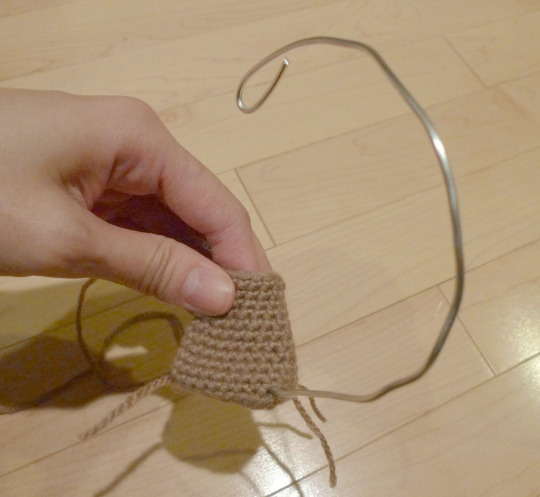
We decided to use a new technique with our monkey: adding wiring inside! I know that some people are against using wires inside amigurumi, and I definitely do not recommend it if you are making this toy for a young child. The safety is questionable since the wires could poke out, particularly if your stitches are not tight or if the child plays roughly with the toy. Our amigurumi sit on display on our shelf, and when the girls do play with them, they are under our supervision, and they play very gently with their toys. Thus, we decided to use this “12 Gauge Decorative Wire” that we found at Michaels (simliar HERE on Amazon) so that we could shape our monkey and make the tail and limbs poseable!
Ryan used the wire to shape a triangular base that would sit on the bottom of the monkey’s body and extend into the long tail.
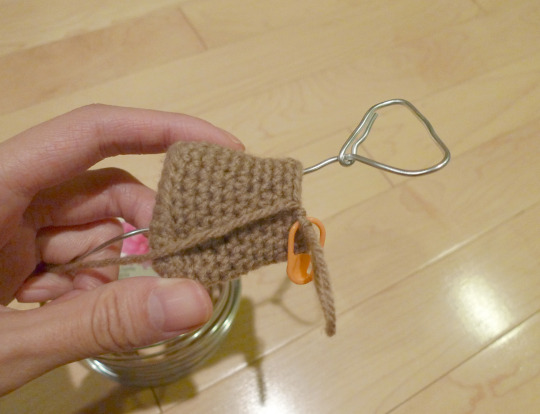
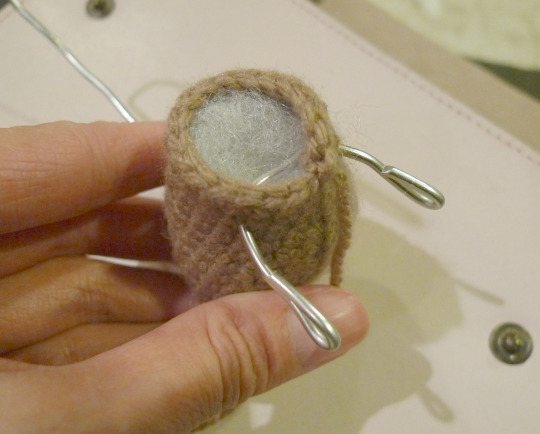
He secured the wire triangle onto the bottom of the body by tying knots in each corner with yarn!
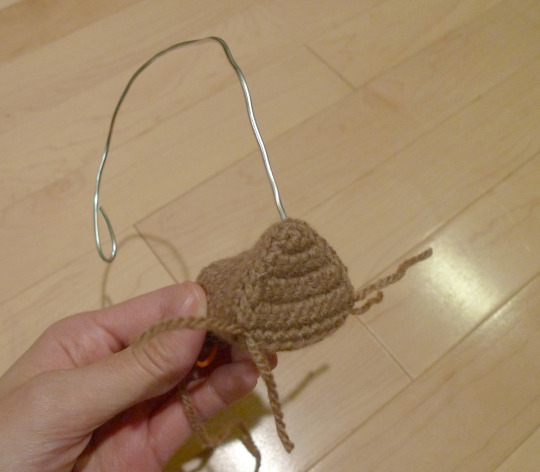
Here you can see the wire tail extending outwards!
He shaped the little wire arms as shown below and bent the tips so that there were no sharp ends that could poke out of the crocheted pieces.
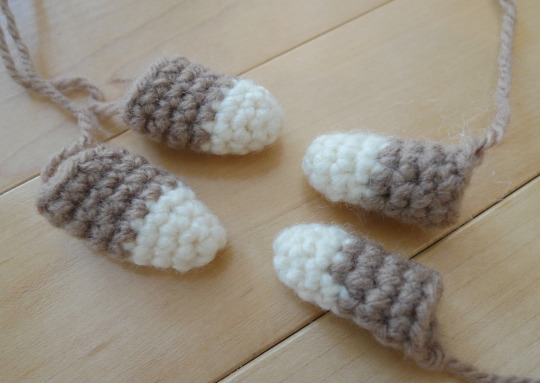
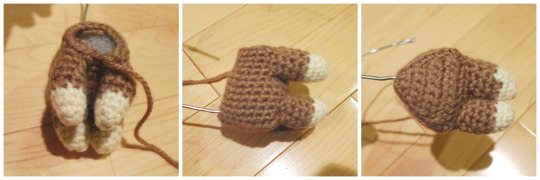
I crocheted these two little arms and legs starting off with the beige yarn and then switching to the tan yarn.
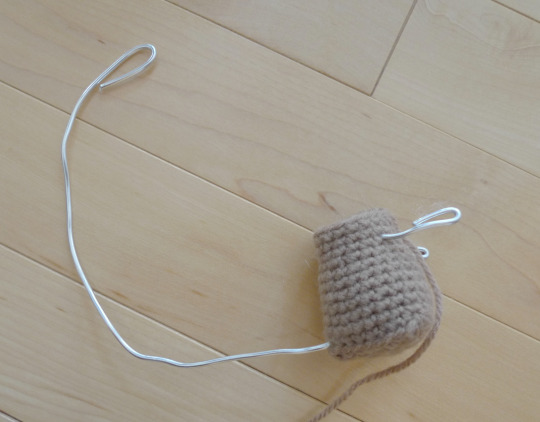
Here is another view of the wire arms and tail! Ryan then did the exact same thing underneath the arms to make wire legs!
Next we inserted the crocheted arms and legs onto the wire arms and legs and attached the limbs onto the body. Having wires inside the arms and legs means that our monkey can hold and hang onto items!
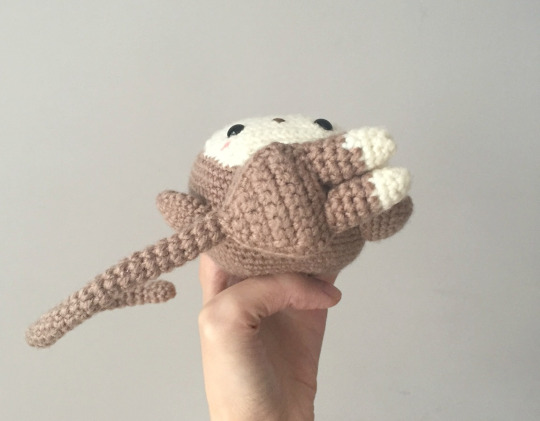
After attaching the head onto the body, this was what our monkey looked like: a cutie pie with a wire tail! Ryan used sturdy electrical tape to secure the bent tip of the tail so that the end would not poke out! He actually used this tape to secure all the wire ends as well (arms and legs) even though we didn’t take a picture of it.

I then crocheted a long tail, inserted it onto the wire tail, and then attached it to the body!

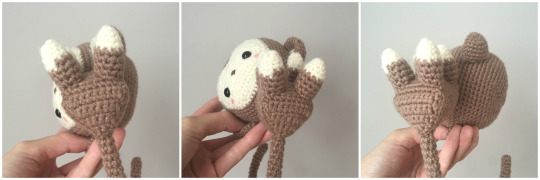
You’ll notice that we did not position the head at a ninety degree angle to the body. Our monkey’s head is slightly tilted downwards, so you want to attach the body close to where the beige face becomes the brown head. Here is an angle from the underside showing when the monkey’s face is pointing straight upwards!
Here are a few other angles of our Monkey from the underside!
We knew our little cutie pie needed his favourite food as his accessory: a banana! I used the yellow cotton yarn found within my Lion Brand Yarn pack of Bonbons in the colour combo “Beach”! I worked in turned rows and shaped it so that there would be edges or ridges after certain rows to simulate those of a real banana. I also tapered the end of each row so that they would curve nicely towards the ends of the banana. During the last row, I decreased my stitches to help with the curve of the banana.
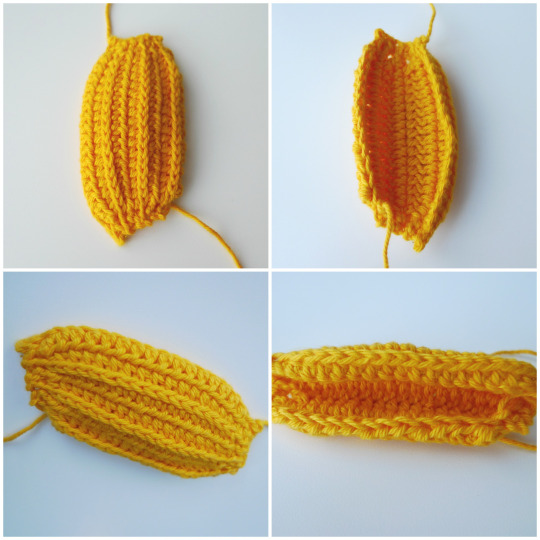
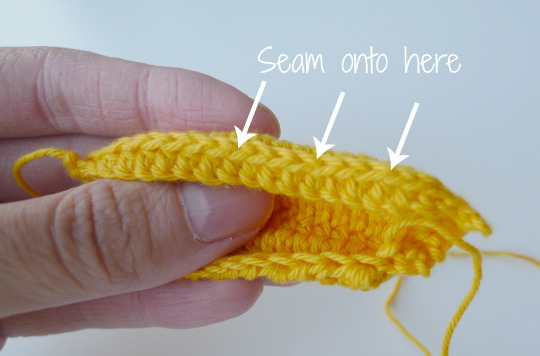
When it was time to seam the banana shut, we seamed the bottom edge of the banana to the ridge as shown below. This also helped with the curve of the banana!
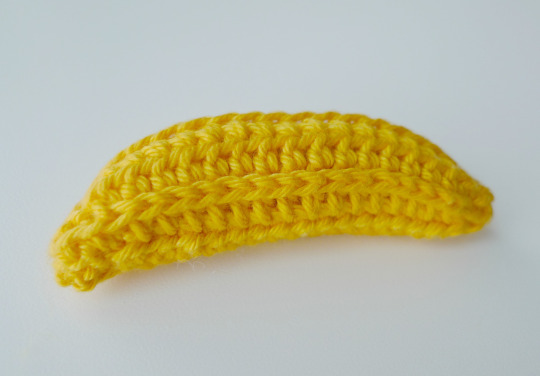
Our banana once it was seamed shut! Don’t you love those ridges and how the ends are tapered?
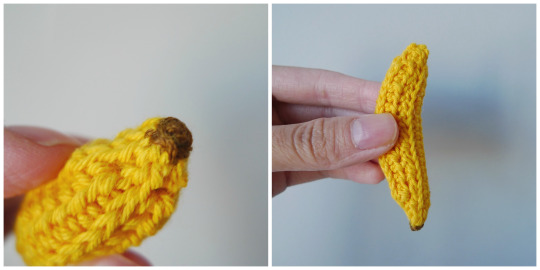
Ryan then used brown embroidery floss to embroider the bottom of the banana.
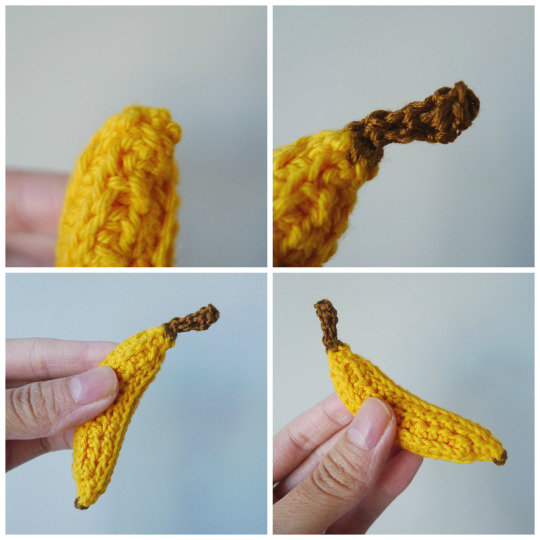
I then picked up stitches at the top of the banana with the same brown embroidery floss and crocheted a few rounds, increasing a bit towards the top. I’m so proud of our little banana!
Now, may we present to you….Kiko the Monkey! Thank you so much for all your amazing name suggestions! I love our global community and how so many of you suggested names that had monkey-related meanings in your languages! Some of the names we loved include: Moka, Miko, Mika, Momo, Mowgli, and Meiko (can you tell that I like alliteration?). Mochi the Monkey would be cute since I love mochi, but I already used that name for one of my dear Fluff Bears. I thought “Monbert” was hilarious since we named our Chinese New Year lamb “Lambert” last year! I also liked “Kiki” (playing on the second syllable of mon-key), but I thought of our little monkey as a boy and it reminded me of Kiki from “Kiki’s Delivery Service”. Instagram user @kawehi1226 suggested “Keko” as it means “monkey” in Hawaiian- we LOVE Hawaii! However, it’s actually pronounced “keh-ko” instead of “key-ko”. Thus, we decided to go with “Kiko” (pronounced key-ko) since we love the sound of it!
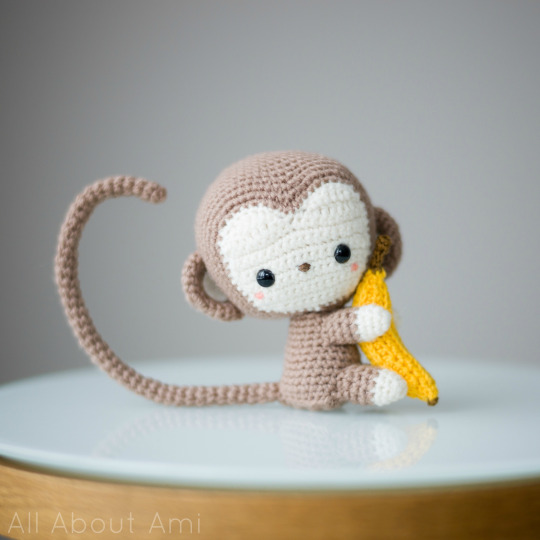
Kiko is a baby monkey, which is why the banana looks so big compared to him! He is having quite the time trying to lift this heavy banana but he is determined to hang on tightly and keep his delicious snack safe!
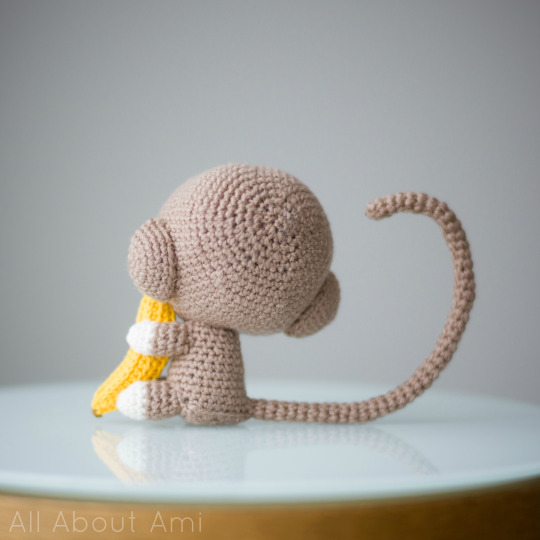
Here is the back of Kiko! His long curved tail adds so much personality and character!
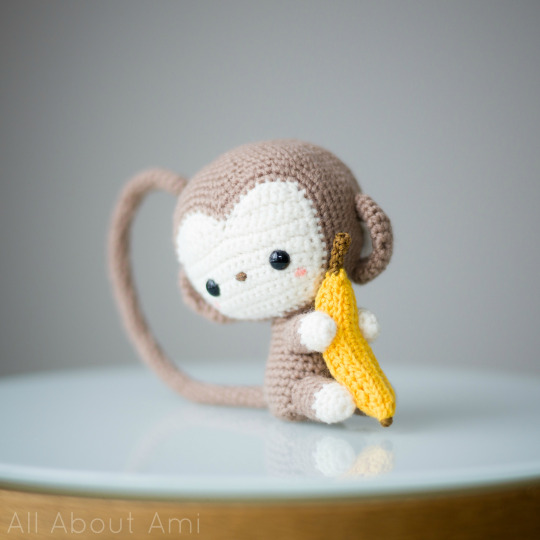
Doesn’t Kiko look incredibly sweet and kawaii? Especially when he’s clutching on so tightly to his banana. You just want to scoop him up and cuddle him!

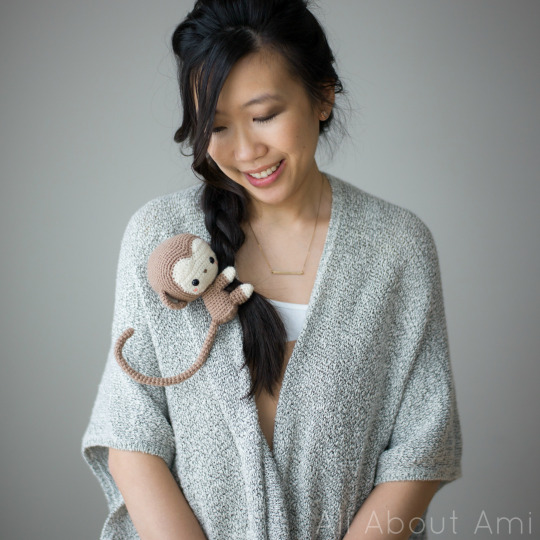
Thankfully, Kiko is a very cuddly monkey who is just learning how to climb. As you can see, he is practicing how to climb up my braid before he attempts to climb large trees 😛 Since Kiko has wires in his limbs, posing is very fun since he can hold and hang onto a myriad of items!
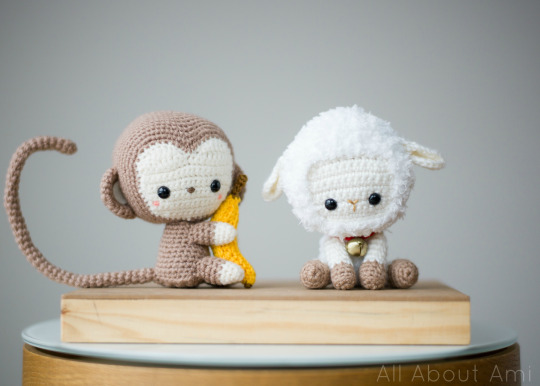
I just LOVE how similar Kiko the Monkey and Lambert the Lamb look! Don’t they look like long-lost brothers? Haha…they are similar sizes, they both have such sweet faces with larger heads, their construction is similar, and they both use that medium tan yarn. What an adorable pair!
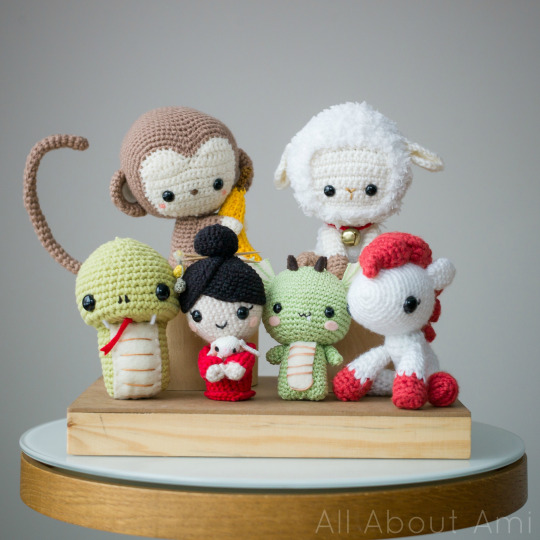
I think each amigurumi artist has their own signature style, and we certainly have our own as Kiko the Monkey fits right in with our other Chinese New Year amigurumi. I looove our little collection and I can’t believe this is our 6th Chinese New Year design already! Haha, we’re going to need a bigger table for next year…
Thank you for reading along and seeing the step-by-step process of how we designed and created our Chinese New Year monkey! I hope that you’re excited to make your own to help you celebrate 2016 and for all the little monkeys in your life! Interesting fact: Ryan’s favourite animal is a monkey! He had a collection of monkeys growing up, so it’s extra special this year that we got to design an amigurumi of his favourite animal 🙂
*****The FREE PATTERN can be found in this blog post HERE! You can also purchase an INEXPENSIVE AD-FREE PDF of this pattern on Etsy HERE and on Craftsy HERE. The printable PDF with step-by-step pictures has been condensed into a total of 6 pages including the cover page!
Don’t forget that you can subscribe to my e-mail list HERE if you never want to miss a post, and you can also follow me on Facebook, Twitter and Instagram to get my updates! I wish you a wonderful 2016 and Year of the Monkey ahead! Thank you for all your support!
{Update: See 20 Monkeys that have already been made all over the world following my free pattern HERE!}