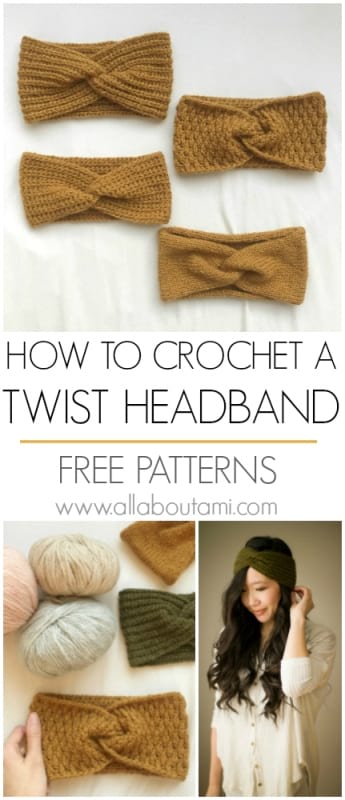
Throughout my years of blogging, I have always LOVED twisted headbands as I think they are such a cute and chic way to stay warm! Headbands work up quickly, they do not use too much yarn, and you can wear them with both your hair down or up! Here are some crochet headbands with a twist that I have made in the past – check out the free patterns and step-by-step tutorials here: the Twist Headband (sizing for adult, toddler and baby using bulky level 5 yarn) and the Criss-Cross Headwrap (lightweight level 3 yarn).
Recently on Instagram and TikTok, I saw some people sharing a brilliant seaming technique to achieve a beautiful seamless twist. As soon as I saw it, I was itching to try it out! In this blog post, I will show you how to use any stitch you want to crochet or knit a gorgeous twisted headband/earwarmer! We will start all the headbands with a simple rectangle and seam them in a special way – I will show you which stitches I used and write out the patterns further on in this blog post!
STEP 1: Choose your yarn and favourite stitch! In this blog post, I used one of my favourite yarns of all-time: Chainette. It is a worsted weight level 4 yarn that is a luxurious blend of 70% Baby Alpaca, 18% Virgin Wool, and 12% Polyamide. It is spun with a modern chainette construction so that it is very light, airy and soft. I used this yarn for my Horizons Beanie and Daylight Cardigan, and I had some balls left-over from these projects! I used a variety of my favourite stitches to make my own headbands: I used a beautiful knit-like ribbing called HDC-SL-BLO (which I used in my Dusk Cape), Single crochet in the front loop only (as in my Rosewood Cardigan and Rosewood Beanie) and the Alpine Stitch (which I used in my Luxe Faux Fur Cowl). I also wanted to try working up a knit headband using simple stockinette! You can see all these patterns written up below.
STEP 2: Do a swatch: use your recommended hook and yarn to work up a small sample using the stitch that you chose (I would suggest doing at least 10 stitches). Determine if you like the density and feel of the fabric created – you can always choose to move down a hook size if you want the stitches to be tighter, or you can move up a hook size if you want to get a looser look. Measure how many stitches is equal to 1″ or 2″ (the larger the sample you take, the more accurate it will be). This will help you determine how many stitches you will need for your overall headband. At this point, you can determine if you want your stitches to run horizontally (sideways) or vertically (up and down). For all my crochet headbands, I worked the stitches vertically, meaning my initial chain was the overall length/circumference of the headband and I built up the height (the number of rows) of the headband. For my knit headband, I started off with the height of the headband (the number of stitches I casted on was the height of the headband) and built up the length of the headband (the number of rows is equal to the overall length/circumference). I aimed for these dimensions for all my rectangles: 19-20″/48-51 cm in length and 4-4.5″/10-11.5 cm in height. You can reference this size chart I found on Pinterest HERE if you want to see general headband size recommendations for different ages!
For example, if you have determined that approximately 7 stitches equals 2″ in the alpine stitch, you can use this ratio to determine how many stitches you will need for 20″ (7 sts/2″ = x/20″). If x is the number of stitches you are trying to determine, you can cross multiply and x equals 70 sts. Another way to think of it is: there are approximately 3.5 stitches for every 1″. If I want 20″, I need to multiple 3.5 by 20, which is equal to 70! Once you have determined how many stitches you will need, you can begin crocheting!
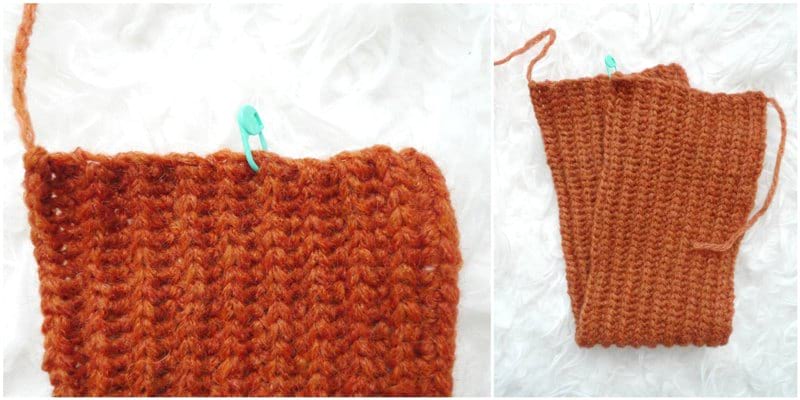
STEP 3: Crochet your rectangle using the crochet hook and yarn and the number of stitches you calculated. Do some measurements along the way to ensure that you are on the right track (sometimes I had to start again and decrease or increase some stitches if the rectangle was appearing too long or too short). As you build up the headband, you can wrap it around your head periodically to check your progress and see how you like the length and width.
STEP 4: Once you have completed your rectangle, it is time to do the SEAMING! This part is very fun as you fold the headband in a special way to achieve the beautiful twist. I have detailed the seaming instructions with this step-by-step tutorial below:
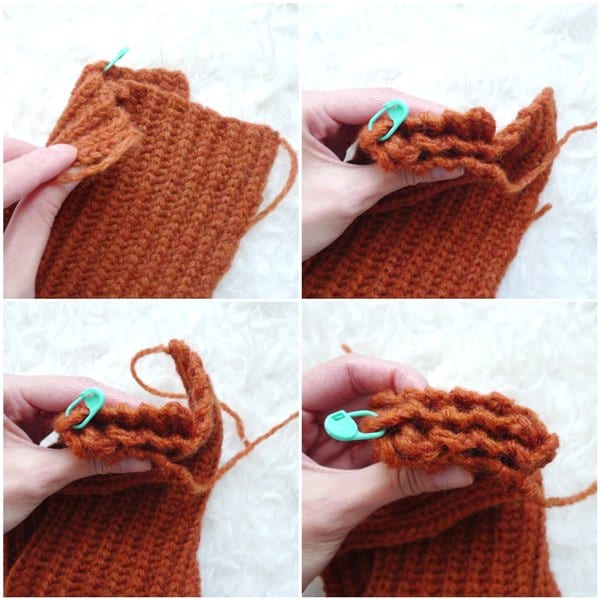
- Use a stitch marker to indicate the halfway point of the short side of the rectangle. Fold the rectangle in half so that the right sides are touching on the inside and the wrong sides are on the outside (this does not matter for stitches that are reversible as both sides look the same). Line up the edge of one side to the stitch marker on the other side.
2. Fold the left side downwards (you have formed a C and the stitch marker is now on the left side). Fold the right side upwards towards the stitch marker (you have formed a reverse C).
3. Using the long final tail and a tapestry needle, seam these layers together – ensure that you are always going through all 4 layers in a back and forth motion. Once you have reached the other side, you can whip stitch back down the other way for extra security.
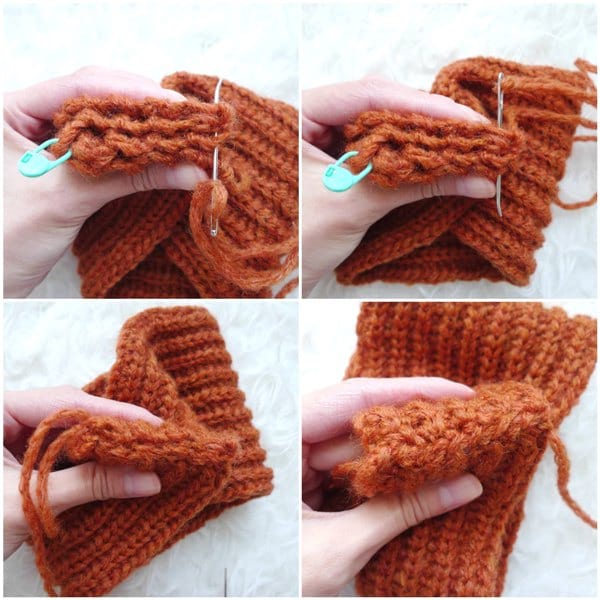
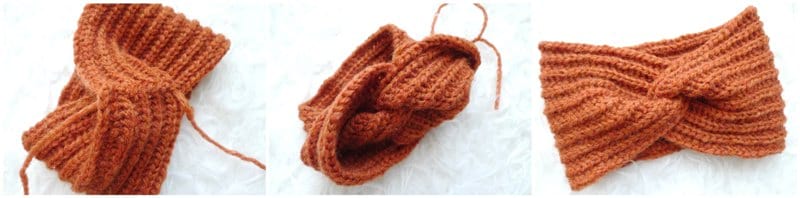
4. Weave in your ends, flip the headband inside out, and you are done! A beautiful twist has been created at the seam!
Please watch this video below to see me demonstrate the twist seaming instructions:
@allaboutami Get ready to do the twist ➰ ##crochetheadband ##howtocrochet ##howimadeit ##crochettok ##yarnlover ##knitheadband
♬ SUNNY DAY – Matteo Rossanese
Here are the PATTERNS that I have written out for the various stitches that I used! Note that for the crochet headbands, you can increase the number of initial chains to increase the circumference of the headband and increase the number of rows to increase the height of the headband. For the knit headband, you can increase the number of cast on stitches to increase the height of the headband and increase the number of rows to increase the cirumference of the headband.
**********************
Ribbed Look (HDC-SL-BLO) – please reference my Dusk Cape blog post HERE and video below to see how to work this stitch!
Materials:
- Chainette Yarn (level 4 worsted weight) – approximately 35 g/92 yds
- 4.5 mm hook
- Yarn needle
HDC-SL-BLO: YO (yarn over), insert your hook into back loop of next st. Yarn over, pull up a loop, pull same loop just created directly through remaining 2 loops.
Gauge: 17 sts and 16 rows = 4″ in HDC-SL-BLO
Chain 81
Row 1: Starting in second st from hook, hdc across. (80)
Row 2: Chain 1, turn. Starting in second st from hook, HDC-SL-BLO across. (80)
Row 3 – onwards: Keep repeating Row 2 until desired height is achieved. I worked 18 rows.
Fasten off and leave long end for sewing.
Finished Dimensions: 19″ around, 4.5″ tall
**********************
Alpine Stitch – please reference my detailed blog post HERE to see how to work the Alpine stitch and all relevant notes for this special stitch! You can see this stitch in action in the video below:
Materials:
- Chainette Yarn (level 4 worsted weight) – approximately 43 g/113 yds
- 4.5 mm hook
- Yarn needle
Gauge: 14 sts and 15 rows = 4″/10 cm in Alpine Stitch
Chain 71
Row 1: Starting in 3rd chain from hook, dc across. (69 sts)
Row 2: Chain 1, turn. Starting in second st from hook, sc in each st across. (69 sts)
Row 3: Chain 2, turn. Dc in first st. *Fpdc around the dc below the next st, dc in next st*, repeat from * till end. (69 sts)
Row 4: Chain 1, turn. Starting in second st from hook, sc in each st across. (69 sts)
Row 5: Chain 2, turn. Dc in first 2 sts. *Fpdc around dc below next st, dc in next st*, repeat from * til last st. Dc in last st. (69 sts)
Row 6-17: Repeat Rows 2-5 or until desired height is achieved.
Fasten off and leave long end for sewing.
Finished Dimensions: 19.7″ around, 4.5″ tall
**********************
Single Crochet in FLO
Materials:
- Chainette Yarn (level 4 worsted weight) – approximately 25 g/66 yds
- 5 mm hook
- Yarn needle
Gauge: 14 sts and 14 rows = 4″/10 cm in Single crochet in FLO
Chain 68
Row 1: Starting in second chain from hook, sc across. (67 sts)
Row 2: Chain 1, turn. Starting in second st from hook, sc in front loops only. (67 sts)
R3-15: Repeat Row 2.
Finished Dimensions: 19″ around, 4.3″ tall
**********************
Knit Stockinette
Materials:
- Chainette Yarn (level 4 worsted weight) – approximately 30 g/80 yds
- 5.5 mm needles (any cord length or flat needles)
- Yarn needle
Gauge: 18 sts and 23 rows = 4″/10 cm in stockinette
Cast on 25 stitches.
R1: Purl all stitches. (25)
R2: Knit all stitches. (25).
Repeat R1 and R2 (stockinette stitch) until desired length. I continued until Row 113.
Finished Dimensions: 19.5″ around, 5.5″ tall (with curled edges reduces to about 4.5″)
***********************
These headbands are so chic and I LOVE how the twist is created and incorporated into the seaming! It is so fun using your favourite stitches to create different textures and looks!
I hope you enjoy working up these headbands and wearing them! They would make quick gifts for loved ones, and they are wonderful stash-busters too! They are so fun to make and it is such a thrill when you flip the headband inside-out to reveal the beautiful twist. Thank you for reading this post, and I hope you love this technique and are inspired to try to make your own twist headbands/earwarmers as well!
You can save this tutorial and sample patterns to your Pinterest boards! Thanks for your support, everyone!
Note: Thank you to Lion Brand Yarn for providing the yarn for this blog post and pattern!