***You can purchase an INEXPENSIVE AD-FREE PDF of this pattern on Etsy HERE and on Craftsy HERE! This beautifully formatted PDF includes the step-by-step pictures and is a total of 7 pages including the cover page! Note that this is the step-by-step blog post – the free pattern can be found HERE!
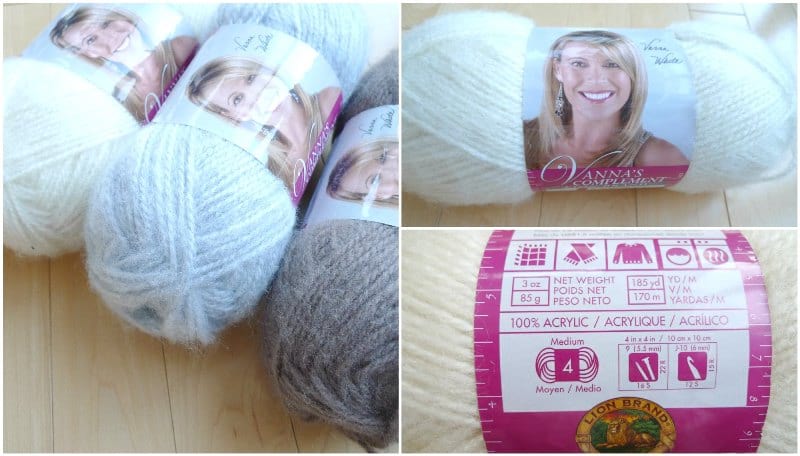
As soon as we returned from the Lion Brand Blogger Bash, Ryan and I started designing our Chinese New Year Dog as Chinese New Year was right around the corner approximately a month away! We picked up this Vanna’s Complement in potential dog colours (beige, grey and taupe) from the Lion Brand Yarn Studio and were excited to begin working with it! Vanna’s Complement is a level 4 worsted weight yarn that is 100% acrylic- it is similar to Vanna’s Choice except that it has a fuzziness to it!
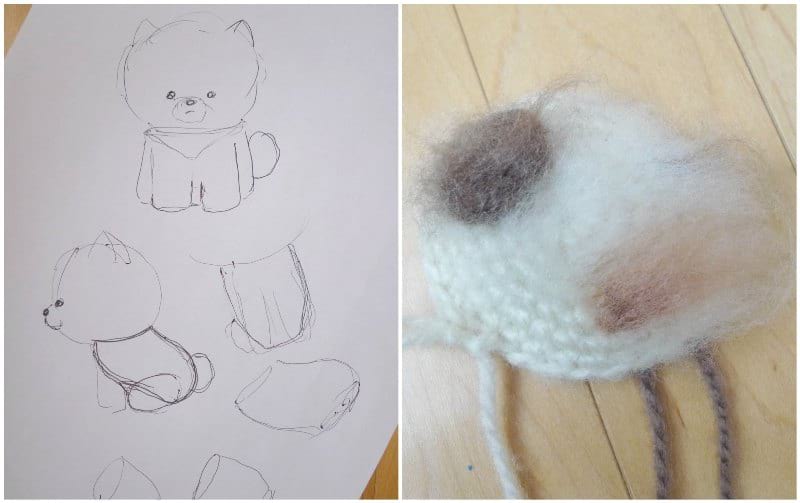
Ryan did this adorable sketch of a shiba inu sitting down with pointy ears and body curving towards the back. We wanted our dog to be fuzzy, so I crocheted a test swatch in the round and Ryan attempted to agitate the fibers with a dog slicker brush! The last time we used this technique of fuzzing up yarn with a dog slicker brush was from way back in 2011 with the Valentine Teddy and Fuzzy White Bear– it was neat revisiting this technique again! We also experimented with crocheting a brown piece and attaching it to the beige piece, but we did not like how it was looking. Thus, Ryan tried out a brand new technique: adding colour with a Sharpie marker and then smoothing and blending it with the dog slicker brush! We have used a pink Sharpie marker to add cheeks to amigurumi before in the past, but we have never used it to actually “paint” or colour the fur! We were excited with how it was looking!
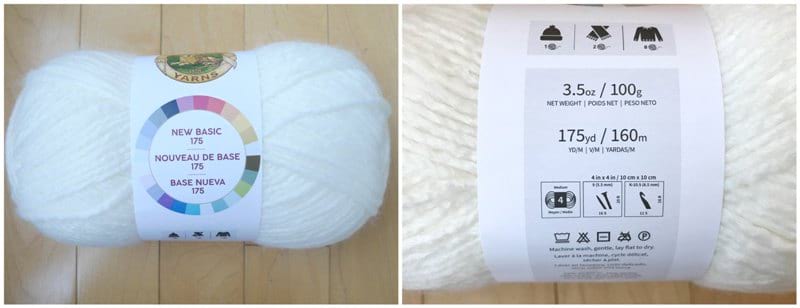
We actually completely finished crocheting our shiba inu but then experienced a setback: we found out that Vanna’s Complement Yarn has been discontinued, and it is nearly impossible to get a hold of the “Fisherman” colour that we used! I know that many people like using the exact same yarn I used, so we decided to try and crochet the same dog we had just designed (following the pattern I had written down) with another fuzzy worsted weight yarn that is NOT discontinued: New Basic 175 in “Cream”! This yarn is a wool blend as it is 25% wool and 75% acrylic!
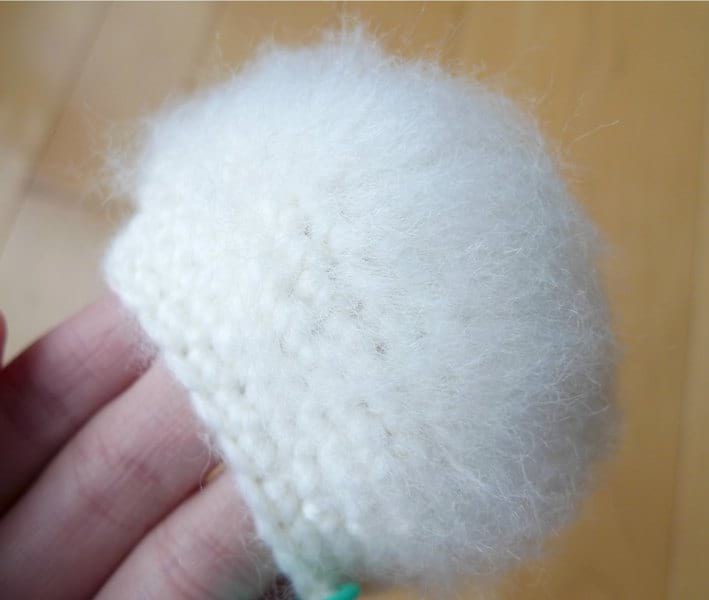
This yarn fuzzes up very well with a dog slicker brush (even better than Vanna’s Complement, probably due to the wool component) as you can see in the picture below! Ryan brushed the fibers in all different directions to draw them out with the wires of the brush, being careful not to fuzz up the working yarn. We took some videos of the brushing and have written out some tips that can be found later on in this blog post!
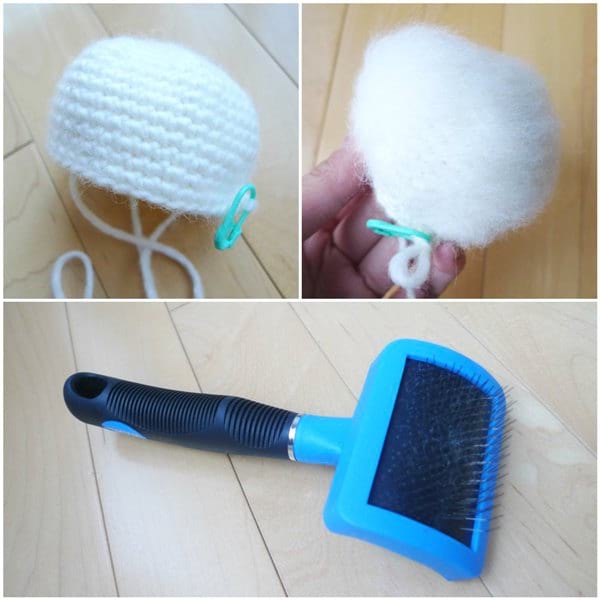
Below you can see what the yarn looks like unbrushed towards the bottom and fuzzed up towards the top! It’s amazing how the texture and yarn completely changes when you apply a dog slicker brush to it! Many people have expressed how they do not like working with fuzzy or eyelash yarn as it is extremely difficult to see the stitches and you need to “feel” for the next stitch. Using a dog slicker brush is fantastic because you can easily see your stitches as you are working, and the fuzzing occurs AFTER the crocheting has been complete.
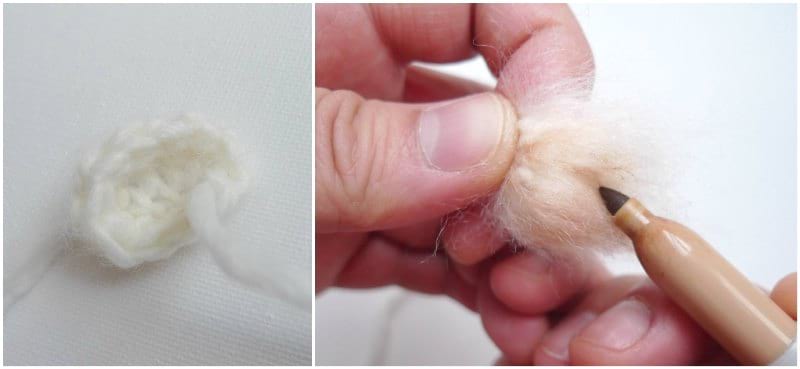
We then got some 9 mm safety eyes and determined where we wanted to place them (without adding the plastic washer backing).
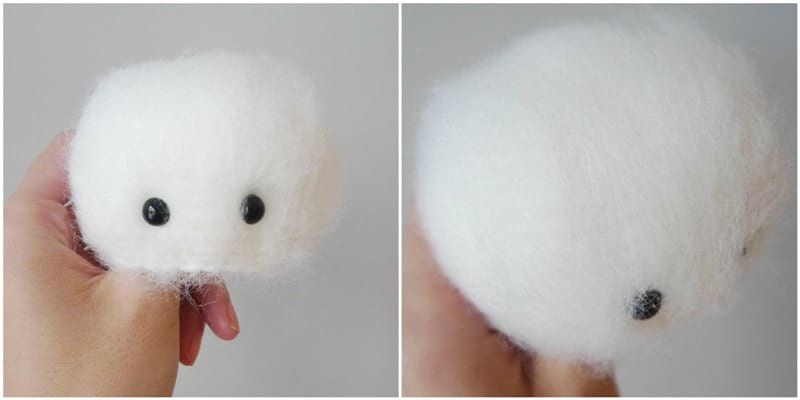
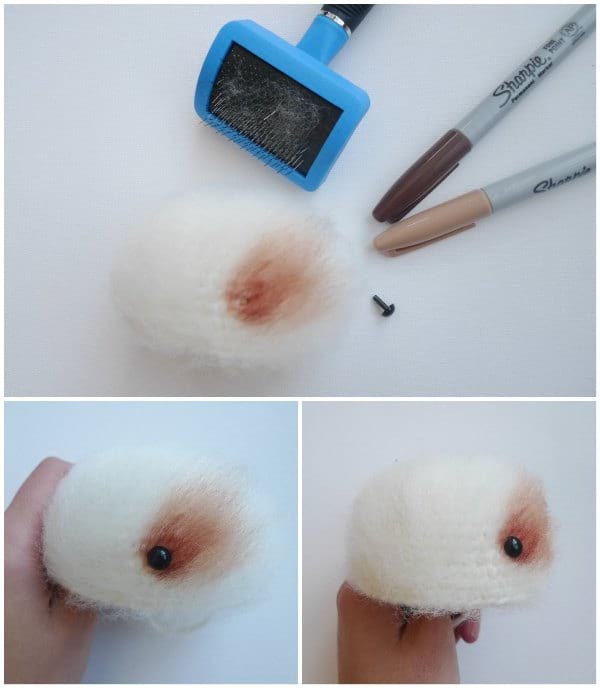
After removing the eye and widening the hole with a crochet hook, Ryan then added colour around the eye area with some Sharpie markers (more detail in video below)! He applied the marker to the brushed fur, NOT the crochet stitches themselves. After applying colour, he then used a dog slicker brush to smooth out and blend the colour. First he used the light brown marker and then the dark brown marker to add greater depth. After he was happy with the colour, he then placed the safety eye back in and then repeated on the other side. He did not actually secure the plastic washer backings into place until the snout was later added on to ensure he was happy with the placement!
We crocheted a snout, fuzzed it up, added an oval safety eye for the nose and then added a little mouth with embroidery floss. Rather than adding the plastic washer backing to the oval nose (which would make the snout protrude out too much), Ryan secured it into place with hot glue. Ryan then attached the snout to the head.
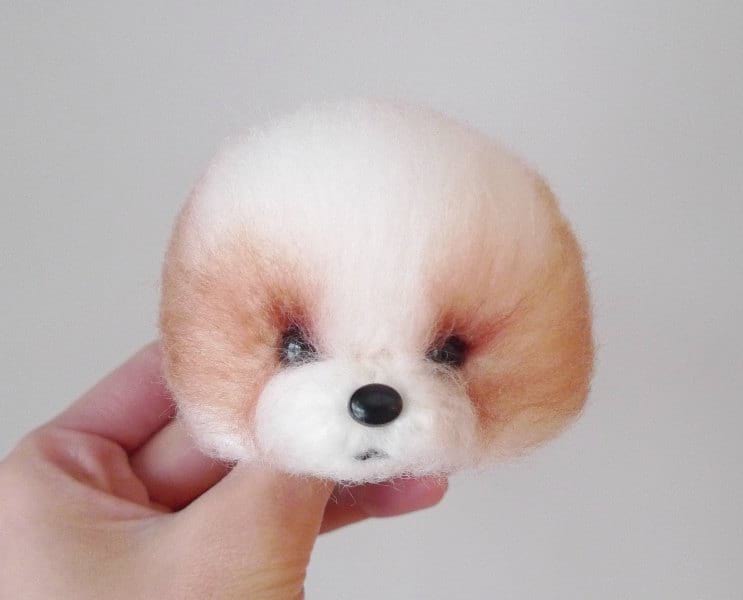
Next, I crocheted some small floppy ears. We decided to give some options for our dogs as our first dog (the shiba inu) had pointy ears and a smaller snout. Ryan fuzzed up the ear and added colour with a Sharpie.
He then attached the ears to the sides of the head as shown below.
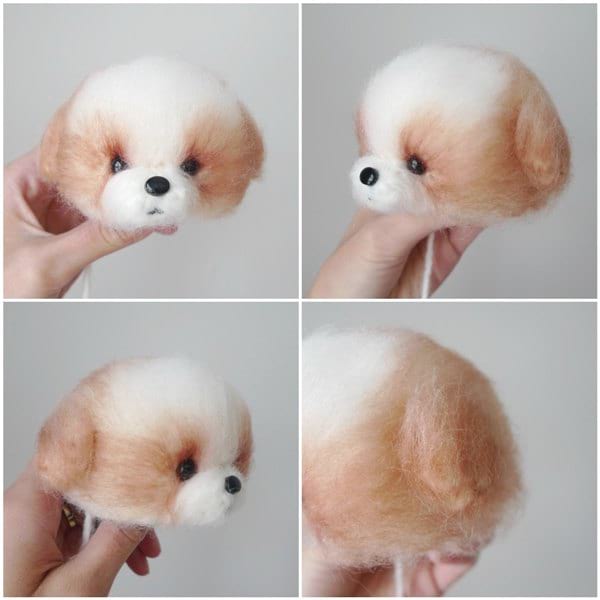
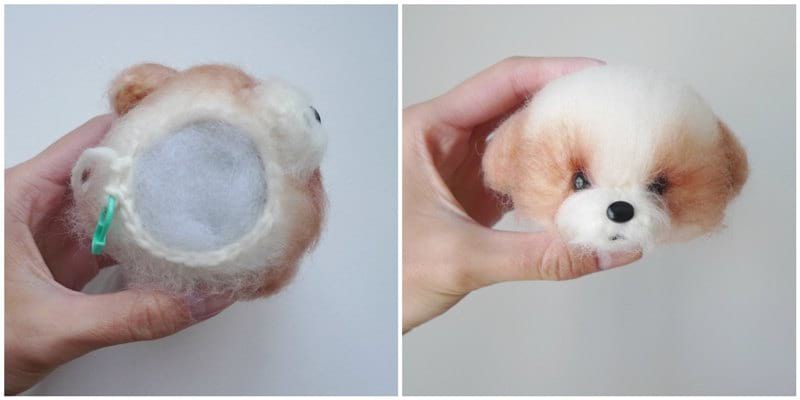
After the eyes, snout and ears were added, it was finally time to close up the bottom of the head!
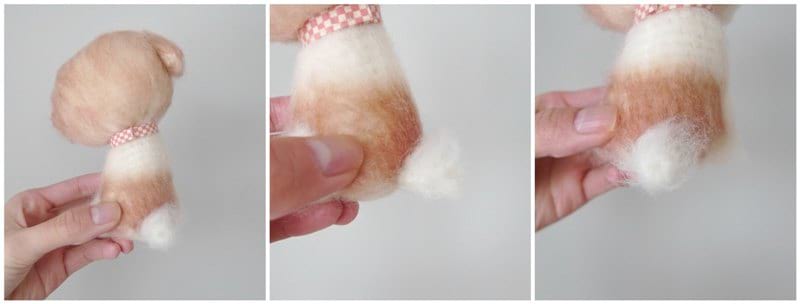
For the body, I worked some uneven increases and decreases to get this shape below! One side has the protruding belly while the other side has the protruding bottom! The top (neck) is slanted downwards as we thought it would be cute if the puppy’s head was angled slightly downwards with a tilted head! Ryan then fuzzed up the body and added colour towards the bottom half.
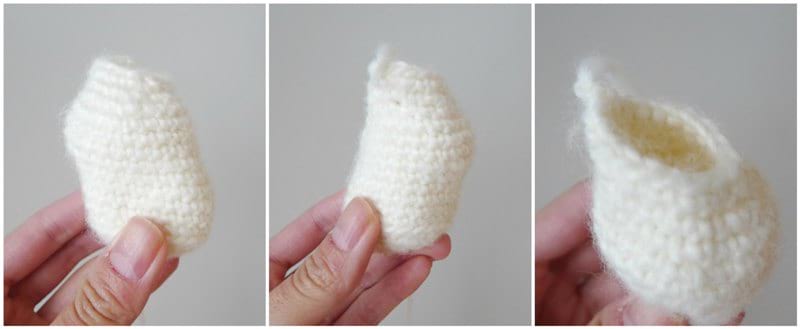
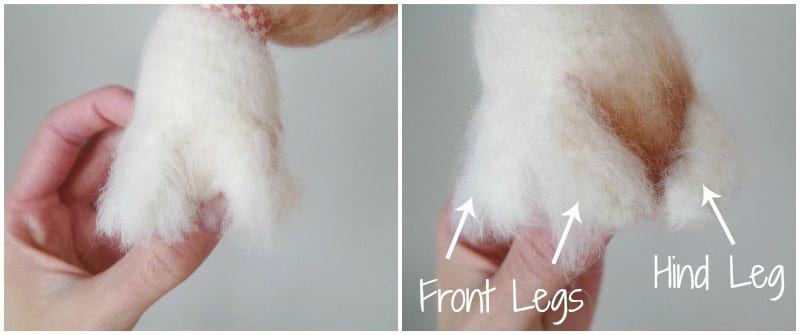
I then crocheted the rest of the limbs: two front legs, a hind leg, and also a tail!

Ryan sewed on the two front legs and one hind leg as shown below. There is only one hind leg because with the way he is sitting, his other “hind leg” would be tucked under his bottom as he would be sitting on it!
Ryan then attached the tail at the back ! In this picture, you can also see the simple little checkered collar that Ryan made for this pup!
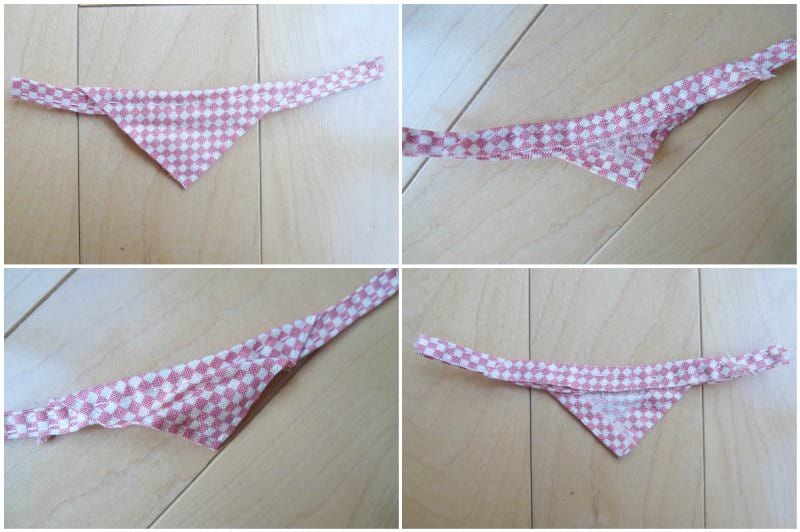
For our shiba inu, Ryan cut and sewed this triangular bandana! He cut the same straight collar and a triangle shape, folding the top of the triangle over the straight collar. He then ruched the front of the triangle to get a creased look, securing it with hot glue.
As mentioned above, we took some videos of Ryan demonstrating how to brush the yarn with a dog slicker brush and how to add colour. You can see it all in action here:
Important Tips (as shown in the video):
- Brush at multiple angles to pull out the fibres.
- Edges need to be brushed out too.
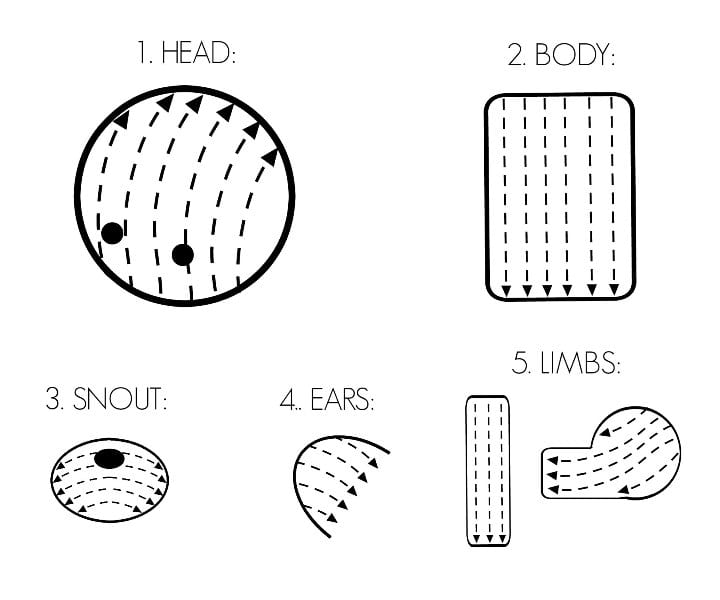
- After fibres have been brushed, comb fibers into the same direction for the final look (see graphic below showing direction of fur for each component)!
- Whenever brushing parts (particularly the limbs since they are so small), protect the working yarn or yarn end as you do not want it to tear or break.
- After tip of leg is brushed, brush out the other end.
- For limbs, after grooming hair in the same direction, trim excess fur (another area that may need trimming is the snout, but do this after the snout has been attached to the head).
- For head, determine position of safety eye. Widen space for the eye with a crochet hook to mark its position as you will be adding colour around this space (eye area).
- Add colour to the brushed fur only. Smooth out and blend the colour with the dog slicker brush
- Layer more color for greater saturation. A second darker colour can be added for greater depth and tone (always start with the lighter color first though).
- When colour around eye area is complete, place safety eye back in to check for symmetry.
- Note that it smells bad when you are adding colour with the Sharpie Markers (we recommend wearing a mask). This smell will go away after a day or two as the ink dries.
- Always brush out and add colour to the individual components BEFORE attaching them together.
- After attaching the limbs to the body and hiding the yarn ends, brush out the attachment areas to blend the fur together.
***VERY IMPORTANT: Work a test swatch (for example the first 6 rounds of the head) with your yarn, especially if you are not using the same yarn that we did. Some yarns may not fuzz up as nicely and may shed too much. We recommend choosing the same yarn that we used for the best result! Practice brushing the fibres to make sure the yarn can be fluffed up and the effect is to your liking. Practice adding colour with the Sharpie marker and smoothing it out before doing all these techniques on your actual dog!
The graphic below shows you the direction in which you should comb the fibers after the yarn has been fuzzed up with the dog slicker brush:
Here are our finished Chinese New Year Dogs! We’ve decided to name these two pups Lulu (the shiba inu) and Timbit! My friend Natalie who blogs at Coquette mentioned how the shiba inu kind of looks like her dog Lulu. Natalie was the first person to give me my big break by commissioning me to design an amigurumi for a big craft site (the Spring Bunnies) after I had only been blogging for 2 months. I will never forget how excited I was (thanks again, Natalie)! It’s perfect too because Natalie’s dog Lulu was born in the Year of the Dog, so this is her year! A reader on Instagram suggested the name Timbit, which is a bite-sized donut ball that the girls love- I think it’s such a cute name! It’s always fun trying to come up with their names, and we always greatly appreciate your help and suggestions!
![]()
I was absolutely blown away when Ryan showed me the brushed fur look he had achieved with the dog slicker brush! I knew this would take our amigurumi to the next level as the stitches almost melt away as the yarn gets a felted look! I cannot believe how adorable and life-like they look!
![]()
Here is our traditional photo showing all our Chinese New Year Amigurumi! It’s unbelievable how the Dogs are our 8th amigurumi in this series that we started at the beginning of our blogging journey! From left to right and starting with the back row, we have: Chinese New Year Doll, Dragon, Lambert, Pony, Monkey, Dogs, Rooster and Snake! All the free patterns and step-by-step tutorials can be found on my blog!
![]()
The free pattern for our adorable Chinese New Year Dogs can be found HERE! We are so proud of how our amigurumi puppies turned out, and it’s so neat seeing our amigurumi designs evolve over time. As you know, I love learning and discovering new techniques, and we are absolutely thrilled that the fur-brushing technique and adding colour with a Sharpie marker worked so well! I still vividly remember sitting down at our dining room table and planning out our Chinese New Year Doll (our first original amigurumi design), and I am so thankful that seven years later, we have kept our tradition going, and that Ryan and I are still working together to dream up our next creation! Without a doubt, these dogs would not be possible without Ryan’s brilliant and ingenious techniques, and I am so thankful that he is so involved and that we can craft together- we make a great team! We hope you enjoyed reading about the making of these puppies and that you feel challenged to try out some new techniques! You can sign up for my newsletter HERE to get all my latest updates and blog posts sent to your mailbox!
![]()