Recently I decided to make myself another “Cabled Beanie” with some slight modifications to the pattern that I designed last year HERE! Firstly, I wanted to make it smaller since my original beanie actually stretched out quite a bit and is loose when I now wear it. I also wanted to see if I could use just one skein of yarn, make it less slouchy, and change up the pattern by framing the cables with front post double crochets!
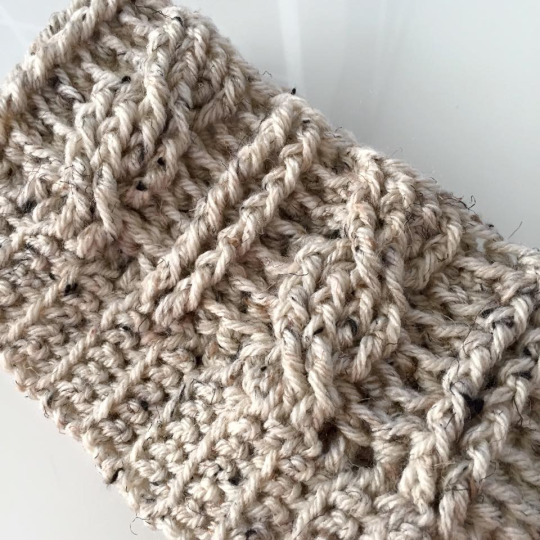
I decided to use “Oatmeal” in Lion Brand Yarn’s Vanna’s Choice to get some beautiful texture and gradient, and it was a popular choice when I shared this picture below on my social media!
***************************************
Here is the adapted pattern for version 2 of my Cabled Beanie! PLEASE check out my full blog post HERE to see detailed step-by-step instructions on how to work the cables and do the ribbed band!
***You can purchase an INEXPENSIVE AD-FREE PDF of this pattern on Etsy HERE! This beautifully formatted PDF is a total of 11 pages including the cover page. It includes the step-by-step picture tutorial and FOUR patterns: the Adult Cabled Slouchy Beanie, Toddler Slouchy Beanie, Chunky Cabled Beanie, and Cabled Beanie version 2!
Materials:
- 6 mm Clover Amour crochet hook
- Medium worsted weight yarn (I used 1 skein of Lion Brand Yarn’s Vanna’s Choice in “Oatmeal”– if a slouchier look is desired, a second skein will be needed)
- Optional: yarn needle to seam up beanie; Clover Pom Pom Maker or Faux Fur Pom Pom (I blogged about these faux fur pom poms HERE)
Special stitches:
- Front Post Treble Crochet (Fptc): Yarn Over (YO) twice, insert hook from front to back around post of stitch indicated. YO and pull up a loop, [YO and draw through 2 loops on hook] 3 times.
- Back Post Double Crochet (Bpdc): YO, insert hook behind post of stitch (insert hook from back to front of stitch), YO, pull up a loop, YO, (pull through 2 loops) twice.
- Front Post Double Crochet (Fpdc): YO, insert hook behind post of stitch (insert hook from front to back of stitch), YO, pull up a loop, YO, (pull through 2 loops) twice.
Ribbed Band:
Chain 6
R1: In back loops only, Sc 1 in second chain from hook and in each chain across (5 sc).
R2-50: Chain 1, turn. In back loops only, Sc 1 in second chain from hook and in each chain across (5 sc).
My ribbed band measured 18″ or 46 cm. Adjust this number based on your own head size (keep in mind that this will stretch over time).
Fasten off and leave long end for sewing. Sew short ends together to form ribbed band.
Cabled Body:
***In each round, the Ch 2 does not count as a stitch. When joining at the end of each round, join to the stitch indicated (NOT the Ch 2) to make an invisible seam.
Join yarn with sl st at any point around edge of band.
Round 1: Chain 2, work one double crochet in same st as Chain 2. Work 49 dc as evenly as possible around edge of band. Join with sl st to first dc (50 dc). [If adapting the pattern, make sure your final number of dc’s is a multiple of 10.]
R2: Chain 2, Bpdc around first dc from previous round (same dc you joined to from Round 1). Bpdc around next st. Work cabling: {Skip next two dc, 2 Fptc around next 2 dc. Fptc around first skipped dc and next dc}. 2 bpdc in next 2 sts. 2 fpdc in next sts. *2 bpdc in next two sts. Work cabling: Sk next 2 st, 2 Fptc around next 2 st. Fptc around first skipped st and next st. 2 bpdc in next 2 sts. 2 fpdc in next 2 sts*, rep 4 times. Join with sl st to first Bpdc. (5 cables, 5 sets of Fpdc’s and 10 sets of Bpdc’s between each set of cables and Fpdc’s)
R3: Chain 2, Bpdc around first Bpdc from previous round. Bpdc around next st. Fpdc 4. Bpdc 2. Fpdc 2. *Bpdc 2, Fpdc 4, Bpdc 2, Fpdc 2*, rep 4 times. Join with sl st to first Bpdc.
R4: Repeat Round 3.
With rounds 2-4, one set of cables is complete! Keep repeating Rounds 2-4 until desired length.
I was able to go until Round 15 with one skein of yarn (I attempted Round 16 but ran out of yarn half way through the round). My hat measured about 8.5″ or 22 cm in height (including the ribbed band). If you would like a slouchier hat, keep adding more rounds until desired length (my original slouchy beanie used about 1.5 skeins of yarn).
Fasten off and leave long end for sewing. Weave yarn through ends of last round, pull tightly and sew hole shut. Alternatively, seam up beanie by slip stitching or single crocheting opposite ends of the opening together as demonstrated in the video below (beanie shown in video is my Braided Cabled Slouchy Beanie)!
Optional: Add yarn pom pom (can use “Clover Pom Pom Maker”) or faux fur pom pom to beanie (read more about them HERE) and you are DONE!
****Important Note: If you would like to adapt this pattern for a baby, child, teen, etc., please check out this very helpful post by Anne HERE that contains a chart with head circumference sizes (your ribbed band) as well as general hat height (the number of rounds or length of the beanie)!
***************************************
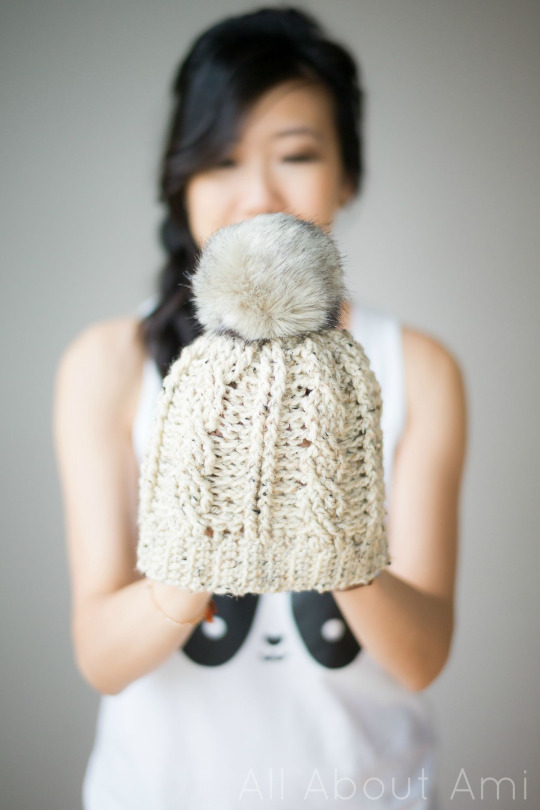
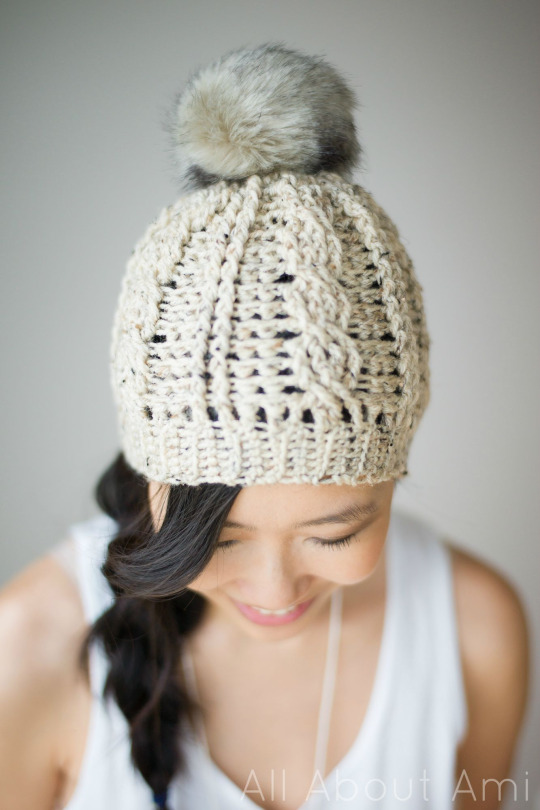
Here is the finished Cabled Beanie that looks so lush with the furry pom pom!
This beanie definitely looks and feels different compared to my slouchy beanie from last year due to the change in size! It’s nice to have different options for headwear as we’re entering fall and winter! {Teething necklace by “LouLoulollipop Finery” and Panda Tank by “Whistle & Flute” in photo below.}

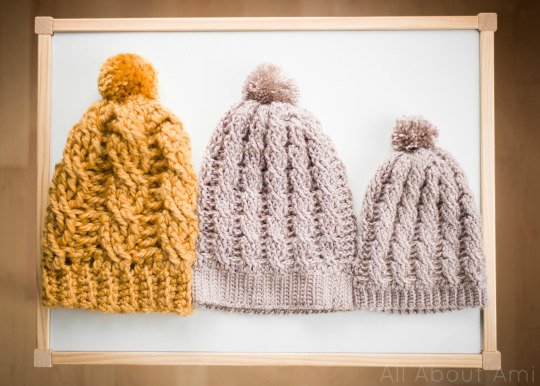
I know my “Cabled Slouchy Beanie” has been on many of your hooks as I’ve loved seeing your pictures on Instagram! Keep tagging me and showing me your projects- let me know if you’ll be trying out this new updated version, and don’t forget to check out my chunky version and toddler version as well! Happy cabling!
[Update: If you love this cabled beanie, check out the “Braided Cabled Slouchy Beanie” with a double brim, luscious braided cables, and the perfect amount of slouch! Free pattern found HERE!]
![]()
This pattern is an original pattern by Stephanie Lau of All About Ami. Please do not claim this pattern as your own. If you wish to share this pattern, you may link to this pattern but please do not reprint it on your site. You may keep a copy for your own personal use but please DO NOT sell the pattern or distribute it.
You may sell products made from this pattern but please clearly credit the design to me, Stephanie Lau of All About Ami, and provide a link to my blog www.AllAboutAmi.com. Permission is NOT granted for mass production or factory manufacturing of any kind. Thank you for being respectful and for your understanding!