When we first heard about a new anime called “Attack on Titan” last year, we were intrigued because everyone was raving about how great it was. Ryan and I enjoy watching anime together, so we decided to give this series a try! We were immediately hooked by the premise of the show, the fast-paced action and the suspense and mystery of it. Some parts were a little gruesome for me, so I admit that I covered my eyes at times (this is also how I watch “The Walking Dead” haha).
When we were brainstorming cosplay ideas for our very first time attending Anime Expo 2014 in Los Angeles, we had a good laugh imagining Myla dressing up as a cute chibi Titan (giant humanoids who terrorize the populace), running around and wreaking havoc. My brother Corey then made the observation that Myla should actually dress up as a soldier and pretend to fight the adults dressed as Titans since the proportion would be correct! We thought that would be so adorable, so we set off making an “Attack on Titan” costume for our toddler!
If you are unfamiliar with the series, this is how the soldiers dress with a cropped jacket, belt, straps, boots, harness, and 3D maneuver gear attached to their sides and back to help them swing through the air. We wanted to dress Myla up as “Mikasa” pictured below, a very strong and skilled soldier who also wears a burgundy scarf.

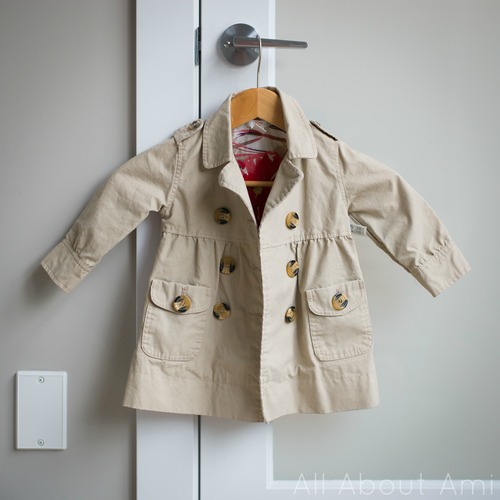
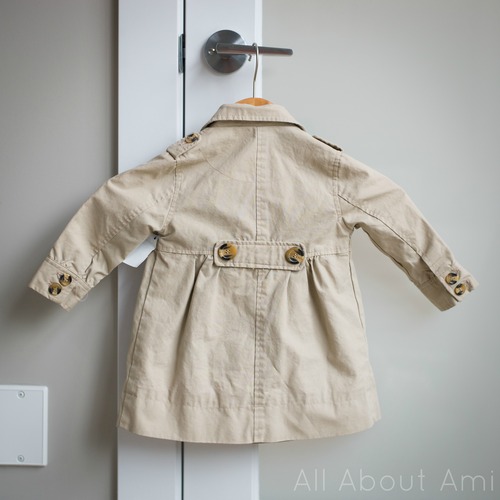
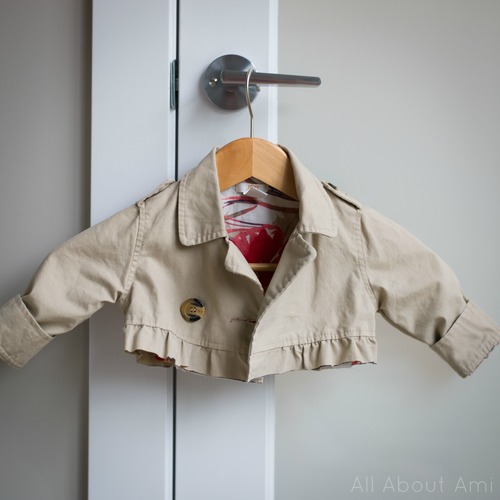
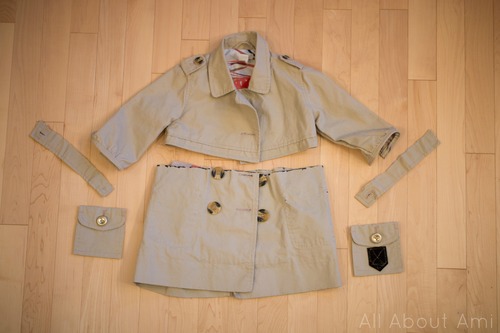
We began looking for a toddler trench coat and were ecstatic to find this one at a gently used kids’ clothing store for only $8! This is what the trench looked like from the front and the back before we heavily modified it!
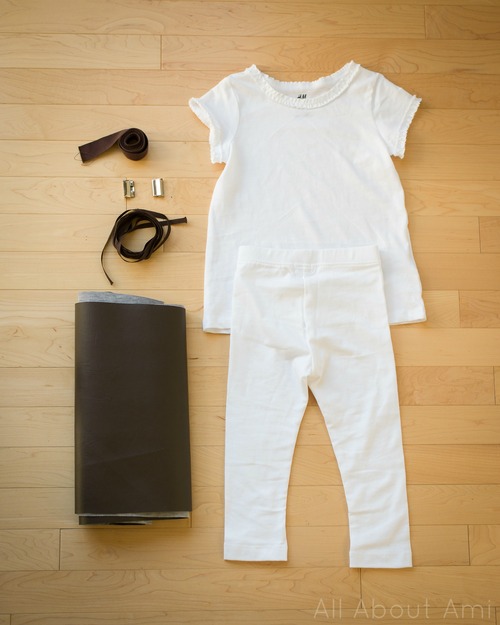
We also picked up this white t-shirt from H&M and some white leggings from Old Navy. From a local fabric store, we purchased some brown canvas material, silver buckles, thin brown straps and faux brown leather.
And now for the modifications! We severely cropped the trench by cutting along the black line…
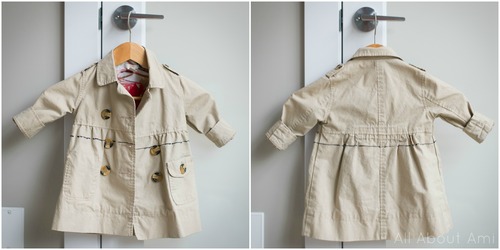
Ta da! This is quite the cute cropped trench, is it not?
We also ended up releasing the ruffled/ruched bottom, reattaching it to make it straight, and cutting off and hemming the sleeve cuffs. In addition, we removed the pockets from the bottom of the jacket so that we could reattach them to the top part, and we replaced all the buttons with gold buttons. It’s amazing how changing the buttons can give a jacket a completely new look!
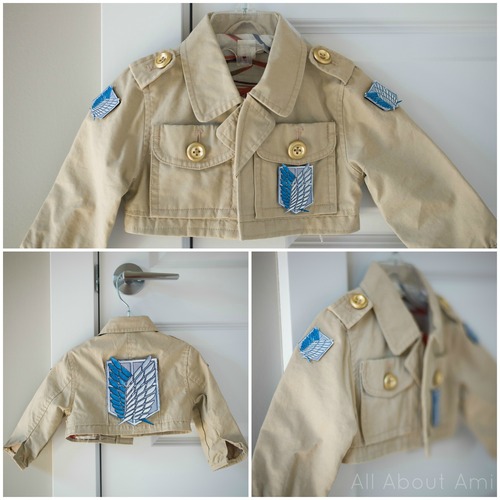
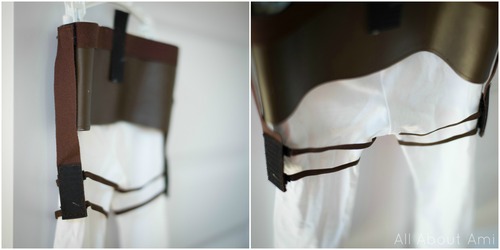
Here is the cropped jacket with the gold buttons and pockets sewed onto the front. We also sewed some velcro backing onto the sides of the arm, the front pocket and to the back.
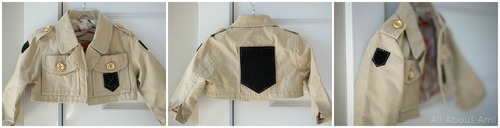
These velcro spots were for the Survey Corps emblems! Ryan found some high resolution pictures of the embroidered emblem, so we simply adjusted the size, printed them off and glued them onto the velcro.
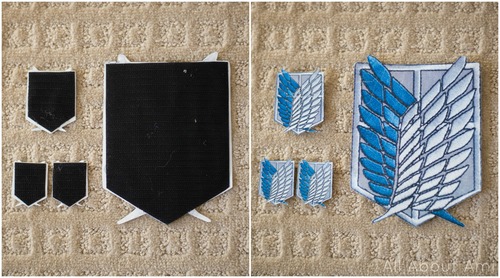
Thus, it was extremely simple to attach these emblems to the jacket since we just had to slap them onto the velcro! Don’t they look great on the jacket? You may also note that we modified the lapel of the jacket as we found that it overlapped too much when Myla wore it.
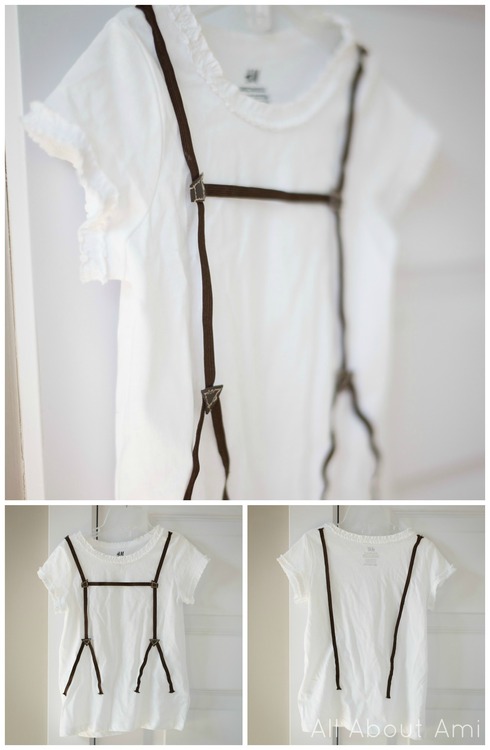
Next we sewed the straps and small pieces of the faux brown leather onto the white shirt. We wanted to secure as much as we could in place so that this would seem like a normal shirt to Myla, not a fancy costume that had too many intricate and complicated parts that she might end up refusing to wear.
We also added some of the brown straps to the leggings and also used the faux brown leather to make the 3D maneuver gear harness. We designed the harness so that it attached onto the leggings with velcro.
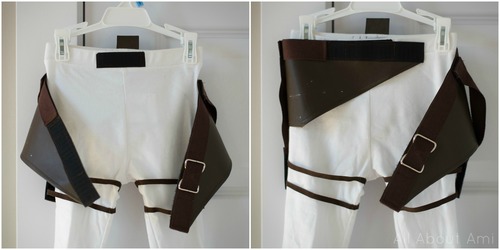
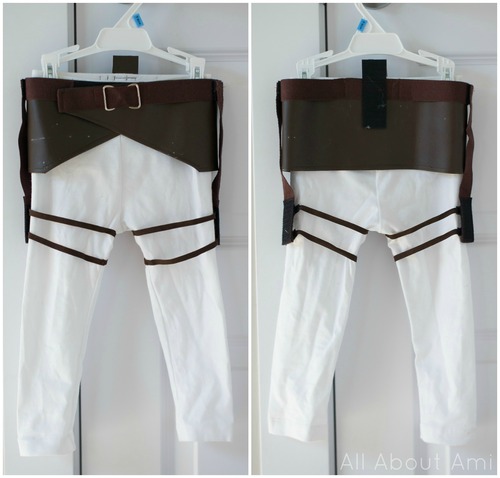
This is what the leggings with the harness looked like from the front and back! To make the belt, we sewed the brown canvas material around the faux leather harness and threaded it through the silver buckle.
We also sewed on velcro pieces to the sides and back of the harness so that we could attach the 3D maneuver gear later on!
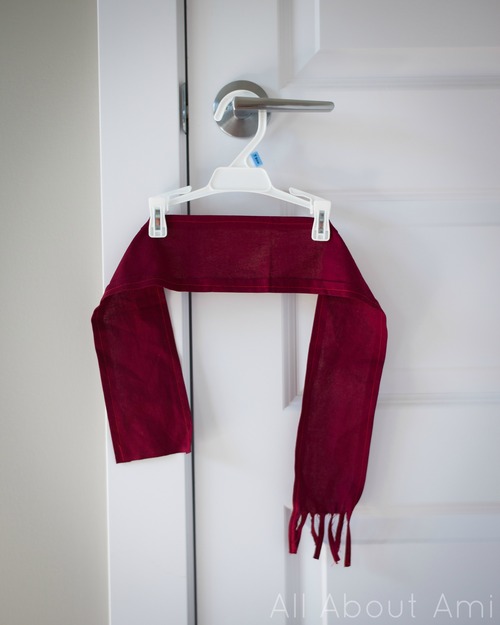
Making Mikasa’s burgundy scarf was simple as we purchased some material, hemmed the edges and cut some fringe along one side!
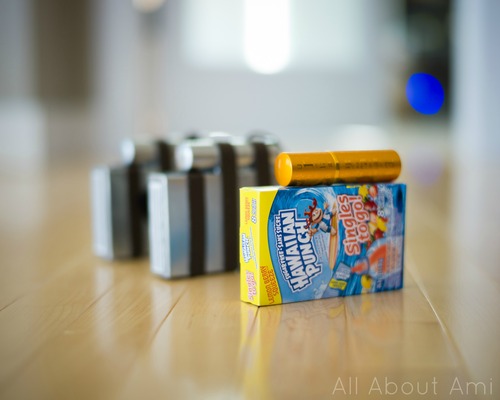
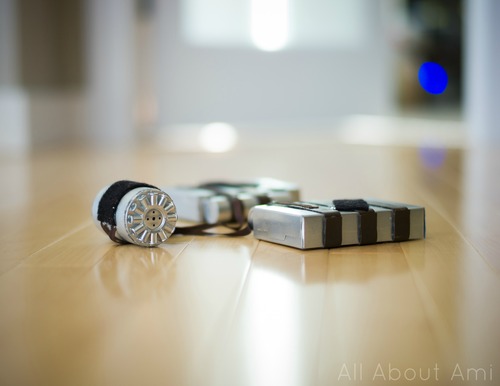
To make the sides of the 3D maneuver gear, Ryan looked around for objects that were the perfect shapes and sizes! We ended up buying some boxes of “Hawaiian Punch” and using some Fragonard perfume atomizers that I had lying around. He glued them together, spray painted them silver, and then glued some of the faux brown leather around it.
For the back part of the 3D maneuver gear, Ryan used the top and bottom part of a glow stick container. I thought it was hilarious how Ryan found these random objects to make the maneuver gear!
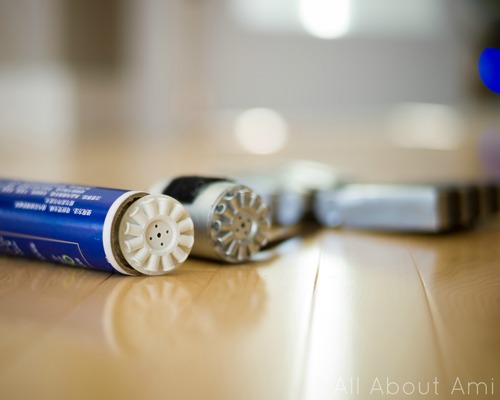
The finished 3D maneuver gear, all spray painted beautifully and ready to be attached onto Myla’s costume!

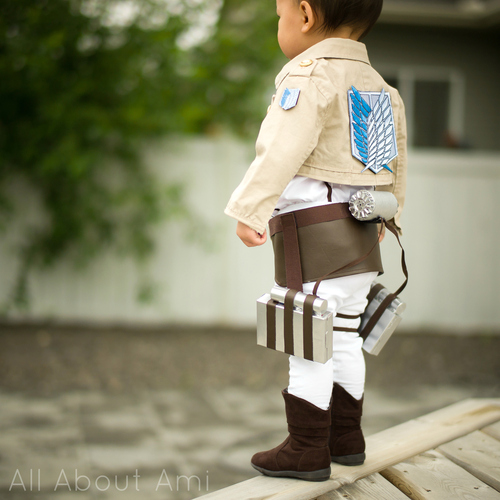
During the week leading up to our trip, Ryan and I worked relentlessly on this costume, staying up till the wee hours of the night. One of our worries was that Myla would refuse to wear it at the Anime Expo and all our hard work would be to no avail! 20-month-olds can be unpredictable, and we weren’t sure how she would handle the crowds or the heat. Thus, we decided to try and take some pictures at home before we left and to make sure that the costume fit. We were so incredibly excited when we put all the costume components on her as it looked so good, and she loved wearing it!
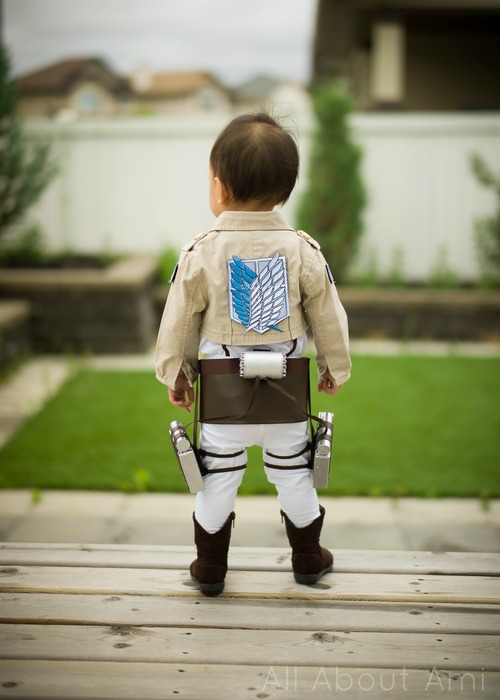
We hoped that she would be just as happy to wear it in Los Angeles!
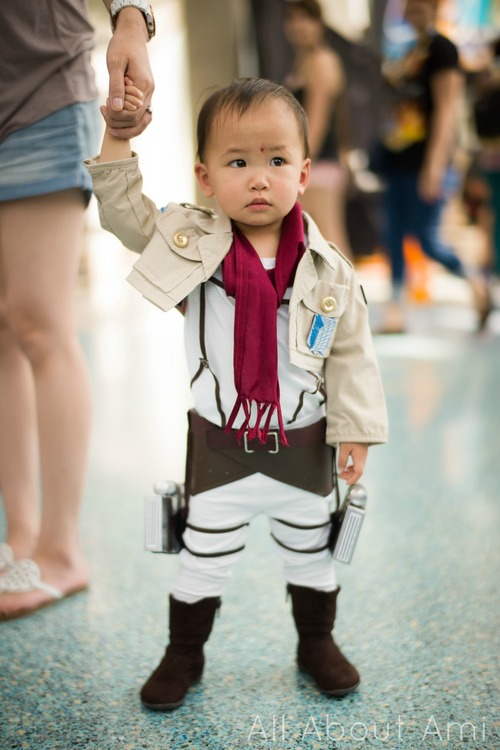
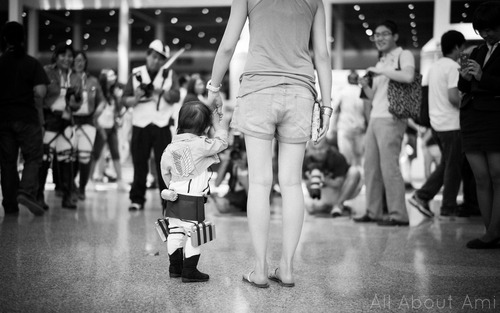
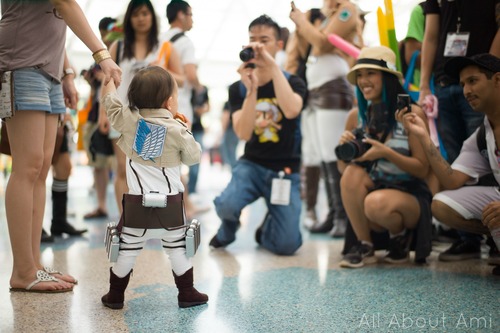
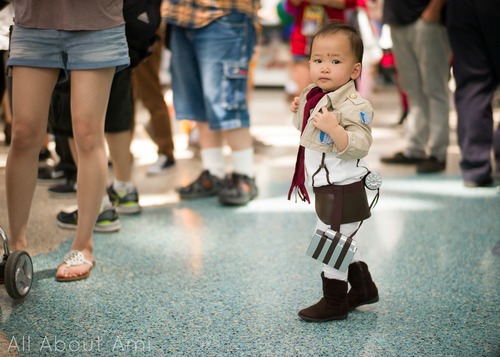
Thankfully, Myla had fun wearing her costume for a little while at Anime Expo! I held her hand the entire time, and she enjoyed walking around the lobby- just look at that darling smile 🙂
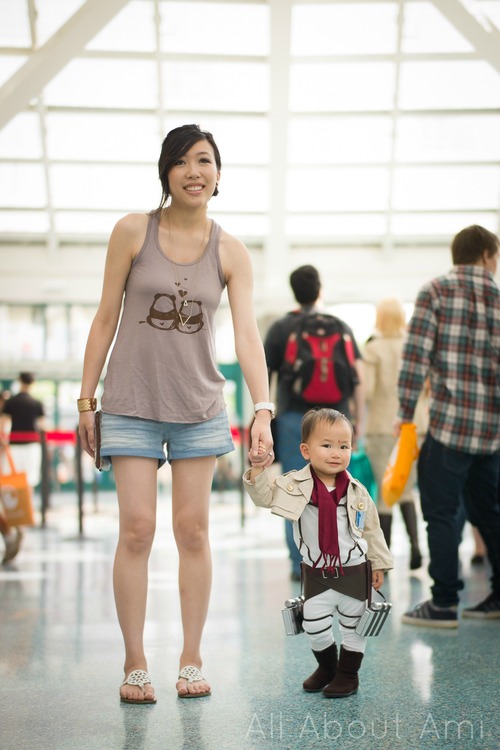
It was amazing seeing her wear the costume that we had spent so much time on, from the jacket and the maneuver gear to the shirt and the leggings. In case you’re wondering, we purchased these cute little brown boots at the same gently used kids’ clothing store for only $4!
We happened to see someone dressed as a Titan walking around the lobby, so we asked if she would take a picture with Myla! Ryan was actually thinking of dressing up as a Titan, but all the costumes we saw on-line were expensive and I feared that Myla would be traumatized seeing her Dad as a Titan. Thankfully Myla was not scared of this Titan, and she was a very nice lady 🙂
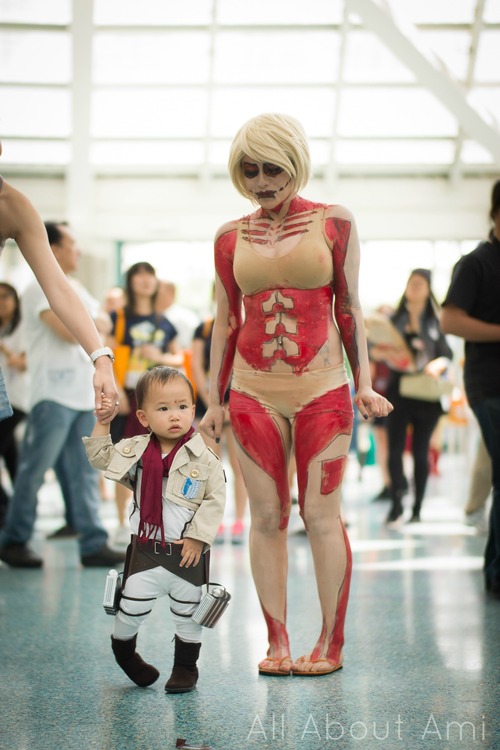
Myla was very popular as everyone who saw her would squeal with excitement when they saw our tiny toddler Mikasa! You can see some adults wearing the same costume as her in the picture below on the left side.
Myla got a little hungry so she started munching on a croissant as she happily posed for people…
After about half an hour, Myla was done wearing her costume as she started taking off her jacket. She couldn’t sit comfortably in her stroller or be carried by us with her maneuver gear and harness, so we changed her back into a comfy dress and continued to explore the rest of Anime Expo that day!
If cosplay and anime is new to you, check out this music video that “The Cosplay Scene” made showcasing Anime Expo 2014. You can see some really intense costumes that people spend the whole year working on, and you can also see our little Myla Mikasa appear in it for two seconds (0:14-0:15)!
Thanks for all your lovely feedback and excitement about this costume! Ryan and I had a lot of fun working on it together, and I’m so glad that I could put my sewing machine to use after it was in hibernation for almost two years (it took me a while to learn how to thread and use the machine again!). The entire costume was inexpensive to make, and we were so proud of our finished accomplishment since we tailor-made each component just for Myla! We hope you enjoyed seeing the making of this costume and that it inspires you to get crafty and try making some costumes for yourself or for your little ones! To read more about our whole Anime Expo experience, what we bought, and who we cosplayed as on the other days (Mei & Totoro, Misty & Togepi), check out the full blog post I wrote up HERE! Happy crafting and cosplaying!