Note: This is the step-by-step blog post of Snuggles the Penguin! The FREE crochet pattern for Snuggles can be found HERE! You can also purchase an INEXPENSIVE AD-FREE PDF of this pattern on Etsy HERE. The printable PDF with step-by-step pictures has been condensed into a total of 4 pages including the cover page!
Let me give you the background story of how Snuggles the Penguin came to be! Back when we were researching cute images of dragons for Chinese New Year, we immediately fell in love with this adorable drawing:
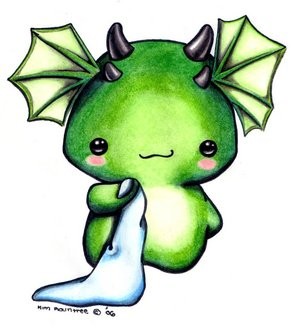
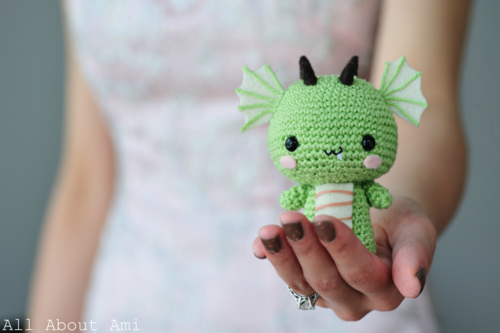
I couldn’t find the source of this image, but I went ahead and crocheted my amigurumi Dragon based on it.
Luckily for me, an astute tumblr follower recognized the artist of the drawing and directed me to Kim Rountree of Oborocharms. I immediately tried to contact her, letting her know that I had made an amigurumi dragon based on the baby dragon she had drawn six years ago. Kim was very quick to get back to me, and she was incredibly gracious, stating that she absolutely loved him and my blog! We developed a friendship from there as we checked out each other’s work: Kim is a very talented artist who makes kawaii stuffies and beautiful charms! Check out her store here!
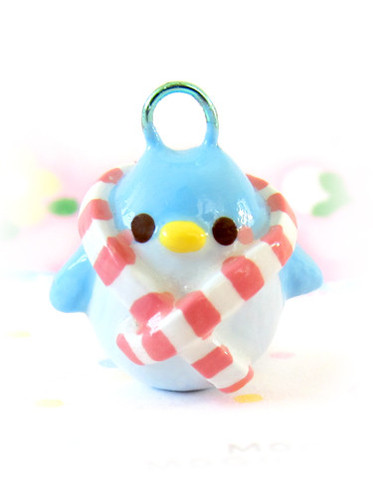
As we continued communicating with one another, we thought it’d be a great idea to do an art trade, particularly since both of us love everything cute and our mediums of art are so different. I had never participated in an art trade before, but I’m so thankful that my very first one was with Kim! And so, we sent each other some suggestions of items we wanted the other person to make. Kim sent me three images of charms she had designed, allowing me to choose which one I wanted to make into an amigurumi. After carefully examining and thinking about the logistics of making each one, we went with this cute penguin wrapped in a scarf:
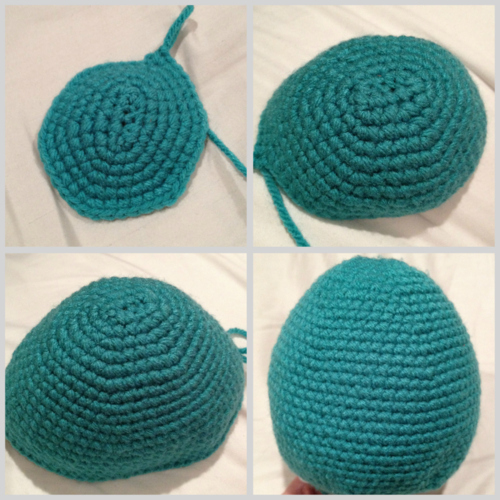
It’s always a fun challenge turning an image/drawing into a 3-D amigurumi! I already had white and yellow yarn at home, but we went out to find the perfect blue colour for his body and reddish-pink yarn for his scarf. Then, we delved right into crocheting his head/body! I crocheted around a series of chain stitches to begin with an oval shape and expanded outwards. He kind of looks egg-shaped as he is more narrow at the top and wider at the bottom.
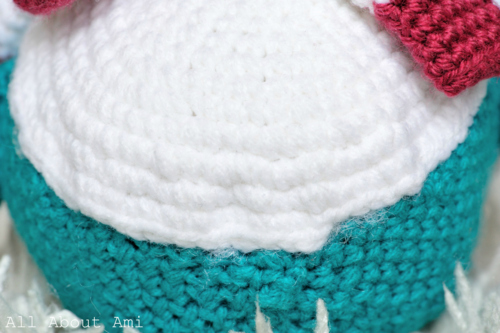
Before closing up his body, I crocheted this round white piece for his belly. We attached this white part onto his body and then attached his safety eyes as we wanted them to be halfway on the blue and halfway on the white (as in the picture). Attaching the white belly was tricky as it ruffled up along the bottom. We ended up attaching the majority of the white belly (along sides and top), attaching the eyes, stuffing the body, closing up the body, adding some stuffing between the body and the white belly, and then attaching the rest of the bottom of the belly.

Next I crocheted a small yellow beak and attached it halfway on the blue and halfway on the white belly (just like the safety eyes).
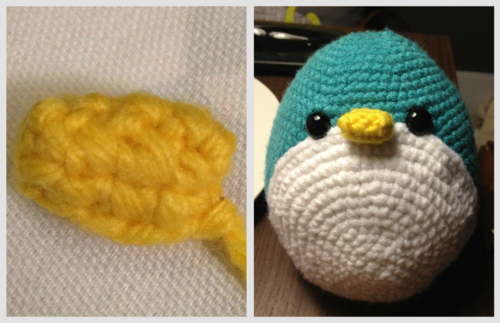
Then we cut out two circular pieces of pink felt and added them for the cheeks! What a sweet face 🙂
I loved the luxurious scarf that Kim had placed around her penguin charm, and it looked somewhat tube-like. Thus, I decided to crochet around a ring to give a thick, sturdy scarf: it also made changing colours easier as I could hide the ends in the tube and make sure the colour changes were on the side of the scarf not showing. I switched between red and white yarn every five rows.
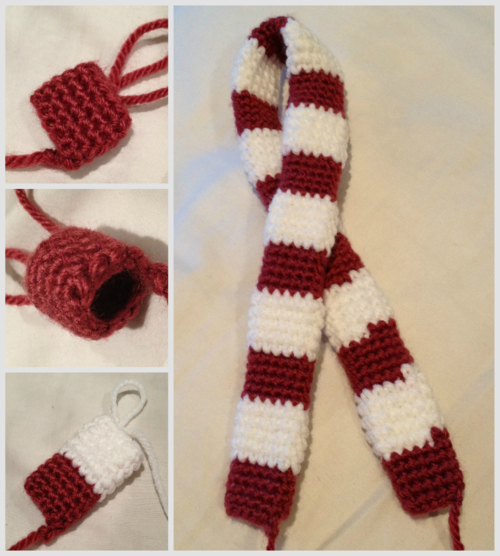
We actually wrapped the scarf around Snuggles and sewed the overlapping parts together.

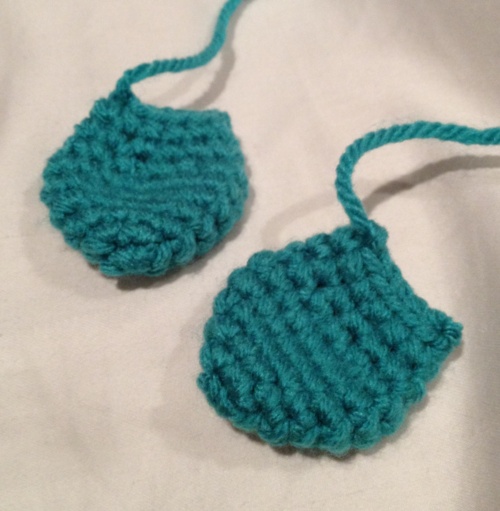
Then I crocheted some little wings for Snuggles the Penguin. Rather than stuffing the wings, I flattened the pieces and sewed the open ends together. We attached them onto the sides of his body under the striped scarf.
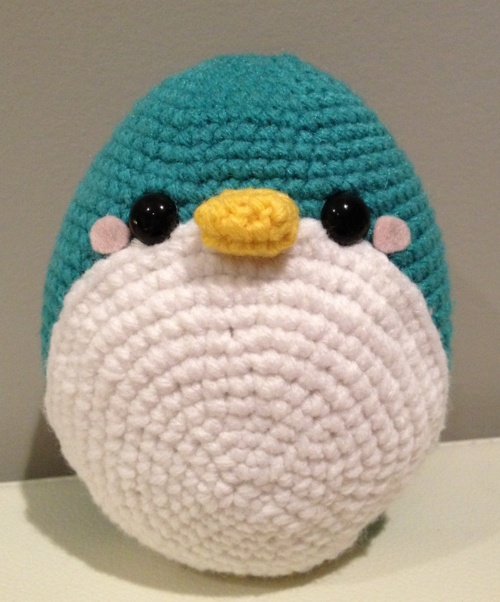
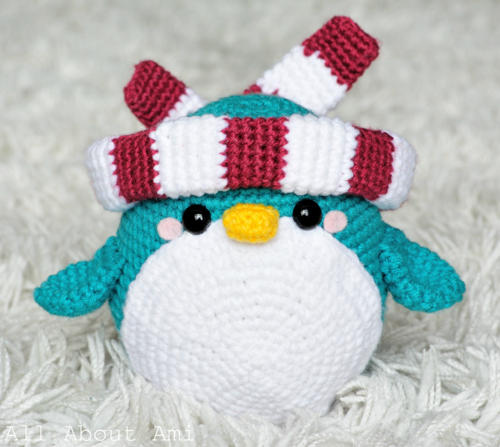
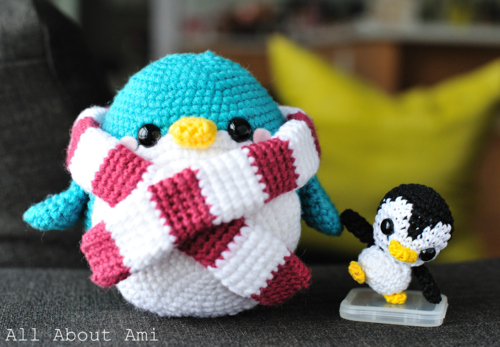
Here is how our Snuggles the Penguin turned out! Do you think he looks like the charm that Oborocharms made?
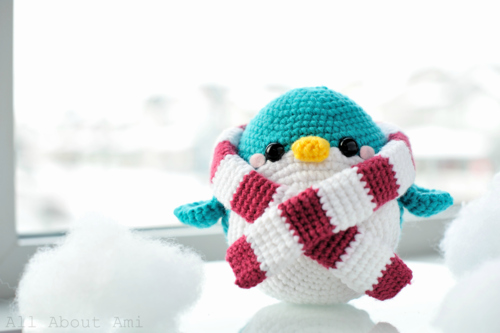
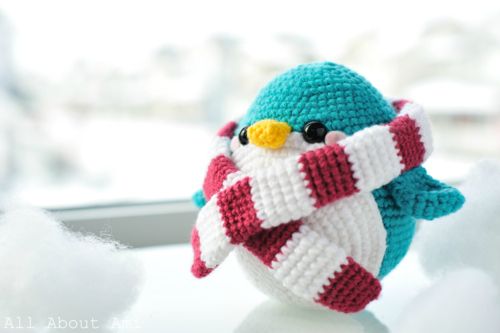
Here is a side view…
Ryan got creative with the fiberfill stuffing as he photographed Snuggles in the “snow”! As we mentioned in the sneak peek, don’t pick a snowball fight with a penguin, because you’ll lose from cuteness overload! Haha, whenever I think of snowball fights, the scenes from “Elf” and “Cloudy with a Chance of Meatballs” always bring a smile to my face 😀

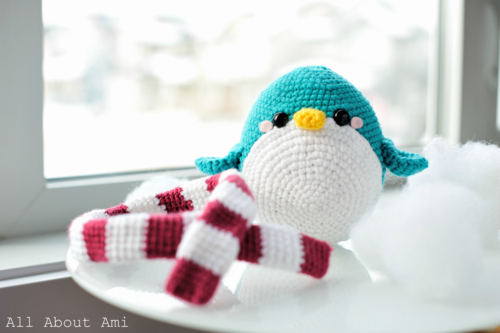
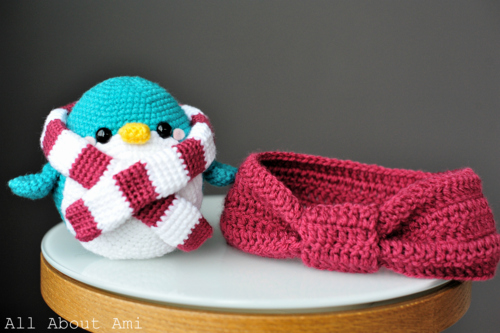
It’s nice that Snuggles’ scarf is removable as he might get too hot with Spring around the corner. And the solid scarf still holds its shape when removed!
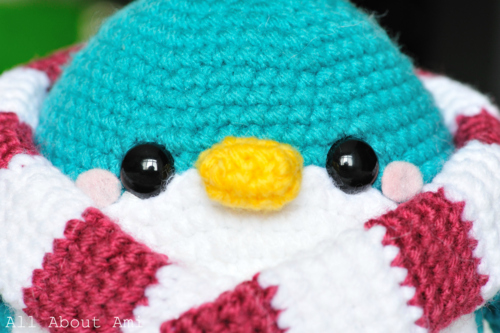
Next up are some close-up shots of Snuggles. I looove this next photo of Snuggles’ sweet face!
Here you can see Snuggles’ wing and how it is concave, curving upwards and out!
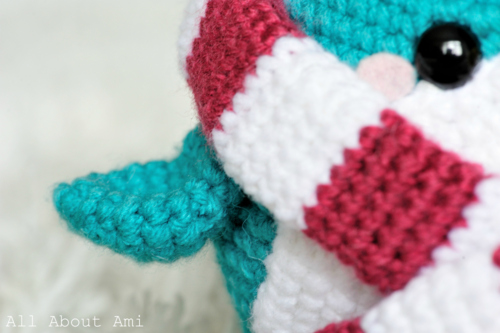
Snuggles’ beak is attached halfway on the blue and halfway on the white belly!

I don’t think Snuggles appreciates having his bottom photographed like this, but we had to do it… As mentioned above, attaching the white belly was a challenge as it curves downwards along his body. We had to attach a flat white piece to a round body, so it definitely was not perfect.
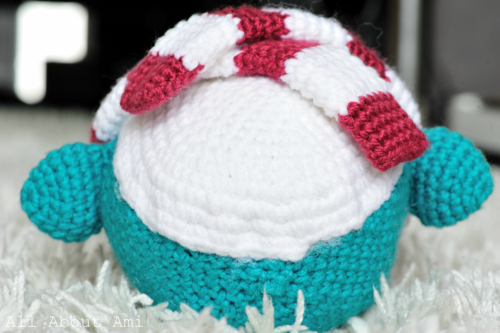
As you can see, there is some bunching at the bottom. Ryan ended up inserting some stuffing between the belly and the body to decrease the ruffled appearance.
Ryan also had some fun posing Snuggles creatively with his scarf! Doesn’t he look like a sushi chef here?
And with his scarf rotated, Snuggles looks like a little rebel with his bandana…

And those of you who have been reading my blog for a while know that Snuggles is not the first penguin I’ve made! Back in May 2011 (almost a year ago!) I made this little penguin (free pattern linked to in blog post) that required switching between black and white yarn for the face that posed an interesting challenge. Snuggles is much bigger!
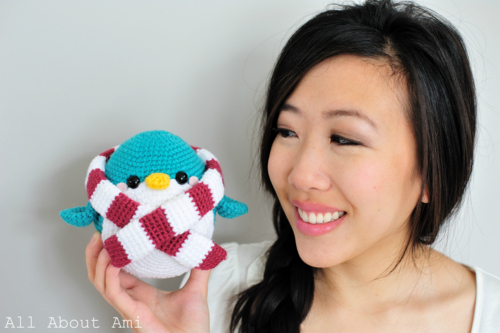
And just to give you more of an idea of Snuggles’ relative size, here’s a pic of me holding him!
It’s always a little sad parting with an amigurumi you’ve worked hard on, but I’m so happy that he’s joining Kim’s family of kawaii stuffies!

Since I had extra red yarn left, I thought it’d be special to make Kim a Knotted Headband so she could match with Snuggles! I know it doesn’t get very cold in California, but hopefully you’ll find some occasion to wear it, Kim!
Ryan and I had a lot of fun turning Kim’s penguin charm into an amigurumi! What do you think of Snuggles? ***The FREE pattern for Snuggles can be found HERE.*** I’m so excited that I got to participate in this art trade with Kim of Oborocharms, and I can’t wait to show you what she made for me! If you follow me on facebook and twitter, you probably already know, but I will be doing a full blog post on it too. Be sure to check out her shop as she has oodles of cute items (if you end up crocheting Snuggles, it’d be cute ordering a matching Penguin charm!). Thanks for everything, Kim, and I hope you like your amigurumi Snuggles 🙂
[UPDATE: Read about what Kim made for me for our art trade HERE!]