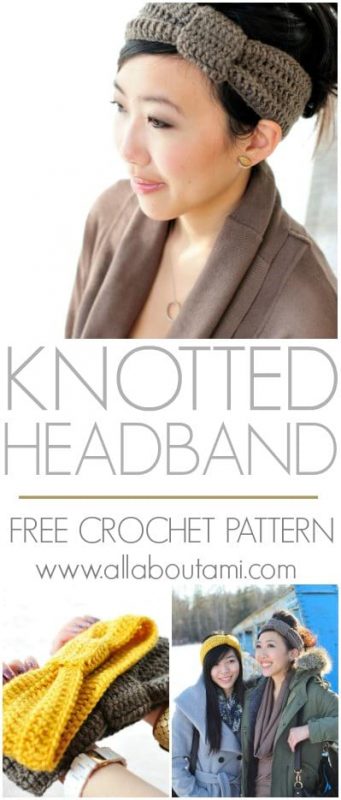
Back in October, I was perusing Facebook when I noticed a picture that my fashionable friend Erika posted of herself wearing a crocheted earwarmer/headband. She is studying overseas in the UK, and she told me that she purchased this headband from Topshop for 10 British pounds, or about $15. I thought her headband was so cute and chic, and I immediately wanted to try making one, especially since hers was crocheted and looked so simple to make!
I had seen some other knitted and crocheted headbands on-line through Craftgawker and on Etsy, and they were definitely very popular as stores such as Aldo and Urban Outfitters were also selling them. Below is my friend Erika wearing her Topshop earwarmer, and below her is a similar headband I found from ASOS. This earwarmer/headband is also commonly referred to as a turband (knotted look of turban + headband), and knitted/crocheted turbands as well as silk/fabric turbands have been spotted on many celebrities as part of the boho chic trend.

What I loved about these headbands in particular were the horizontal rows vs. the vertical rows. Working with horizontal rows can be more challenging off the get-go as you need to start with the appropriate length (you don’t want your headband to be too big or too small!). When working with vertical rows, you keep crocheting row upon row until you get your desired length. Both have different looks, but I decided to go with the horizontal rows to make my Topshop and ASOS-inspired knotted headband!
I started off by crocheting a series of 70 chain stitches. To tell you the truth, I actually started off crocheting too many chain stitches and my headband turned out too long! I had to undo my work as I wanted my headband to stretch a bit, and not be too oversized!
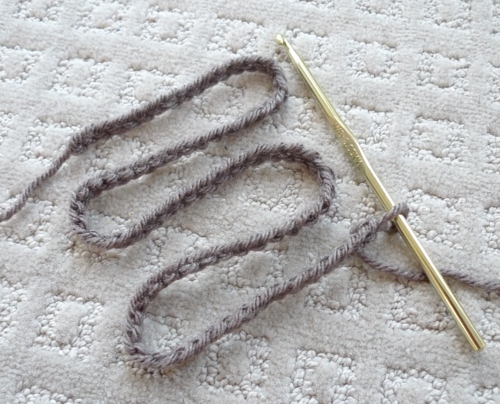
I used double crochets for more height, and it appeared that the Topshop headband also consisted of double crochets.
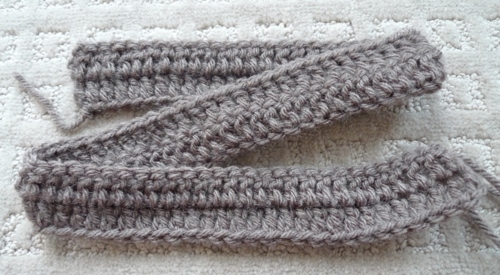
Once I finished six rows of double crochets, I was done the headband portion! This is a very quick project 🙂
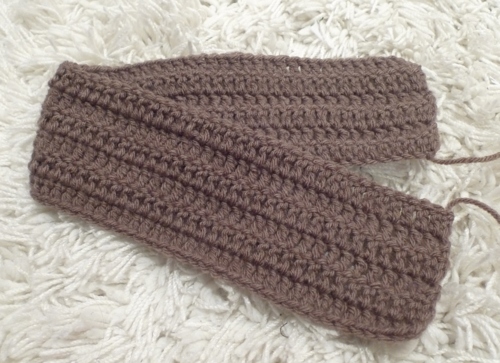
Next I folded the crocheted piece in half and sewed the ends together…
I wanted my headband to be very ruched (pinched edges) around the knot just like the Topshop earwarmer, so I pinched the middle rows of my headband together (approximately Rows 2-5) and then sewed them together. I pinched the middle rows where the edges of the headband were sewn together as I wanted this seam to be concealed later on.
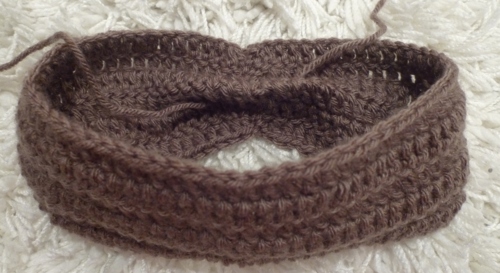
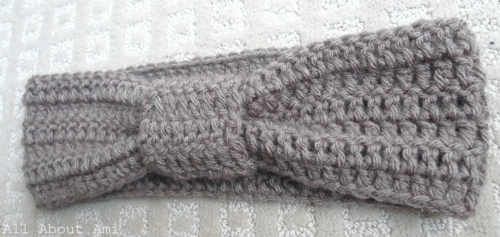
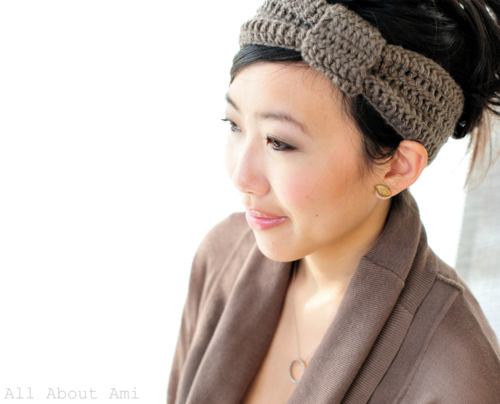
This is what my crocheted headband looked like from the front with the ruching.
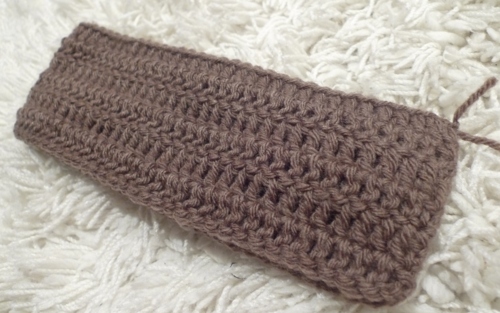
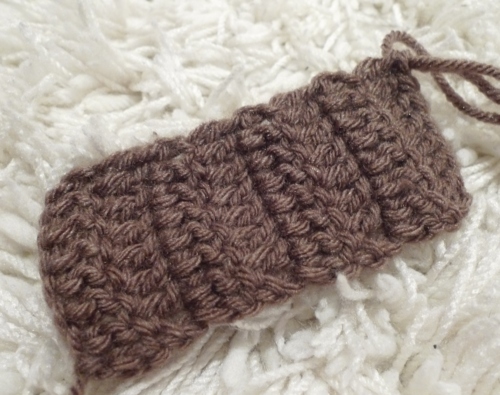
Next up, I created the narrow strip that serves as the knot! Once again, I worked with horizontal rows to make it consistent with the rest of the headband.
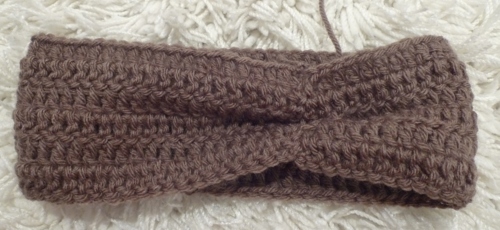
Once I was finished making the strip, I wrapped it around the ruched part where the ends came together.
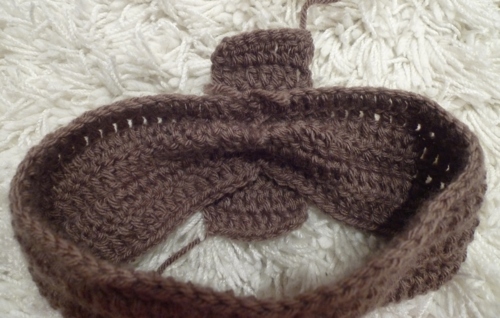
I sewed the edges of the knot together and hid the loose ends within the knot. You can’t see any more seams with this clean finish!
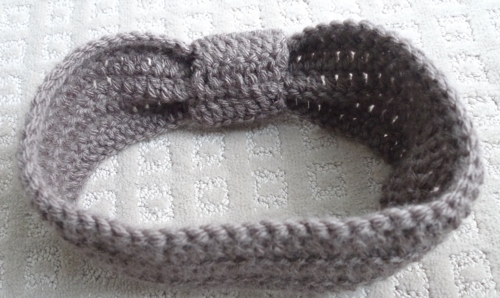
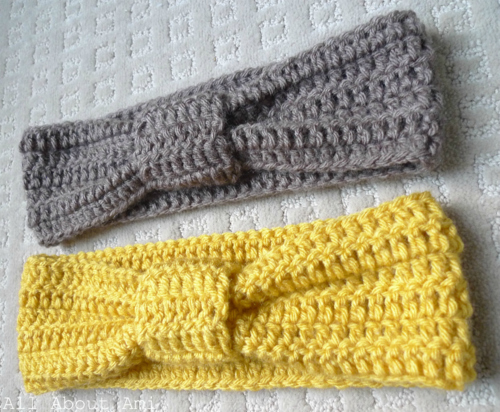
Here is my finished knotted headband! I actually used the same taupe yarn that I used to make my brother’s slouchy beanie for my headband…
I also made my sister a knotted headband using the same mustard colour yarn I used for my own slouchy beanie. It’s nice being able to use up that yarn that’s been lying around!
Here is the very simple pattern I made up for this Knotted Headband, perfect for beginners:
**********
Materials:
- 5 mm Clover Amour crochet hook
- Yarn, medium weight (I used Lion Brand Yarn’s Vanna’s Choice in taupe and mustard)
Headband:
Chain 70, or until 20″/50 cm long [keep in mind that head sizes vary, so please check your piece along the way to make sure it will fit your own head]
R1: Dc in 4th ch from hook and in each chain across (68 dc) [my piece now measured 18″/46 cm across]
R2-6: Chain 2. Turn. Dc in 4th chain from hook and in each chain across (68 dc)
My piece was 3.4″/8.6 cm wide after six rows. Fold the crocheted piece in half and sew the edges together. To emphasize the ruching, pinch the middle rows of the headband (approximately Rows 2-5) and sew them together (about 3″/7.6 cm across). Be sure to pinch the middle rows where the ends of the headband were sewn together to conceal the seam.
Knot:
Chain 10
R1: Dc in 4th ch from hook and in each chain across (8 dc)
R2-8: Chain 2. Turn. Dc in 4th chain from hook and in each chain across (8 dc)
My piece was 4.6″/11.7 cm long after eight rows. Wrap this crocheted strip around the pinched portion of the headband. Sew the ends together and hide any loose ends in the knot.
**********
Here are some ideas of how you can make your own variations of this Knotted Headband:
- use thicker, chunkier yarn
- make the knot bigger
- add more rows to give more height
- do back post double crochets or work in the front or back loops only to make the headband appear ribbed
- instead of double crochets, try using different stitches such as half double crochets, puff stitches, triple crochets, etc.
- use different colours for different rows or for the knot
- try making vertical rows (start off with width of headband and continue crocheting the length; see what this looks by checking out the ribbed band of my Urban Jungle Slouchy Beanie here)
- make a longer, thinner knot and wrap it around the band twice (as in the ASOS headband)
- add a flower
I was so excited to wear my new crocheted Topshop and ASOS-inspired Knotted Headband!
I think this Knotted Headband looks great worn with your hair both up and down, so I took my sister Ashley with me so we could model our headbands!

These headbands make great statements in your winter outfits!

When worn with your hair up, I personally think it looks great with some extra poof or volume at the crown!
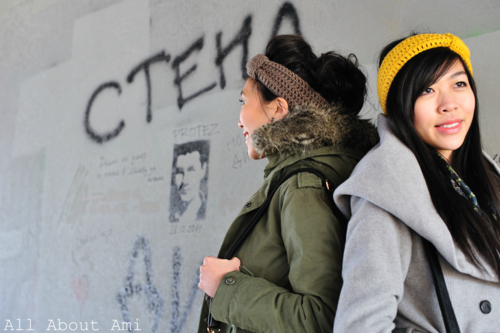
It was a brisk day when we shot these photos, but we had some good laughs and fun posing in the snow! Our purses below were both great finds from our recent travels. We picked up this bag for Ashley from a cute little boutique in Montmartre, Paris called “Anoki”. I found this gorgeous Deux Lux bag from a fun store called “Alice in Hulaland” in the hippie surfer town of Paia in Maui. I love these souvenirs since they remind us of our recent adventures!

[On Ashley, Scarf: Next, Jacket: Zara, Jeans: Citizens of Humanity, Boots: Sterling, Purse: Anoki. On me, Parka: Aritzia, Cowl Sweater: Costa Blanca; Jeans: Rock and Republic; Boots: Aldo, Purse: Deux Lux]
If you’re interested in this knotted headband/turban look, Kaley of “Let’s Make It Up” has a great video tutorial on “How to Tie and Style a Turban” using bandanas and scarves here, and she also shows you how to style your hair around it. She has some really great hair tutorials on her channel!

Be sure to check out my earlier posts about the Urban Jungle Slouchy Beanies and the Puff Stitch Scarf if you want to try and crochet more items that you can wear!

I wanted to post these crocheted Knotted Headbands earlier, but things got so busy with the Teddy Ornaments, the Dragon for Chinese New Year, and the Sweetheart Bunny for Valentine’s Day, along with all our recent travels. It’s probably warmed up in many places by now and clothings companies have definitely started rolling out their Spring collections, but here’s a fashionable way to stay warm and look chic during this last month of winter before Spring officially comes! I’m sure I’ll be revisiting this pattern in the fall and whipping up a few more of these in different colours since they’re so easy to make! Is it still pretty cold where you live? Will you be trying out this knotted headband? It’s a great project for beginners or for people who have been wanting to learn how to crochet! I’d love to see your pics on my facebook page or twitter! Happy crocheting 🙂
[UPDATE: Farah of “The Frilly Pages” has made a knitted version of my Knotted Headband! To see her step-by-step blog post and free pattern, click HERE!]
This pattern is an original pattern by Stephanie Lau of All About Ami. Please do not claim this pattern as your own. If you wish to share this pattern, you may link to this pattern but please do not reprint it on your site. You may keep a copy for your own personal use but please DO NOT sell the pattern or distribute it.
You may sell products made from this pattern but please clearly credit the design to me, Stephanie Lau of All About Ami, and provide a link to my blog www.AllAboutAmi.com. Permission is NOT granted for mass production or factory manufacturing of any kind. Thank you for being respectful and for your understanding!