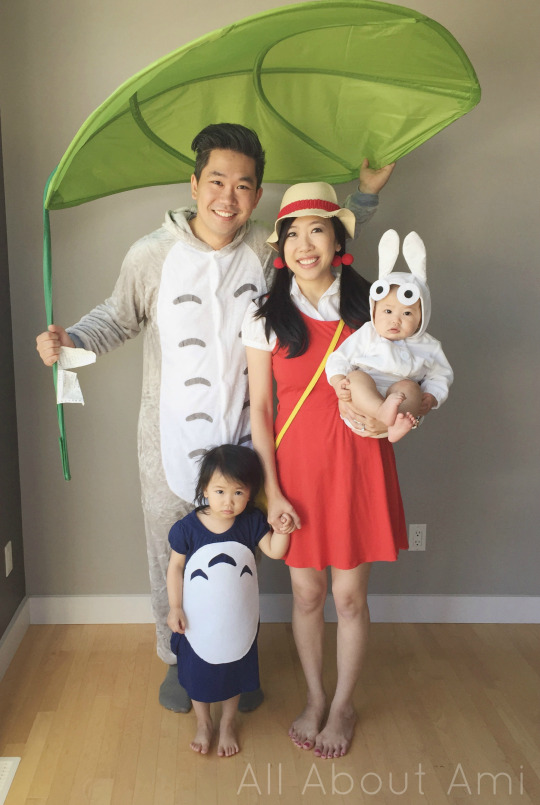
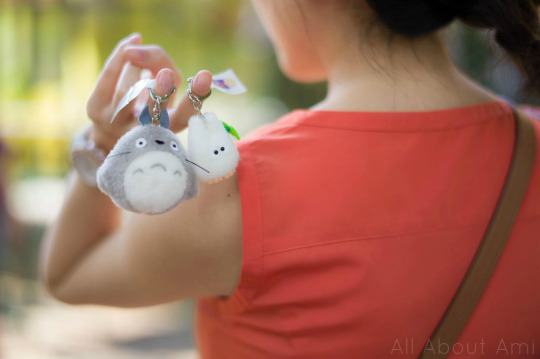
Recently I blogged about my amigurumi Jiji the black Cat that I crocheted HERE as a part of our family cosplay at the Edmonton Expo. It’s been a tradition of ours to dress up as a family, and last year we went with a Totoro theme as pictured below! The girls look so little! I crocheted the red ball accessories adorning my ponytails, as well as the red strip around my hat.
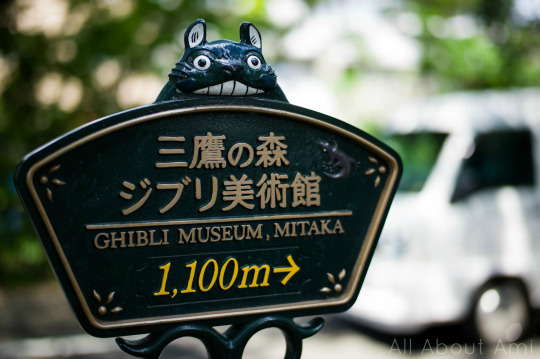
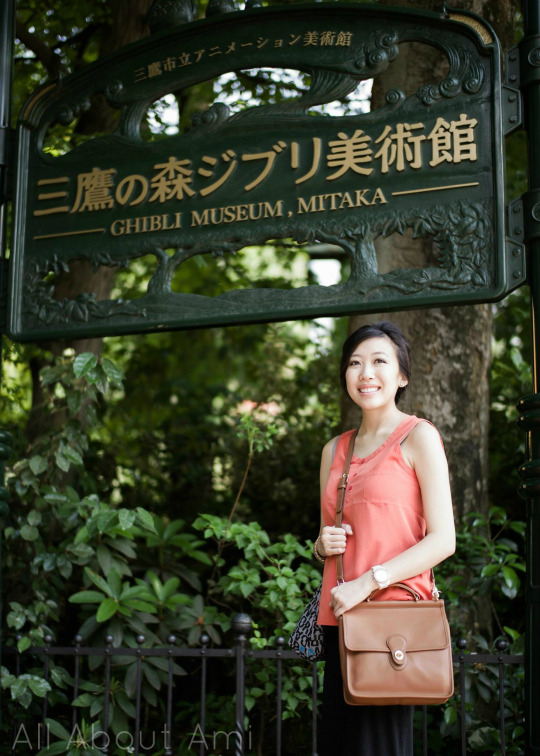
As you can probably tell, we love Studio Ghibli! Ryan and I actually went to visit the Ghibli Museum four years ago when we traveled to Japan, and it was amazing! It was neat seeing the exhibitions, the beautiful artwork, and going to the rooftop garden. Here are just a couple of photos from that trip four years ago…
I was actually pregnant with Myla too, so it was our babymoon!
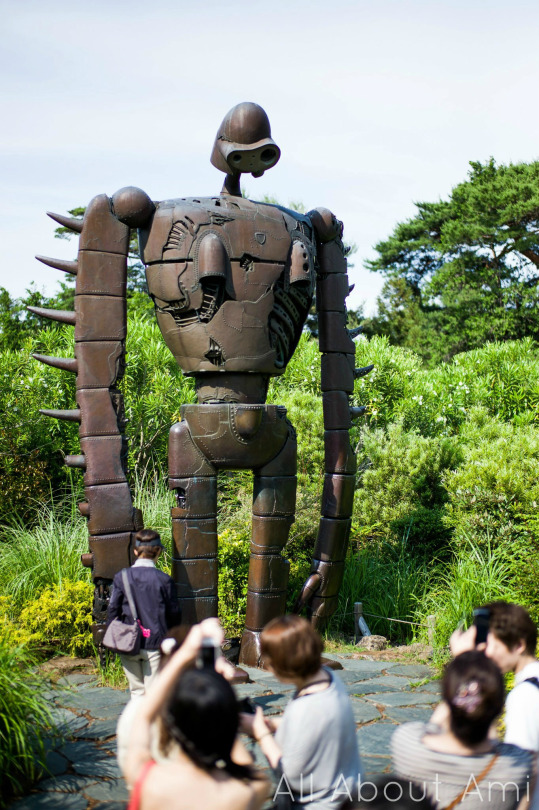
We weren’t allowed to take pictures within the museum, but we could on the rooftop garden! Fans of “Laputa: Castle in the Sky” will get excited to see this!
I picked up some little Totoro souvenirs back then! Inside the museum, they even had a catbus for children to play in- we’ll definitely have to come back with the girls sometime in the future as they would LOVE it!
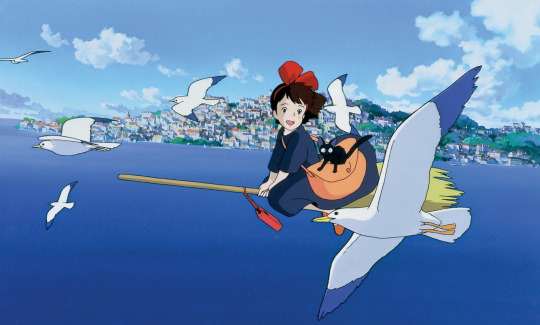
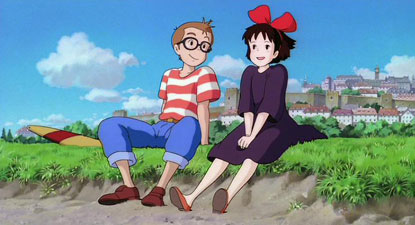
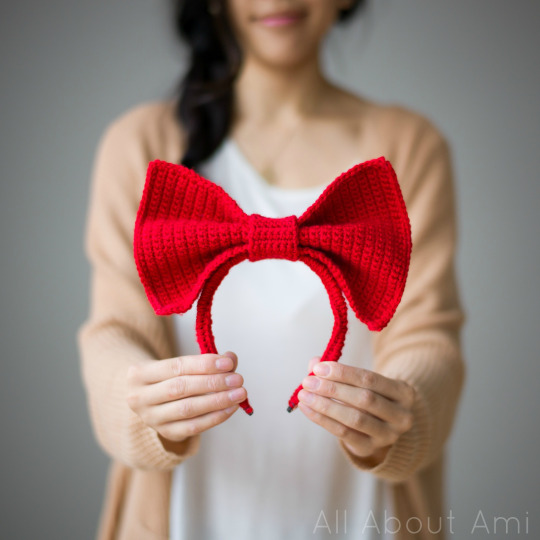
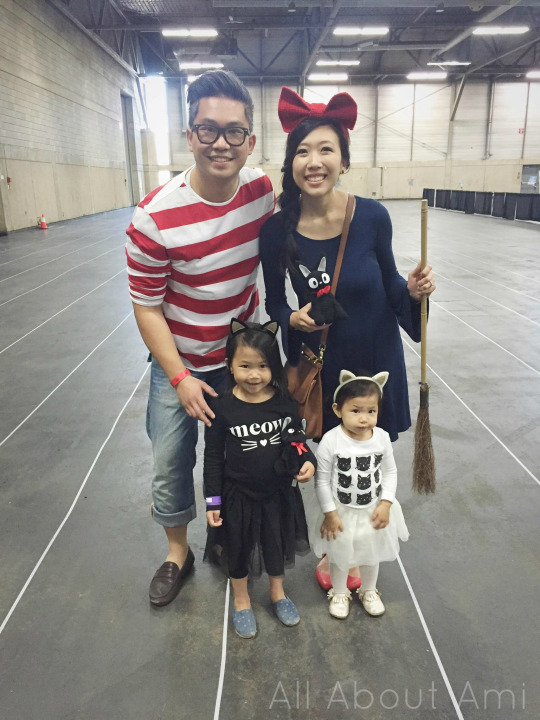
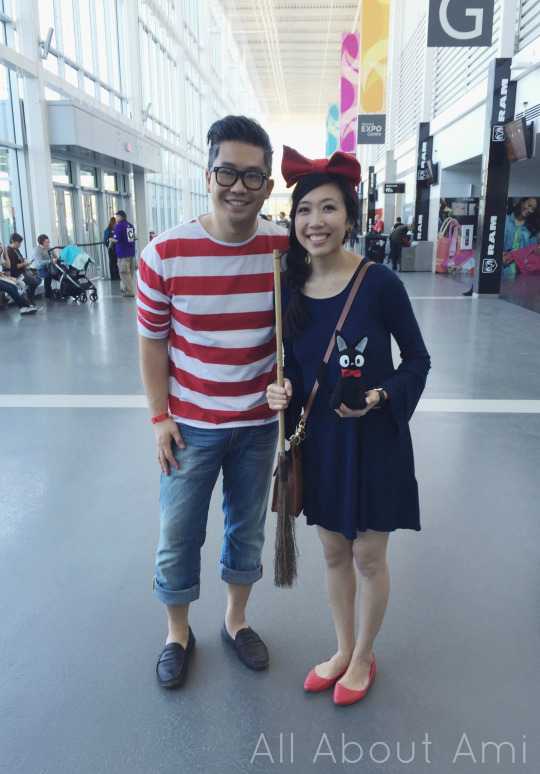
Another Ghibli movie that we love is “Kiki’s Delivery Service”! If you read my previous Jiji blog post, there will be some repeat pictures, so bare with me! Kiki’s Delivery Service is a 1989 film about a young witch who moves to a new town and learns how to be independent and make a living! Kiki goes on this adventure with her loyal cat, Jiji. As you can see in the picture below, she wears a large red bow headband, a black/navy blue dress, a brown satchel bag, and red flats.
Kiki’s love interest is Tombo, a boy who wears a red and white striped shirt, black glasses, blue jeans, and brown shoes.
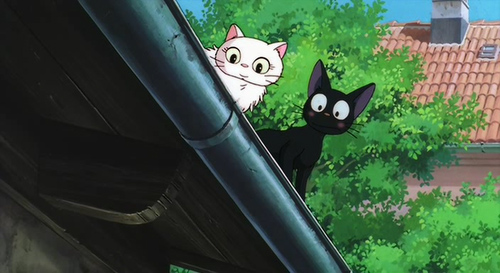
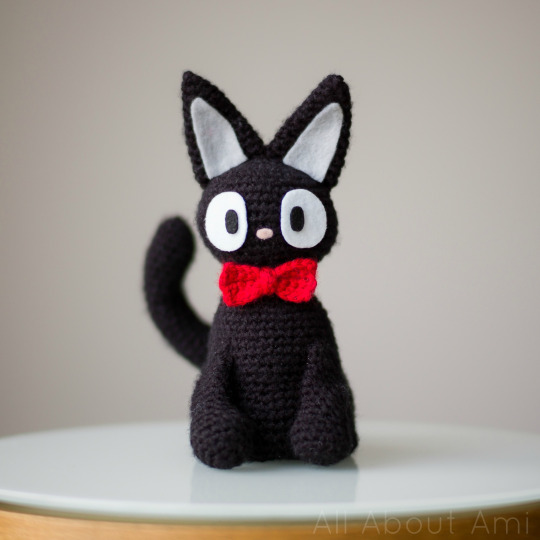
There are two adorable cats in the movie: a white cat named Lily and a black cat named Jiji!
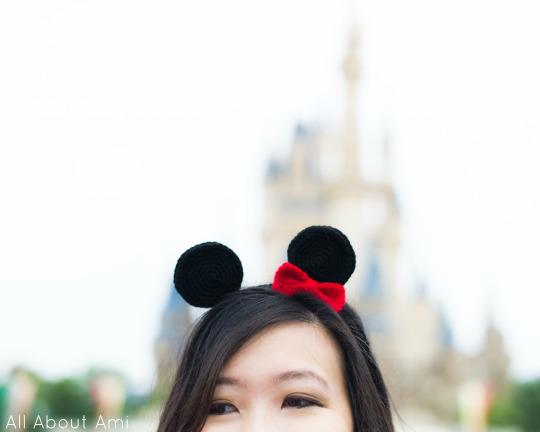
I decided to crochet Kiki’s big bow headband, and I actually had experience crocheting headbands before with my Minnie Mouse Ears Headband as pictured below (free pattern HERE)! This was actually from the same Japan trip when we went to Tokyo Disneyland! This time, however, I would be making a much LARGER bow!
I used Lion Brand Yarn’s Vanna’s Choice in the colour “Scarlet” as it is the perfect bright red!

I started off with a series of foundation single crochets. This was the height of my bow as each subsequent row would add to the width of the bow. I used a 2.75 mm crochet hook to get nice and tight stitches which would allow my bow to be more stiff and hold its shape better!
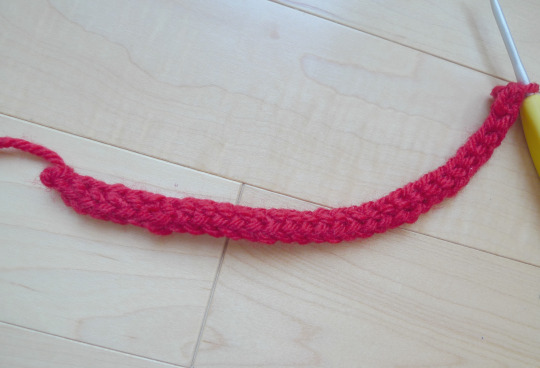
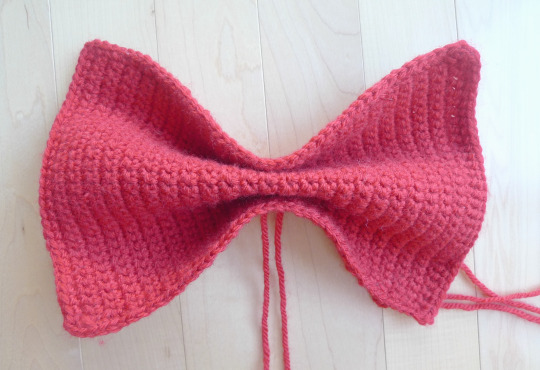
After crocheting 48 rows, i was happy with the width.

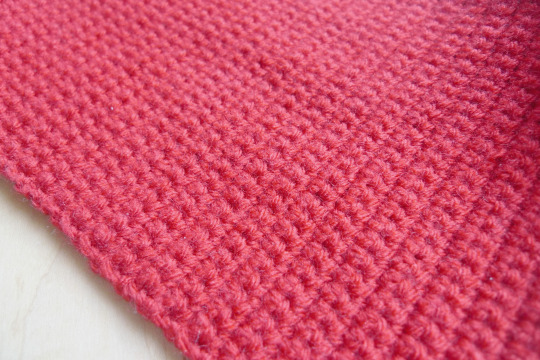
Don’t those stitches look tight and even?
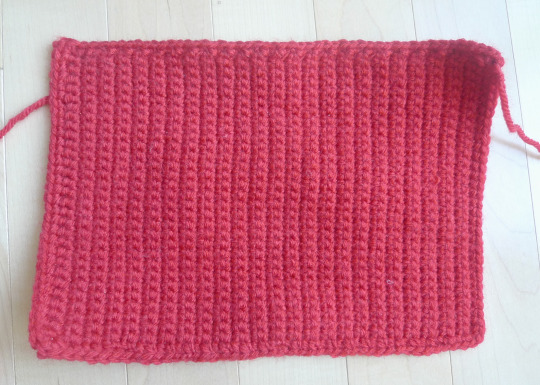
I then smoothed out the edges by single crocheting around the entire rectangle, doing three single crochets in each corner.
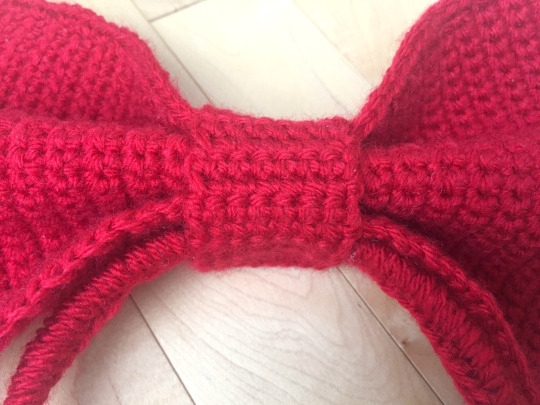
It was then time to pinch the rectangle together to form the bow! I pinched it as shown below with the rectangle folded in the middle.
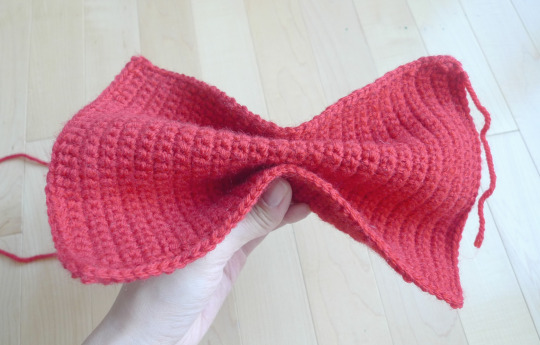
I threaded some yarn through a yarn needle and passed it upwards through the center…

And then passed it back down through the center.

I then tied a couple of knots very tightly.
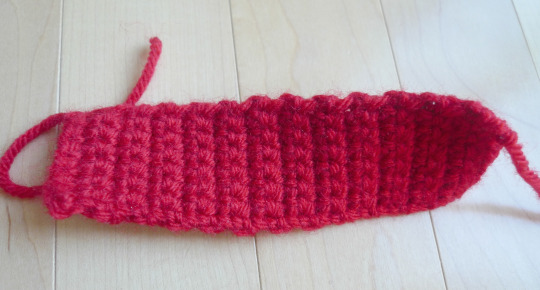
I then crocheted a narrow strip as the middle knot that would later be folded around the bow!
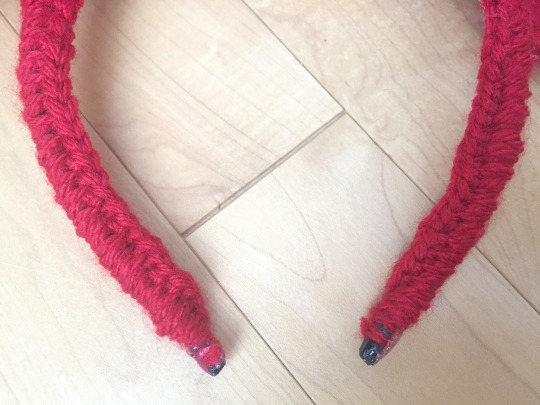
I grabbed an extra headband I had in my house and began crocheting around it as shown HERE. I would definitely recommend using a headband that has “teeth” towards the top (e.g. see HERE) so that it can better grip the yarn and stitches so they won’t slide around. To really hold the stitches in place, we also added some hot glue on both edges so that there was no way that the stitches could slide off.
After that, we placed the bow ontop of the headband and wrapped the middle knot around both the bow and the headband. I sewed it into place and Ryan also added some hot glue to help secure the bow and middle knot onto the headband!
***************************************
Here is the free pattern for my “Kiki’s Delivery Service Bow Headband”!
Materials:
- 2.75 mm Clover Amour Hook
- Red medium worsted weight yarn, level 4 (I used Lion Brand Yarn’s Vanna’s Choice in “Scarlet”.)
- Headband with teeth
- Glue gun
Rectangle:
Row 1: Foundation single crochet 30 (30 sts)
Row 2: Chain 1, turn. Starting from second st from hook, Sc 30 (30sts).
Row 3-48: Repeat Row 2.
Do not cut yarn. Single crochet around border of rectangle, doing 3 single crochets in each of the 4 corners.
Pinch rectangle as shown in picture above. Thread yarn needle and pass it up through the middle and then back down towards the bottom. Tie multiple knot and pull tightly.
MIddle Knot:
Row 1: Foundation single crochet 8 (8 sts)
Row 2: Chain 1, turn. Starting from second st from hook, Sc 8 (8 sts).
Fasten off and leave long end for sewing.
Headband: Crochet around headband using tutorial found HERE. Add hot glue to secure the ends onto the headband.
Place scrunched rectangle ontop of headband. Wrap middle knot around rectangle and headband. Sew ends of middle knot together. Use hot glue to secure bow and middle knot onto headband.
***************************************
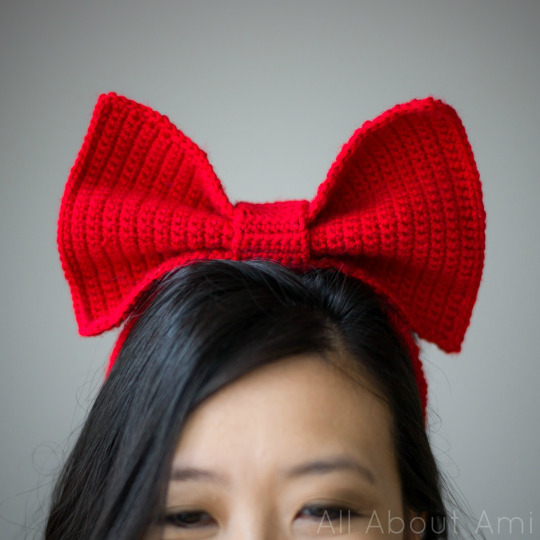
I was so excited to try on my Bow Headband and was delighted that it kept its shape very well! At first we thought we would need to add some wiring, but the stitches were tight enough that the bow could stand up well by itself.
I was worried that I wouldn’t be able to find a dress that looked like Kiki’s, but I was sooo happy when I found this navy blue dress at Forever 21! It is very comfortable, and it was less than $20. I found my comfortable red flats from Forever 21 as well, and they were only $15! My brown purse is an old Coach satchel, and Ryan found this wooden broom at a Halloween store. We bought the girls’ cat shirts from Old Navy, their tutus from Walmart, and their cat ears from H&M and Claire’s. We tried looking for a red and white striped shirt for Ryan at the mall, but it’s surprisingly hard to find (hehe I guess they’re not in style right now), so we had to buy a Waldo costume to get the Tombo look!
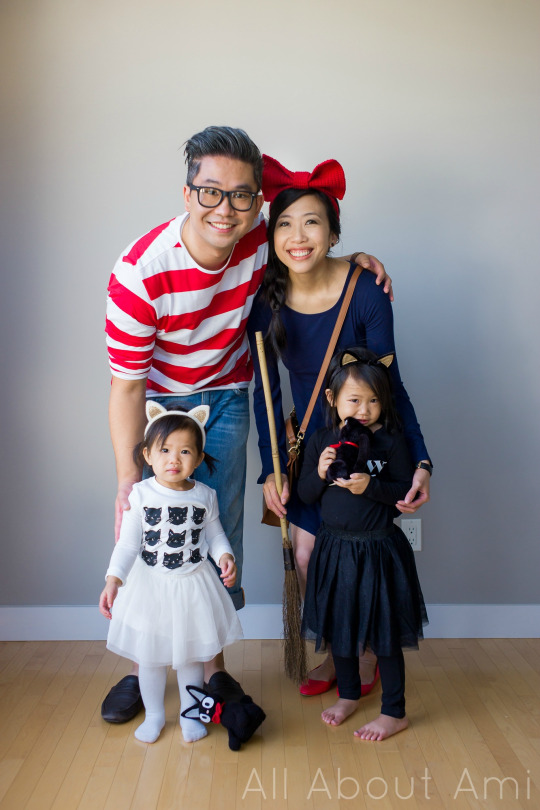
The girls thought it was so fun that we were dressing up as characters from Kiki’s Delivery Service! We wanted to make sure they were comfortable so they could walk and sit with ease, and they loved wearing their tutus!
It was fun putting together this costume with items from the mall and at home, and I’m so proud of my crocheted bow headband! I love the shape and how it turned out, and I hope you found my pattern helpful in case you want to dress up as Kiki and make one for yourself too! I think it would make a cute headband when visiting the Disney parks too!
Don’t forget that you can check out my full blog post about my amigurumi Jiji HERE! If you’re a Kiki’s Delivery Service fan, you must crochet him! The pattern is very simple and the results are adorable!
I hope you enjoyed reading about our family cosplay! It’s so fun dreaming up what we want to dress up as and figuring out our costumes. Let us know if you’ll be doing any family or group costumes this year for Halloween too!
Amazon Affiliate Link: