I’ve always wanted to try crocheting some sort of clothing piece that I could wear as I’ve previously made a lot of accessories such as cowls and hats. I dabbled in sweater-making with Myla’s “Arbor Baby Sweater” but up till now, I could not find a crocheted sweater pattern for adults that I absolutely loved. Furthermore, I didn’t feel confident enough to try making my own design since I had no previous experience working on an adult sweater.
Much to my delight, I saw a picture of a gorgeous sweater that draped beautifully on-line, and it turned out to be a free crochet pattern on the Lion Brand Yarns website called the “Simple Crochet Shrug” (see HERE). When I quickly read through the pattern, I was blown away by its simplicity as the construction was simply one massive rectangle folded in half and then seamed along the sides while leaving arm holes- no other attachments were necessary! It was a very popular pattern as over 600 people had made this project on Ravelry, and I couldn’t wait to give this sweater a try!
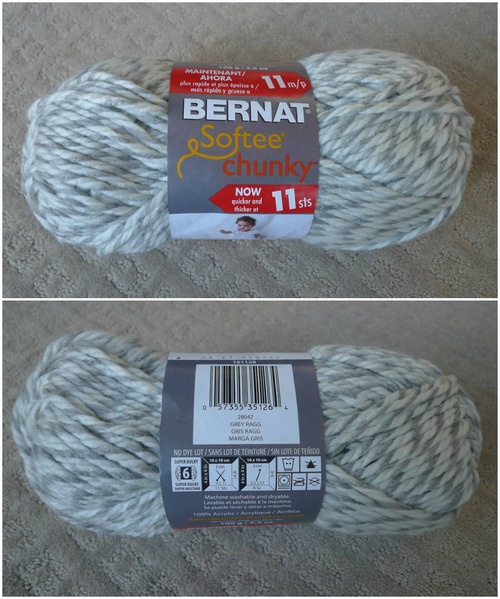
Picking out the colour and yarn I wanted for my sweater was tricky, but eventually we decided upon Bernat’s Softee Chunky in “Grey Ragg”. It is a very soft yarn that does not fuzz up too easily and I absolutely loved the light grey and white variegation that I knew would give my sweater a beautiful look. It’s a super bulky (level 6) yarn that has a net weight of 100 g/3.5 oz and approximately 99 m/108 yds. In total, I used five skeins of this yarn. Each skein regularly costs $4.99 (Canadian) and with the Michael’s 40% off coupon, each skein came out to $2.99, so the cost of materials for this sweater was very affordable. You can also find this yarn on Amazon HERE!
I read through almost all the Ravelry entries of this project to see how other people’s sweaters turned out depending on how many chains they started with, what yarn they used and any other modifications they made. It was a challenge determining the size as some people’s sweaters turned out too long or too short, and it was hard to judge how tall these people were in their photos. I wanted to make my sweater oversized and long enough to cover my rear, and I actually ended up making my sweater WAYY too big on the first try. Sweaters stretch a lot and I decided to frog my work and start over so that I could try and make it the perfect size on the second try!
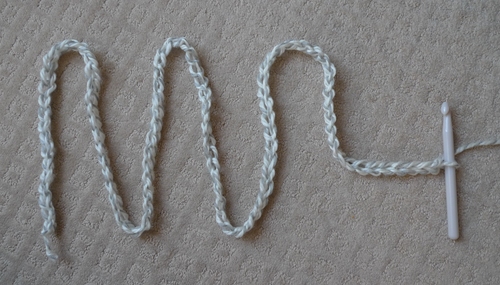
I chained 76 using my 10 mm crochet hook. It is VERY important to note that this initial series of chain stitches will be the LENGTH of your sweater, so determining this initial length is key as you will not be able to change it later on (unless you add some edging at the end). The rows worked later on will be the width of your sweater. Do keep in mind that your sweater can stretch later on as you pull it downwards too. For reference, I am about 5’ 6″ tall.
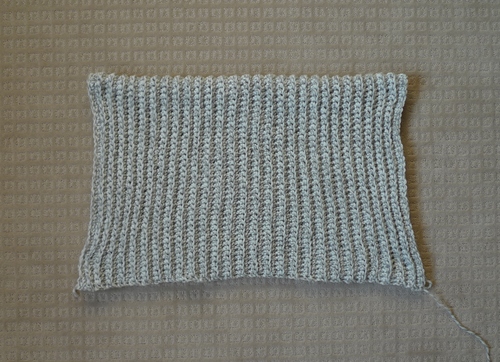
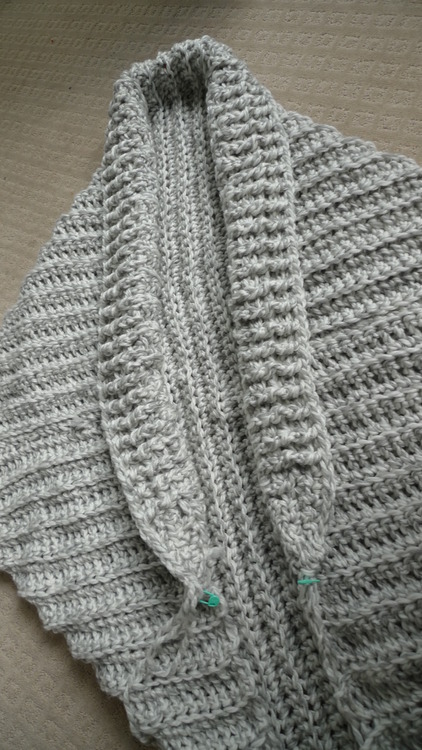
To achieve the beautiful ribbing of this sweater, you work single crochets in the back loops only. As a reminder, the back loops are the loops further away from you while the front loops are the ones closer to you when you’re crocheting.
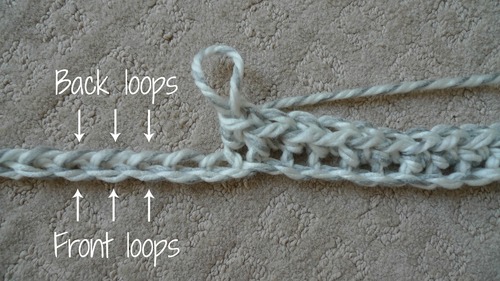
You crochet row by row in the back loops only, turning your work as you go. How simple can this pattern be? It’s the perfect project to work on when you’re watching tv or having a conversation since you don’t need to keep the count and it works up so quickly since you’re using chunky yarn and such a large crochet hook. Doesn’t the ribbing give such beautiful texture?
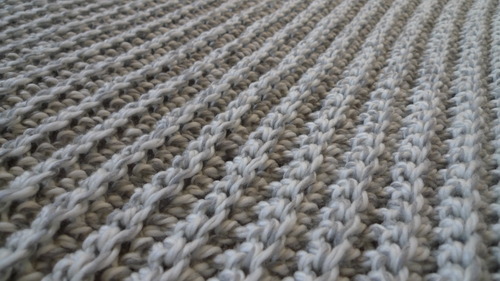
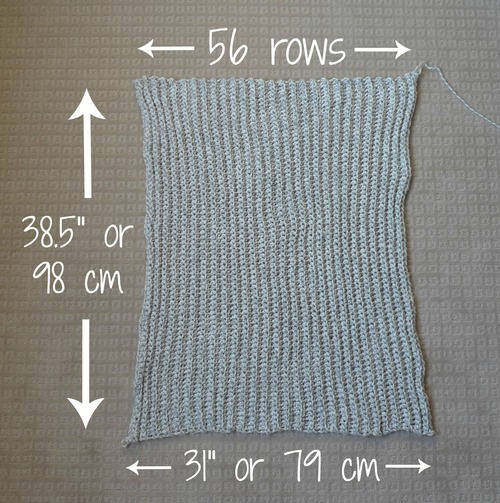
You keep adding rows until you are happy with the width of your sweater. In the end, I ended up with 56 rows measuring 31″/79 cm across. Lengthwise, my rectangle was 38.5″/98 cm (remember that this is capable of stretching quite a bit too).
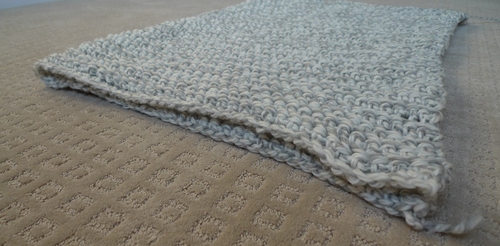
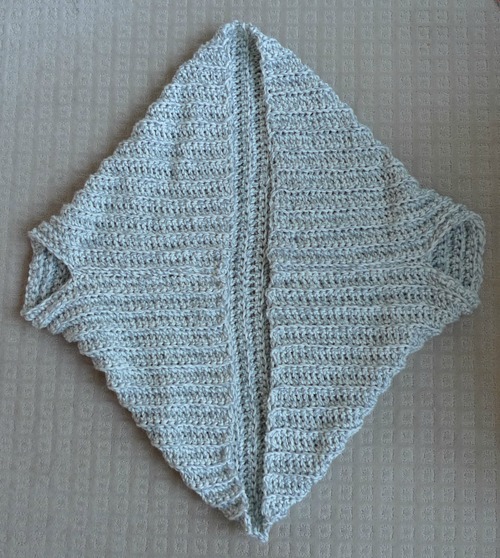
Next, you fold the rectangle in half. It is very important that you fold your rectangle in half so that the rows are running vertically! I noticed that quite a few people on Ravelry were folding their rectangles the wrong way as their rows were running horizontally. This meant that their resulting sweaters were very wide and short!
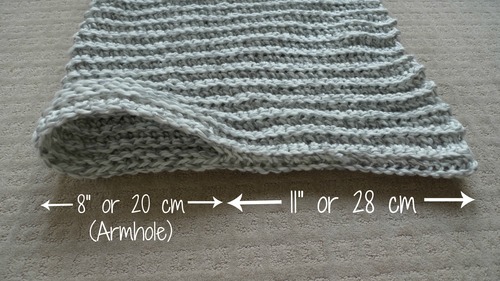
To create the arm holes, you seam up the sides by whip stitching them together with a yarn needle (see this tutorial HERE for more detailed instructions).
I seamed up 11″/28 cm and left 8″/20 cm for the arm hole on each side.
This is how you wear the piece- now it’s looking more sweater-like 🙂 You’ll notice that the the rows now run horizontally in the front but vertically in the back. When I was working on this piece and periodically measuring it to my body to check for size, it seemed as though it might end up being too short. However, we learned from our first experience, and we knew that it was capable of stretching a lot later on. Thus, don’t be too worried if you think your sweater seems it might be a tad short…
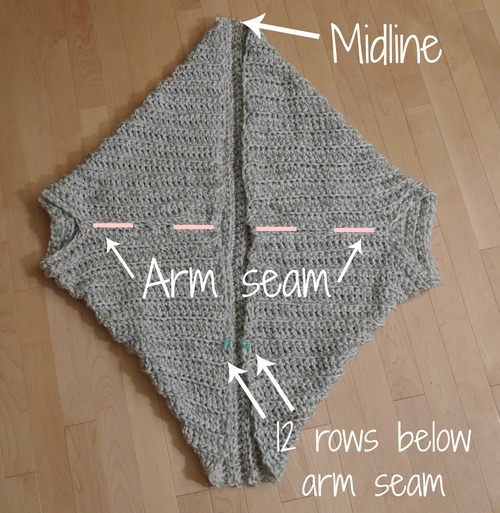
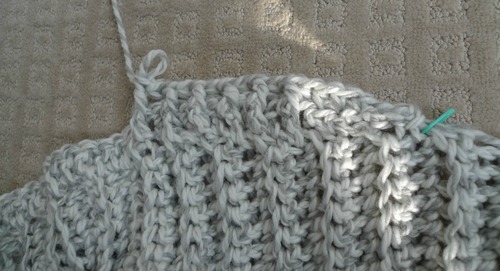
I wanted to add my own modification to this sweater pattern by adding a special ribbed collar. To do so, I located the midline of the sweater and attached a stitch marker (you can’t see it too well in the picture below, but there is a peach stitch marker where the midline arrow is pointing to). Next, I wore the sweater and determined where I wanted the collar to start. I placed a green stitch marker 12 rows below the arm seam on either side (this will vary depending on your height and where you want your own collar to start). In case you’re interested, I have been using my “Clover Lock Ring Markers” a lot for all my recent projects, and none of them have broken on me (buy them HERE)!
Starting from the green stitch marker on the left side (when you’re looking at the sweater) and crocheting upwards towards the peach marker, I worked some slip stitches, single crochets, half double crochets and then double crochets in Row 1. This helped to slowly build up the collar and make it taper towards the ends. I did the exact same pattern back downwards to the other green stitch marker once I reached the midline at the top to make it symmetrical. I used a smaller 8 mm crochet hook for this collar part to get tighter, smaller stitches compared to those of the body. I also tried to pick up stitches quite close together so that there were no gaps in the collar.
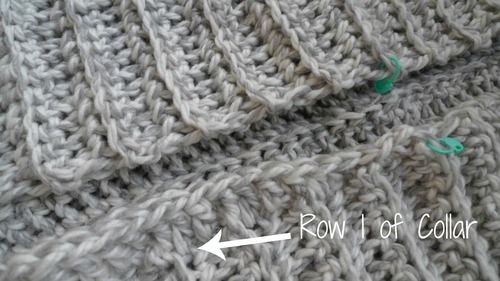
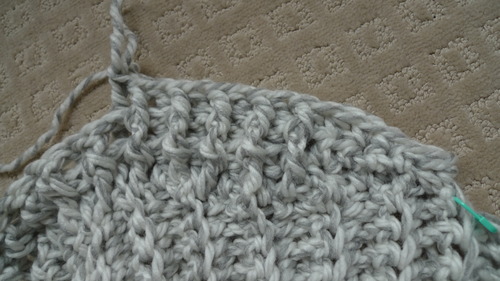
Row 1 is complete!
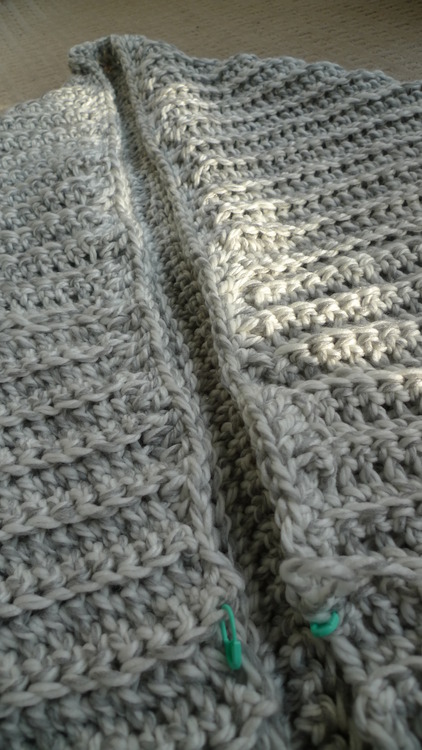
Next I alternated front post double crochets with back post double crochets in Row 2 to begin creating a ribbed effect.
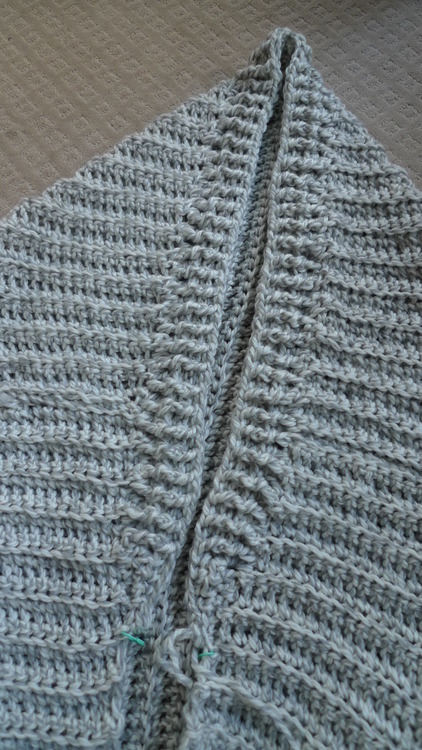
I did the same thing for Rows 3 and 4 to really emphasize the ribbing.
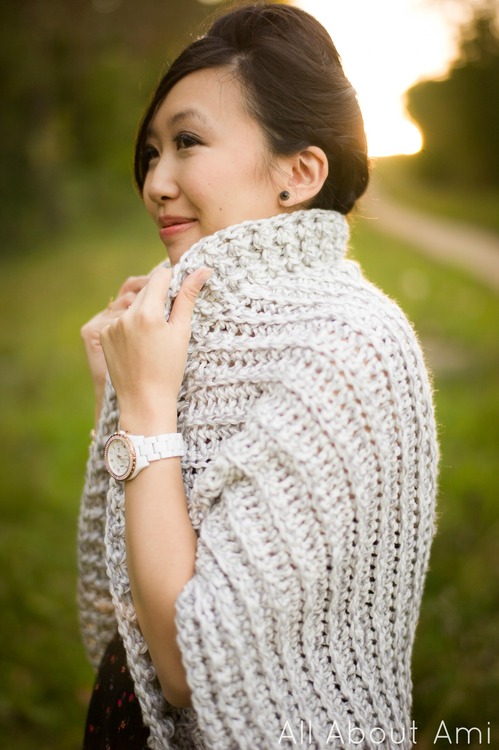
The ribbed collar is complete!
You can fold the collar up…
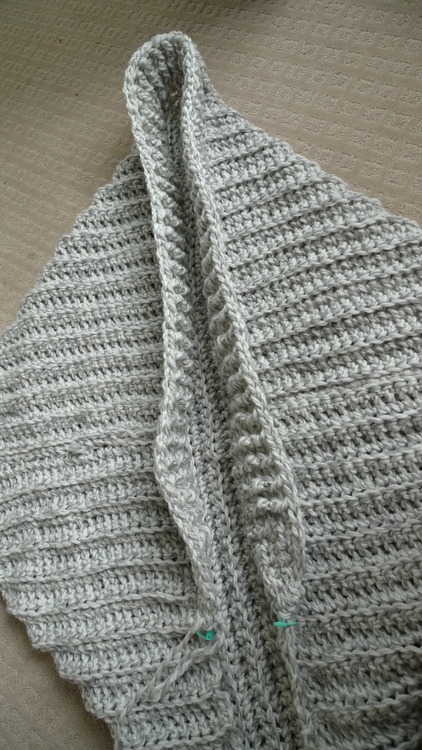
And the ribbing is on the other side too 🙂 I think this ribbed collar is a really nice addition, don’t you? I’m really happy with how it turned out!
Here is the pattern for the collar that I added in case you’re interested in crocheting one for your sweater too!
********************************
To access the free Lion Brand pattern for their “Simple Crochet Shrug”, click HERE. They have also written up patterns for the same shrug using different weights of yarn (e.g. worsted, bulky, super bulky), so see a list of them HERE towards the bottom under “Also available in other Lion Brand yarns” to get an idea of what numbers you should use for your particular yarn.
In summary for my own sweater, I chained 76 initially and did 56 rows of single crochets. I used a 10 mm crochet hook for the body of the sweater and 5 skeins of yarn. Keep in mind that these numbers will vary for yourself depending on how long and wide you want your sweater to be (and depending on your height), what hook size and yarn you use (worsted, bulky, super bulky) and how tightly you crochet (smaller, tighter stitches will result in your sweater stretching less while loose stitches will result in more stretching).
Collar Pattern:
– Tag upper midline with stitch marker.
– Tag sides with stitch markers indicating where you want your collar to begin and end (12 rows below arm seam for mine).
{Sl st = slip stitch, Sc = single crochet, Hdc = half double crochet, Fpdc = front post double crochet, Bpdc = back post double crochet (learn how to do Fpdc’s HERE and Bpdc’s HERE)}
Using 8 mm hook,
R1: Sl st 2, Sc 2, Hdc 2, Dc 57 (or however many it takes for you to reach stitch marker at upper midline- space your stitches close together so that there are no gaps). Dc at stitch marker. Repeat exact same pattern down the other way to your stitch marker: Dc 57, Hdc 2, Sc 2, Sl st 2. Slip stitch to next stitch, turn.
R2: Sl st 2, Sc 2, Hdc 2, alternate fpdc and bpdc around (i.e. start with fpdc, bpdc, fpdc, bpdc, etc) until 6 stitches left. Hdc 2, sc 2, sl st 2. Slip stitch to next stitch, turn.
R3: Same as R2 but alternate bpdc with fpdc (i.e. start with bpdc, fpdc, bpdc, fpdc, etc) to ensure that ribbing is building up.
R4: Same as R2.
Fasten off and weave in ends.
********************************
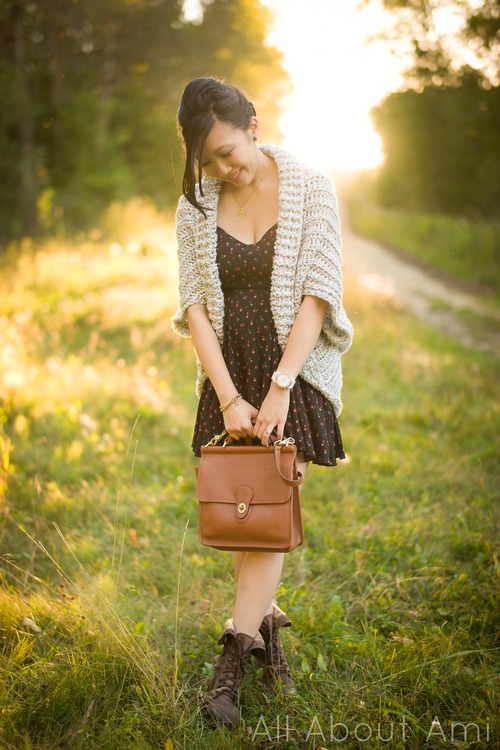
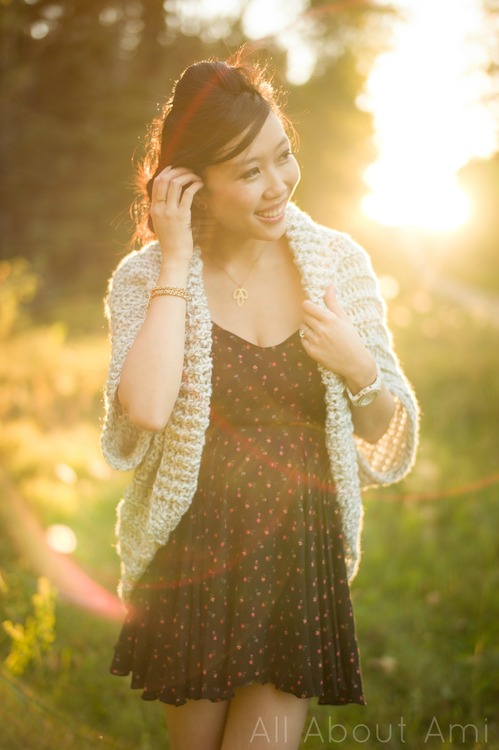
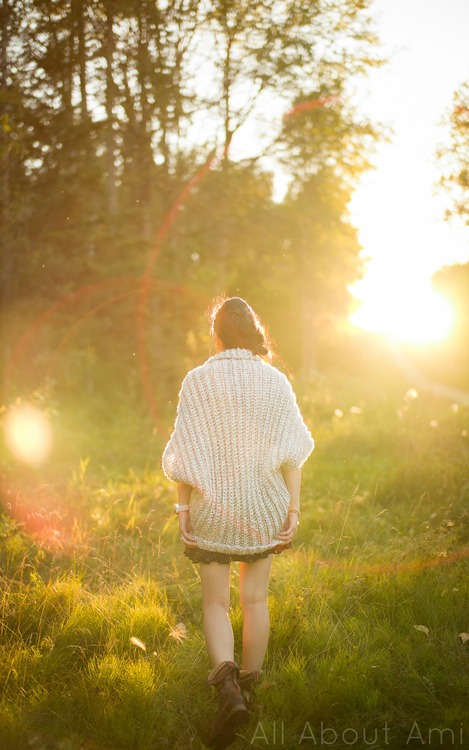
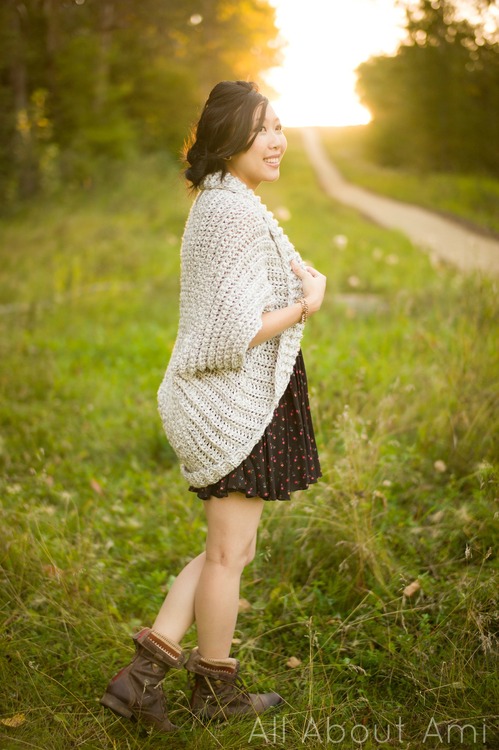
I was incredibly excited to try on my new sweater and we took advantage of the last days of summer weather to do a photoshoot before the snow comes! This sweater is so versatile as it looks cute over a dress, and I can see myself wearing this in the winter with leggings and tall boots too!
I’ll be able to wear this as my pregnant belly continues to grow as I enter my third trimester soon- oversized cardigans and sweaters are a must as winter and sweater weather rolls around! I practically lived in my nursing tank tops with blazers and cardigans over top when I was nursing Myla (see my Maternity Fashion HERE and my Nursing Fashion HERE), so I know I’ll be wearing this sweater a lot post partum, especially since we’re having a winter baby.
I’m really happy with how the sizing of the sweater turned out as the length is not too long or too short. The ginormous sweater I made on my first try (I chained 100 and did 68 rows) made me look like I was being engulfed in a blanket as it extended down towards my calves!
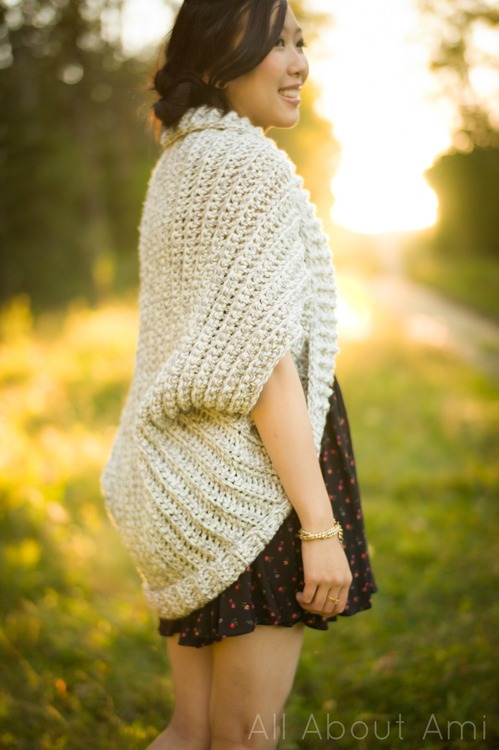
The vertical ribbing looks beautiful from behind. This sweater is so incredibly luxurious and romantic…
This sweater does tend to bunch around the bum area a bit due to its construction, but it’s not a big deal…
Popping up my ribbed collar! If you don’t want to add this special collar or you think it might be too difficult, you could always simply crochet more rows when working on your big rectangle to increase its width. The piece will naturally fold to give a collar if it’s wide enough.
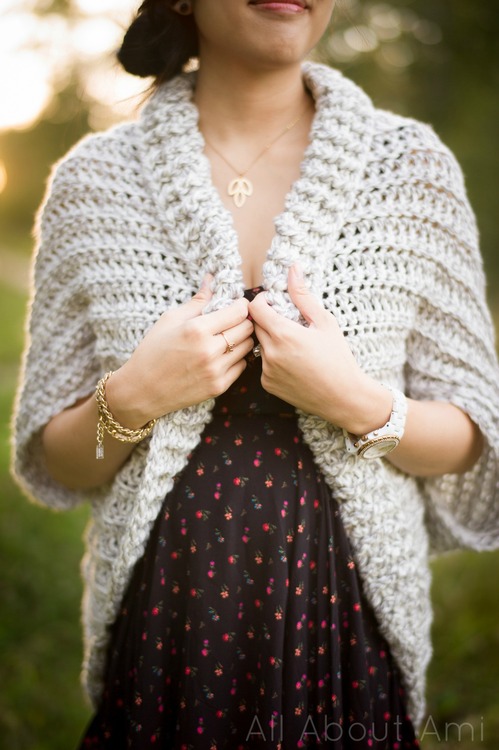
You could also add some buttons to this sweater if you wanted some closure! I myself love how it hangs and drapes naturally when I wear it. Another modification you could try is adding sleeves by crocheting around the armholes too!
[Dress: Urban Outfitters, Boots: Steve Madden; Purse: Coach; Sweater: Me :D; Bracelet: Mikaylove; Necklace: Mahina; Watch: Michael Kors]
I know people tend to whip out their crochet hooks as temperatures drop and fall and winter begin, so this is the perfect project to work on! Sweater weather will soon be upon us, and it is actually currently snowing where I live as I write this post (ahh, the fleeting days of summer). This sweater is so incredibly simple to crochet and the results are gorgeous, like something you would see in a high end fashion boutique. It’s a great beginner’s project, and it’s such an amazing feeling being able to wear something you created with your own two hands from scratch (I love seeing the looks on people’s faces when they discover that I made my crocheted pieces)! Let me know what you think of this sweater in the comments below, if you’ll be trying out this design, and if you’ve come across any other sweater patterns that you’ve loved. If you do end up making your own sweater, I think it’d be really helpful to leave a comment below letting us know what yarn you used and how many chains and rows you ended up going with too 🙂
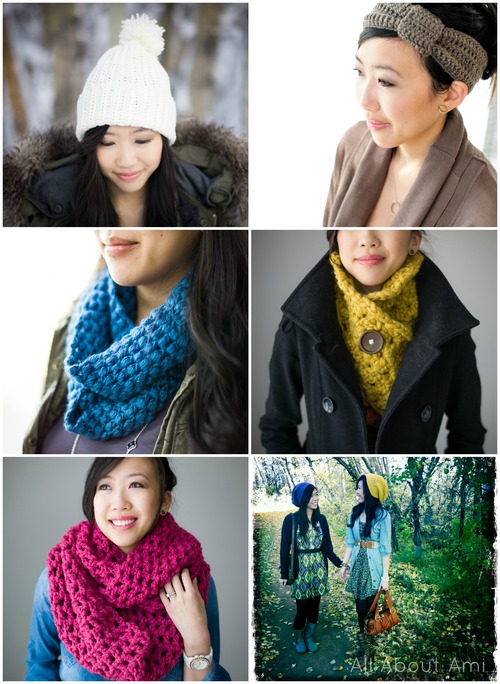
Here are some of my previous winter crochet projects in case you’re interested in crocheting some hats and cowls while you’re at it! From left to right and top to bottom we have the Easy Ribbed Pom Pom Beanie, Knotted Headband, Puff Stitch Cowl, Buttoned Shell Stitch Cowl, Long Double Crochet Cowl, and Urban Jungle Slouchy Beanie. The “Easy Ribbed Pom Pom Beanie” has a similar construction to this sweater and is a great beginner’s project! Don’t forget to keep up with me on my Facebook, Twitter and Instagram as I’m putting the final touches on a lot of new designs and projects. I’ve been on a crocheting frenzy as I try and bring to life all the designs swirling in my mind before Baby #2 comes and life gets extremely busy! Enjoy making your own beautiful sweaters and let me know how it goes!